Fluffy, with the perfect chew, these gluten-free dinner rolls are the perfect addition to any meal from a Simple Weeknight Dinner to a Holiday Feast. Made with just a handful of ingredients these gluten-free dinner rolls will quickly become a family favorite. This recipe can easily be doubled in case you are feeding a (gluten-free) crowd and can even be made ahead of time. Because we all know oven space can be tight on holidays.
Recipe Ingredient Notes
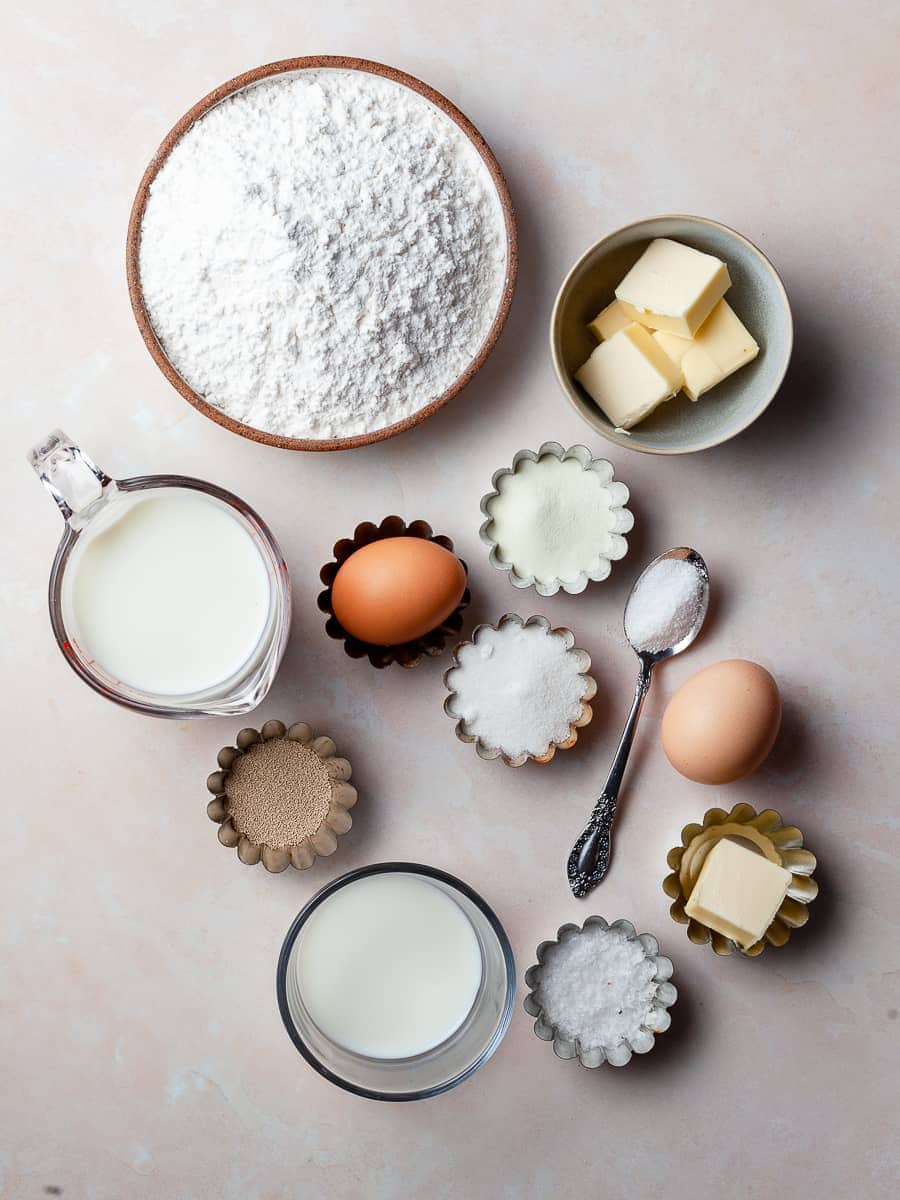
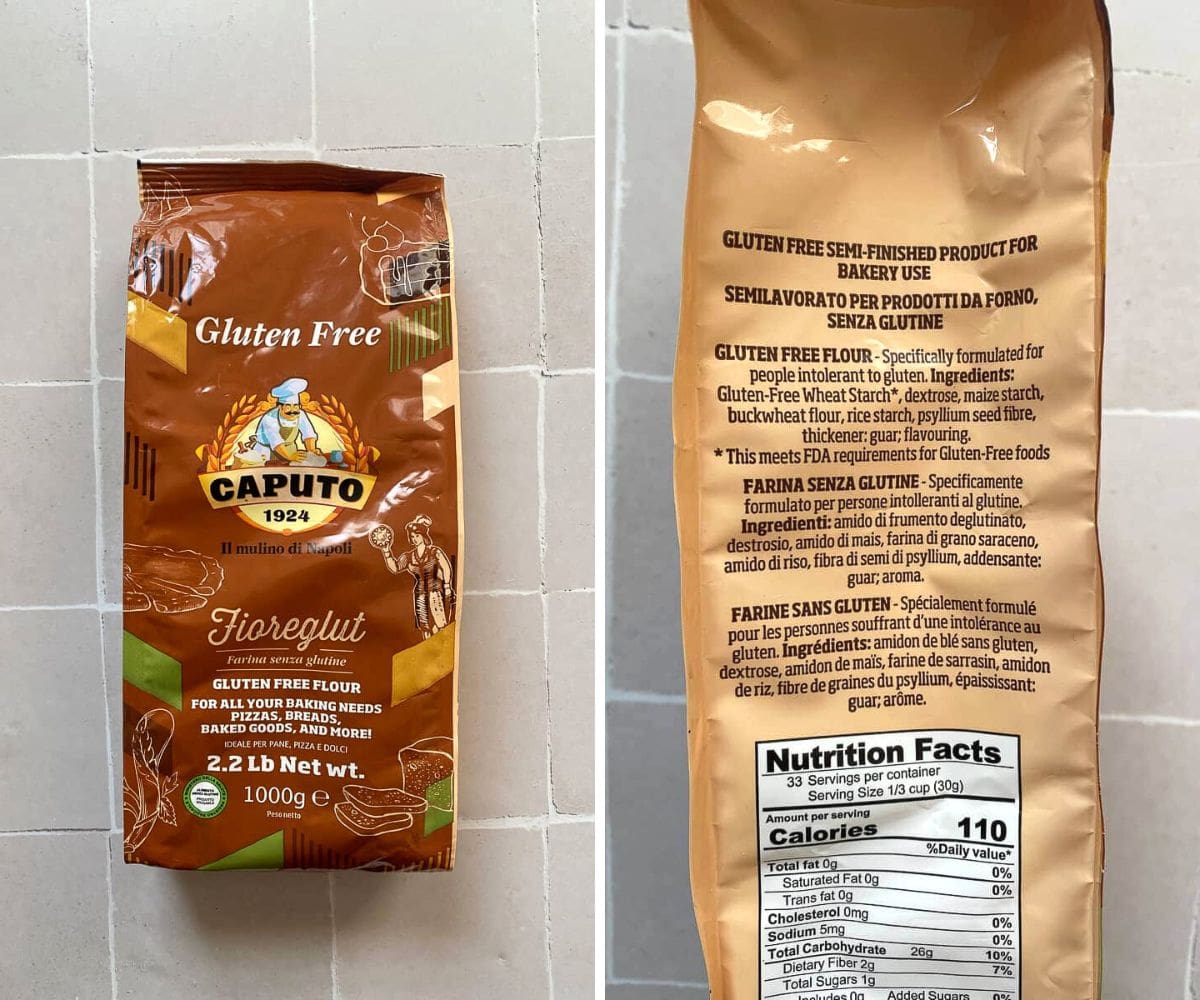
Gluten-Free Flour: The only gluten-free flour blend that will get you those fluffy gluten-free dinner rolls is Caputo Fioreglut. This product is the secret to gluten-free pizzas and breads that taste like the real deal. It is imported directly from Italy and sold on Amazon as well as in some local grocery stores. This flour is super fine, without any gritty texture. It also contains gluten-free wheat starch. If you are allergic to wheat, do NOT use this product.
Active Dry Yeast: I prefer active dry yeast which has to be activated in a warm liquid before adding it to the dough. If you only have instant yeast, it can be used as well.
Milk: I recommend using whole milk in this recipe. It gives the rolls their richness.
Milk Powder: I highly recommend using milk powder in this recipe. It enhances the taste of the baked goods by adding just a hint of sweetness as well as a creamier texture (think of it as an additional emulsifier). The fat found in milk powder also acts as a tenderizer resulting in a softer bake. You can find milk powder in the baking section or near the canned milk in your local grocery store. I buy this product online: Whole Milk Powder.
What is gluten-free wheat starch?
Gluten-free wheat starch has been approved by the FDA, but still,, many celiacs are skeptical about enjoying products made with it.
Seeing "gluten-free wheat starch" listed on a certified gluten-free product may seem scary but this ingredient has been used for decades in certified gluten-free products in Europe. As someone with celiac, I have never encountered issues eating products made with gluten-free wheat starch. If you are allergic to wheat, do not eat products made with wheat starch.
Wheat starch is a processed substance made from the endosperm of wheat grain. It is mostly used to improve the texture of baked goods.
Making wheat starch is a very simple process. Wheat flour is turned into a simple dough (basically just flour and water) and then "washed". Gradually the starch is washed out and dissolved in the water while the gluten sinks to the bottom of the container and remains solid. The starchy liquid is then further processed and all that’s left behind is wheat starch.
In certified gluten-free wheat starch (or codex gluten-free wheat starch), the level of gluten must be within 20 parts per million (ppm). It is important to mention that everybody reacts differently to gluten - so it is a personal decision to use a product containing gluten-free wheat gluten.
Please be aware, that if a product lists "Wheat Starch" instead of "Gluten Free Wheat Starch" (or Codex Gluten Free Wheat Starch) it most likely won't be certified gluten-free.
If you would like to learn more about Gluten Free Wheat Starch, I recommend checking out this article from Schaer - What you should know about Gluten Free Wheat Starch.
How to make gluten-free dinner rolls dough
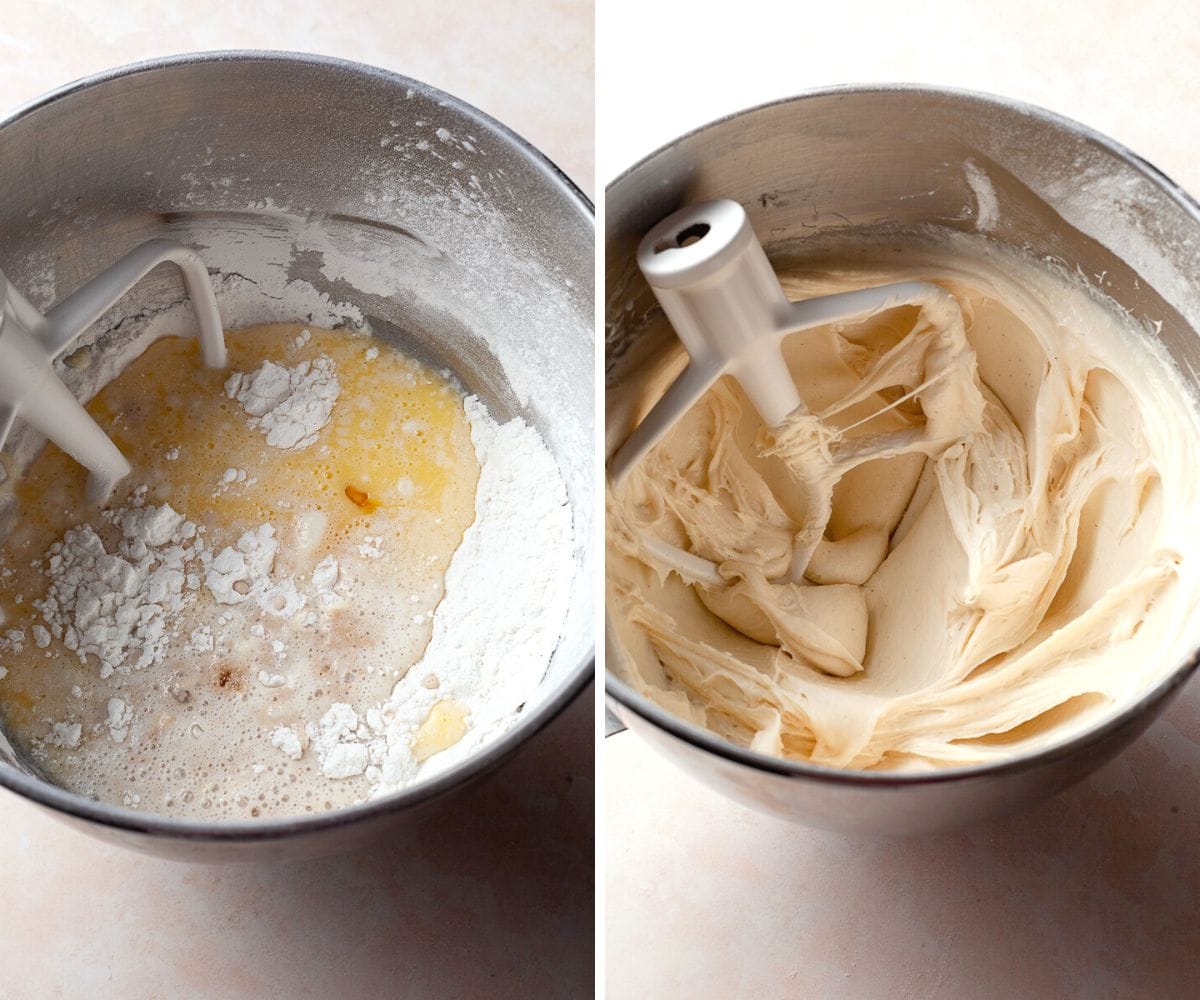
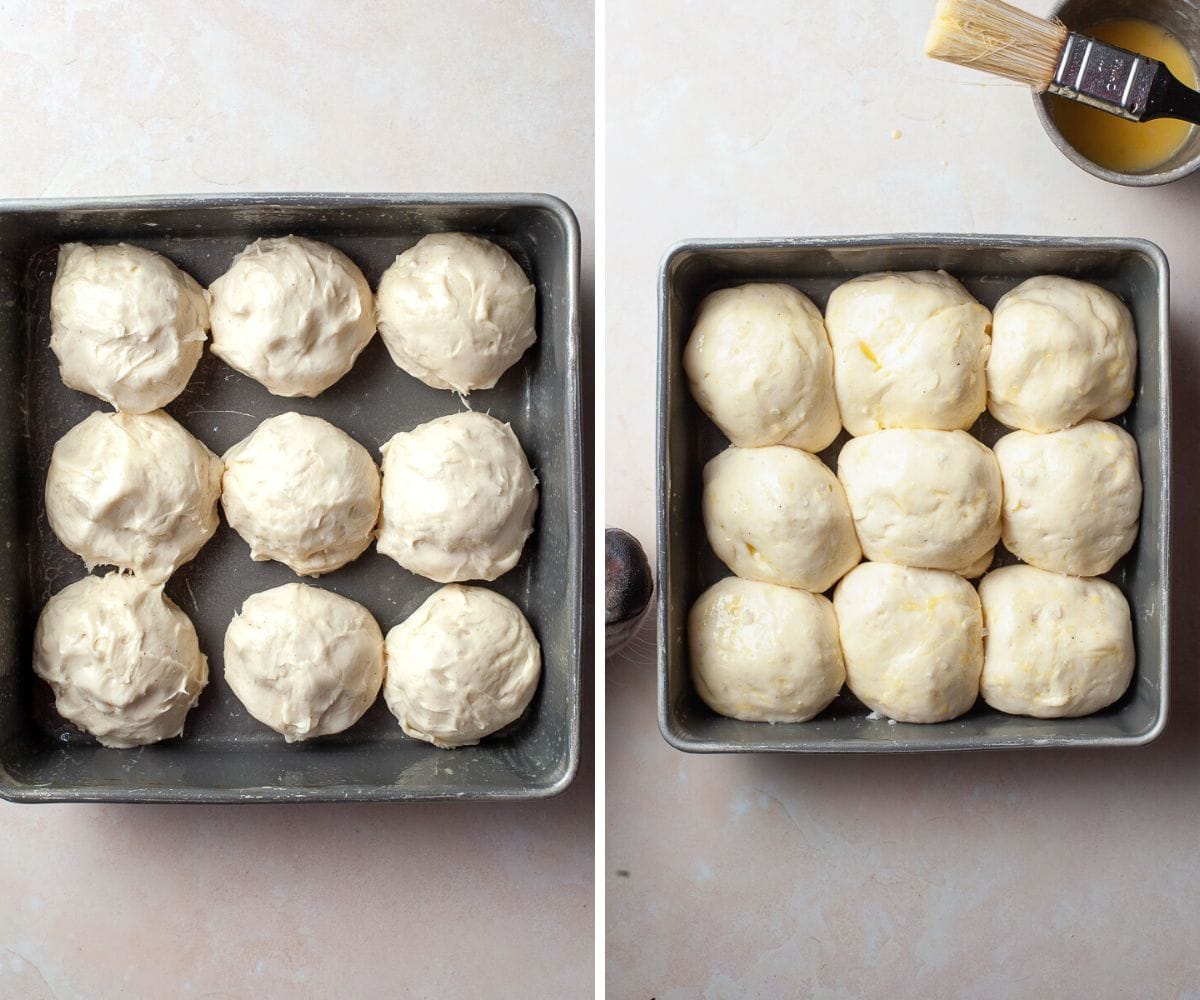
You will be surprised to learn that making fluffy gluten-free dinner rolls is pretty simple. The portioned rolls do have to rest and rise for 45-60 minutes but this is a very traditional step of making yeast-based bread. It is important to mention that gluten-free bread dough is very different than "traditional" bread dough. So do not be surprised if your dough looks more like cake or muffin batter. DO NOT add more flour! Trust me with this.
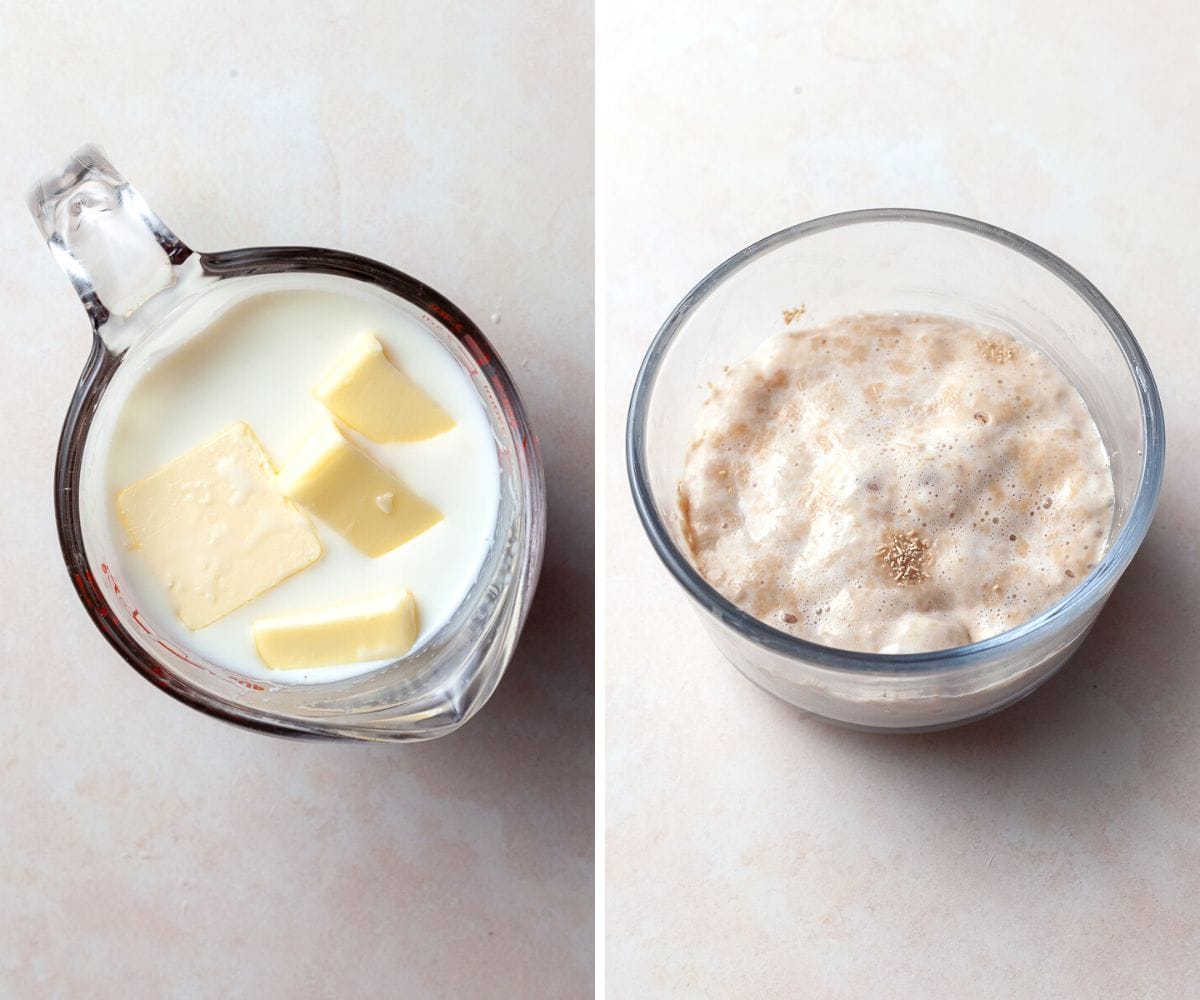
Step 1: To activate the yeast, warm the 25 grams of whole milk in a small bowl in a microwave for 15-20 seconds. You want the milk to be around 110F (No hotter than 115F or you will kill your yeast). I recommend using a digital thermometer to check the temperature. Sprinkle the yeast and a pinch of sugar over the warmed milk and allow it to sit for 10-15 minutes. The yeast will be ready when it looks bubbly and frothy. If your yeast is not bubbly and frothy after 10 minutes, it most likely is dead and should not be used in any recipe.
Step 2: While the yeast is "waking up", warm the remaining milk and melt the butter. You can do this in a small pot on the stove or in a microwave-safe bowl. It is important to mention this mixture must be between 110-114F before adding it to your dry ingredients.
Step 3: In the bowl of a stand mixer fitted with the paddle attachment, combine the gluten-free flour, granulated white sugar, milk powder, and salt and mix for 30 seconds on low speed to whisk the dry ingredients together.
Step 4: Once the butter and milk mixture is between 110-114F, turn the mixer to low speed and add the liquid and the egg yolk to your dry ingredients. Add your activated yeast and mix to combine. Turn off your mixer, and scrape down the sides and the paddle.
Step 5: Once all the ingredients have been added and you scraped down the sides of the mixing bowl, turn the mixer to a medium-high speed and mix the gluten-free dinner roll dough for 5 minutes. During the mixing process, the flour will be hydrated and become thicker.
How to portion and proof dinner rolls
I recommend using an 8x8 pan or a pan similar size - if your pan is too big, the rolls will have too much room to spread out and won't rise up.
Step 1: While your gluten-free dinner roll dough is mixing, prepare an 8x8 pan by generously greasing it with oil. Do not skip this step, especially if your baking pan is older. Use your #20 cookie scoop, and portion the dough equally in 9 dinner rolls. The dough will be sticky, so you may lightly spray your cookie scoop with some nonstick cooking spray. If you have some leftover dough, you can equally distribute it between your scooped rolls.
Step 2: When the dinner rolls are portioned out, lightly wet your fingers and smooth out the tops of the rolls
Please be careful not to use too much water. If your dough is too sticky, you can lightly oil your fingers with neutral oil or your nonstick pan spray.
Step 3: Lightly wrap your pan with plastic wrap or top it with a CLEAN kitchen towel and allow for your rolls to be proofed in a warm place for one hour or until doubled their size. As for a warm spot, I recommend around 100F.
How to bake gluten-free dinner rolls
Around 45 minutes into the proofing process, preheat the oven to 350F. If you use your oven as a proofing spot, please make sure to remove your rolls before turning on your oven.
Step 1: Once the gluten-free dinner rolls have doubled their size, brush them with an egg wash (you will not use all of it. You can store leftover egg wash for 7 days in your fridge) and lightly sprinkle the rolls with some flaky salt.
Step 2: Bake the rolls for 30-35 minutes, until they are golden brown and their internal temperature is around 190F-195F (you can test this with a digital thermometer insert in the center of a roll)
Step 3 - OPTIONAL: This is optional but a tasty optional step. While the gluten-free dinner rolls are baking, finely chop 1-2 cloves of garlic. You can also use a Microplane and grate the garlic. In a small saute pan melt butter. To the melted butter add the garlic and parsley and sautee for 1 minute over medium-low heat until fragrant. Remove from heat.
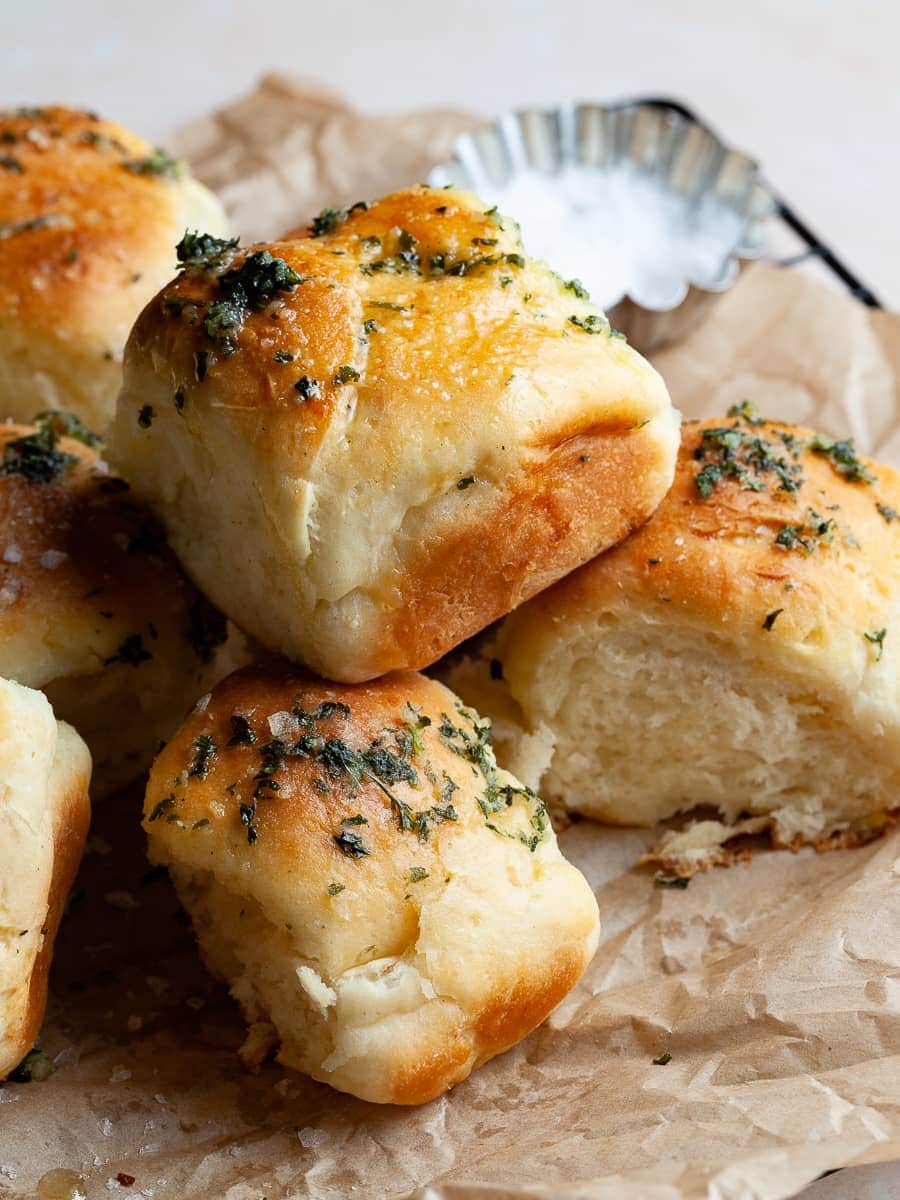
Step 4: Once your rolls are fully baked, remove them from the oven and brush with the garlic parsley butter or alternatively with plain melted butter. Sprinkle with more flaky sea salt. Allow for the rolls to cool for 5 minutes in the pan before unmolding them. I recommend running a butter knife around the sides of the pan to make sure the rolls don't stick to the sides of the pan.
Enjoy! I am not gonna lie, those soft dinner rolls taste the best fresh from the oven!
Storage & Freezing
While these gluten-free rolls taste the best straight from the oven, they do store very well at room temperature. I recommend placing them on a sheet of parchment paper and then transferring them to a ziplock bag or airtight container. Clearly, they won't be as light and fluffy the next day but you may always nuke them in the microwave for 15-20 seconds or wrap them in foil and reheat them in the oven at 300F for 10 minutes.
Please be aware if you live in a humid climate your bread may become moldy. That's why I recommend refrigeration if that is the case.
How to make Gluten-free Dinner Rolls Recipe ahead of time
Especially with the holidays, everyone would like to prepare ahead of time. There are several options for how to prepare this recipe for soft dinner rolls ahead of time.
Reheat fully baked dinner rolls: bake your dinner rolls as directed and allow for them to cool completely. Once cooled, wrap them tightly in aluminum foil. Freeze them for up to one month. The night before you are ready to serve them, remove them from the freezer, loosen the foil a bit, and thaw at room temperature. You can serve them when they are thawed but I recommend reheating them in the oven (in their foil package) at 300F for 10-15 minutes. Brush with additional butter and sprinkle with more sea salt if you like.
IMPORTANT: If you plan on freezing your dinner rolls for a future meal, I recommend skipping the garlic butter finish after the first bake!
Make the dough one day ahead: Make the dinner rolls dough as directed. But instead of allowing them to rise at room temperature, refrigerate them right away. Cover them with a lightly sprayed plastic wrap and refrigerate for up to 24 hours. Allow for the dough to come to room temperature before baking while the oven preheats. Bake as directed.
Can I make this recipe with a different flour?
The short answer is "No". Products like Bob's Red Mill 1-1 and King Arthur Measure for Measure are not designed to be used in yeasted recipes. Even Cup4Cup states on its website that the flour is not designed to be used in bread recipes. With this being said you may try the recipe with your favorite gluten-free all-purpose flour blend (NOT a cup-for-cup replacement blend) but I can not guarantee that the recipe to work. I understand not everyone has access to Caputo Fioreglut or can digest gluten-free wheat starch.
Note about Salt in my Recipes
I use Diamond Kosher Crystal Salt in all of my recipes unless otherwise stated. If use use a different brand or kind of salt in your kitchen please adjust accordingly since some salts can be saltier. If you use Morton’s Kosher Salt please be aware that their salt granules are smaller in size, denser, and crunchier and twice as salty.
Baking in grams
I share my recipes in grams and by weight since baking by weight is the most accurate way to bake. Digital Scales are very affordable and easy to use. You can purchase them on Amazon for less than a set of measuring cups. For small amounts under 10 grams, I like to use this Precision Pocket Scale. Measuring cups are very inaccurate which can cause significant errors when it comes to gluten-free baking or baking in general. Especially since I bake with gluten-free flours which weigh differently than “regular” flours. I do provide some ingredients like spices and leavening agents in measuring spoons. To learn more about Baking with a digital scale.
Note about Ovens and Oven Temperatures
All my recipes are tested and developed with a conventional oven. I always bake my baked goods on the rack placed in the MIDDLE of my oven. This way the heat coming from the bottom will not burn my baked goods.
If you are baking with convection (fan-forced), please adjust the recipes accordingly. Convection oven can cause baked goods to dry out quickly and still be raw inside. Since takes at least 15-20 minutes for a standard American Oven to be fully preheated. I highly recommend investing in an Oven Thermometer.
Substitutions and Modifications
Any dietary or ingredient modifications/substitutions to this recipe may alter the end result in appearance and taste. I tested my recipes several times as published in this post and The Gluten Free Austrian Blog is not responsible for the outcome of any recipe you find on our website.
Ingredients
To Activate Yeast
- 25 grams of whole milk
- 4 grams of active dry yeast
- pinch of granulated white sugar
Dinner Roll Dough
- 280 grams Caputo Fioreglut
- 30 grams of granulated white sugar
- 10 grams dry milk powder
- 2.5 grams of Diamond kosher salt
- 225 grams of whole milk
- 50 grams unsalted butter
- 1 large egg yolk
Egg Wash
- 1 large egg & 1 tablespoon milk or water whisked together
For Garlic Butter
- 30 grams unsalted butter
- 1-2 garlic cloves, finely chopped or grated
- 1 teaspoon dry parsley or 1 tablespoon fresh parsley, finely chopped
- flaky sea salt
Hands Free Mode:
Prevent screen from sleeping
Instructions
How to make Gluten Free Dinner Rolls
- Warm 25 grams of whole milk in a small bowl to 110-114F
- Add active dry yeast and sugar and allow to sit for 10 minutes. Your yeast is ready to use when it looks bubbly and frothy
- In the meantime warm the additional 225 grams of whole milk and butter to 110F (114F max) and set aside
- In the bowl of your stand mixer combine Caputo Fioreglut, granulated white sugar, dry milk, and salt, and mix for 30 seconds at a low speed to combine.
- When the butter and milk mixture is between 110-114F, turn your mixer to low speed and add the liquid and the egg yolk to your dry ingredients. Add your activated yeast and mix to combine. Turn off your mixer, and scrape down the sides and the paddle.
- Once all your ingredients have been added and you scraped down the sides of your bowl, turn your mixer to a medium-high speed and mix your dough for 5 minutes. During the mixing process, the flour will be hydrated.
- The dough will more look like a cake or muffin batter. DO NOT ADD MORE FLOUR!
- While your gluten-free dinner roll dough is mixing, prepare an 8×8 pan by generously greasing it with oil. Do not skip this step, especially if your 8×8 pan is older.
- Use your #20 cookie scoop, and portion the dough equally in 9 dinner rolls. The dough will be sticky, so you may lightly spray your cookie scoop with some oil. If you have some leftover dough, you can equally distribute it between your scooped rolls.
- Once you have your dinner rolls portioned out, lightly wet your fingers and smooth out the tops of the rolls, Please be careful not to use too much water.
- Lightly wrap your pan with plastic wrap or top with a CLEAN kitchen towel and allow for your rolls to proof in a warm spot for one hour or until doubled their size. As for a warm spot, I recommend around 100F.
- Around 45 minutes into the proofing process, preheat the oven to 350F. If you use your oven as a proofing spot, please make sure to remove your rolls before turning on your oven.
- When the rolls have doubled their size, brush them with an egg wash and lightly sprinkle the rolls with some flaky salt.
- Bake your rolls for 30-35 minutes at 350F, until they are golden brown and their internal temperature is around 190F-195F (you can test this with your digital thermometer)
- OPTIONAL: This is optional but a tasty optional step. While the gluten-free dinner rolls are baking, finely chop 1-2 cloves of garlic. You can also use a Microplane and grate the garlic. In a small sauté pan melt butter. To the melted butter add the garlic and parsley and sauté for 1 minute over medium-low heat until fragrant. Remove from heat.
- Once your rolls are fully baked, remove them from the oven brush them with the garlic butter, and sprinkle with more flaky sea salt. Alternatively, just brush them with some melted butter.
- Allow for the rolls to cool for 5 minutes in the pan before unmolding them. I recommend running a butter knife around the sides of the pan to make sure the rolls don’t stick to the sides of the pan.
- Enjoy!
Notes
Disclaimer: I have tested this recipe with 5 different gluten-free flour blends. Caputo Fioreglut is the only flour blend that gave me those light and airy dinner rolls.
Storage: While these gluten-free rolls taste the best straight from the oven, they do store very well at room temperature. I recommend placing them on a sheet of parchment paper and then transferring them to a ziplock bag or airtight container. Clearly, they won't be as light and fluffy the next day but you may always nuke them in the microwave for 15-20 seconds or wrap them in foil and reheat them in the oven at 300F for 10 minutes.

%20(2).png)
.png)
0 Comments