
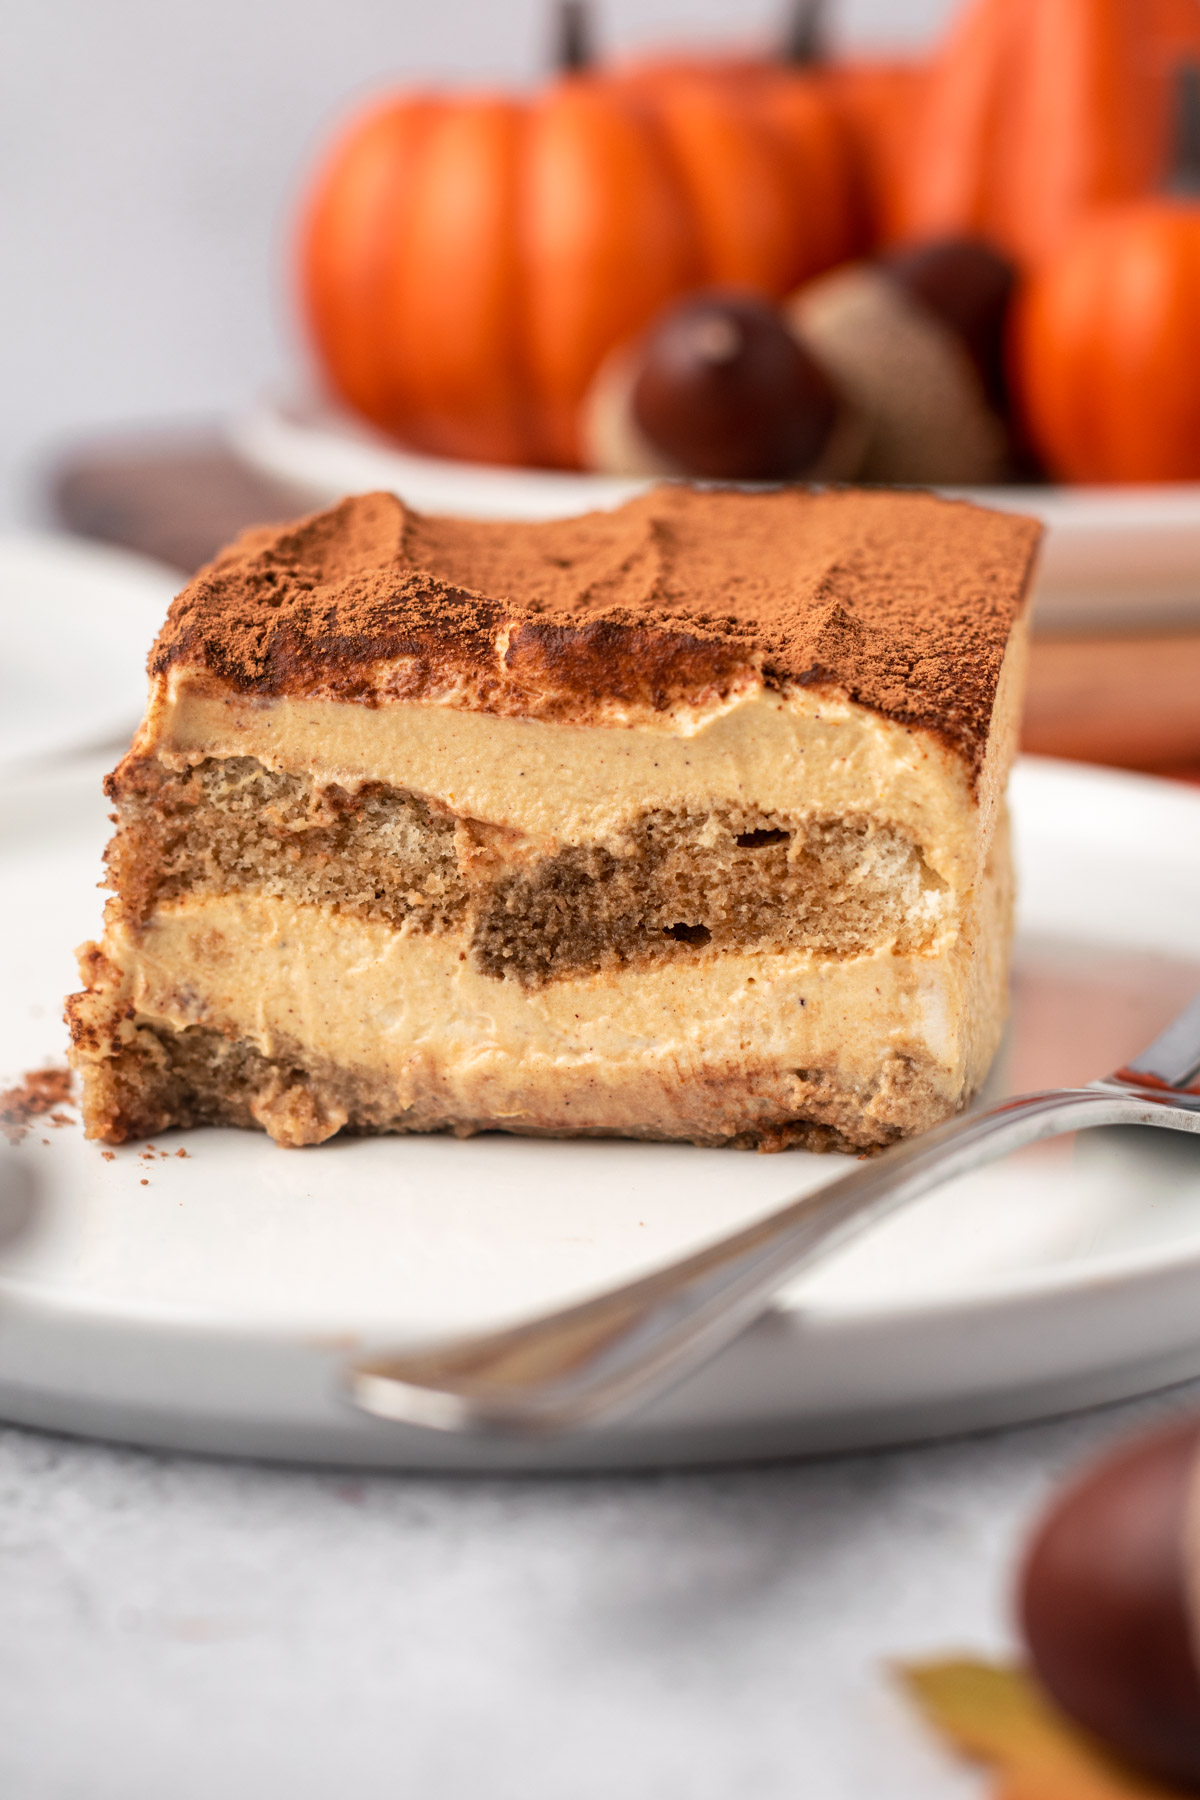
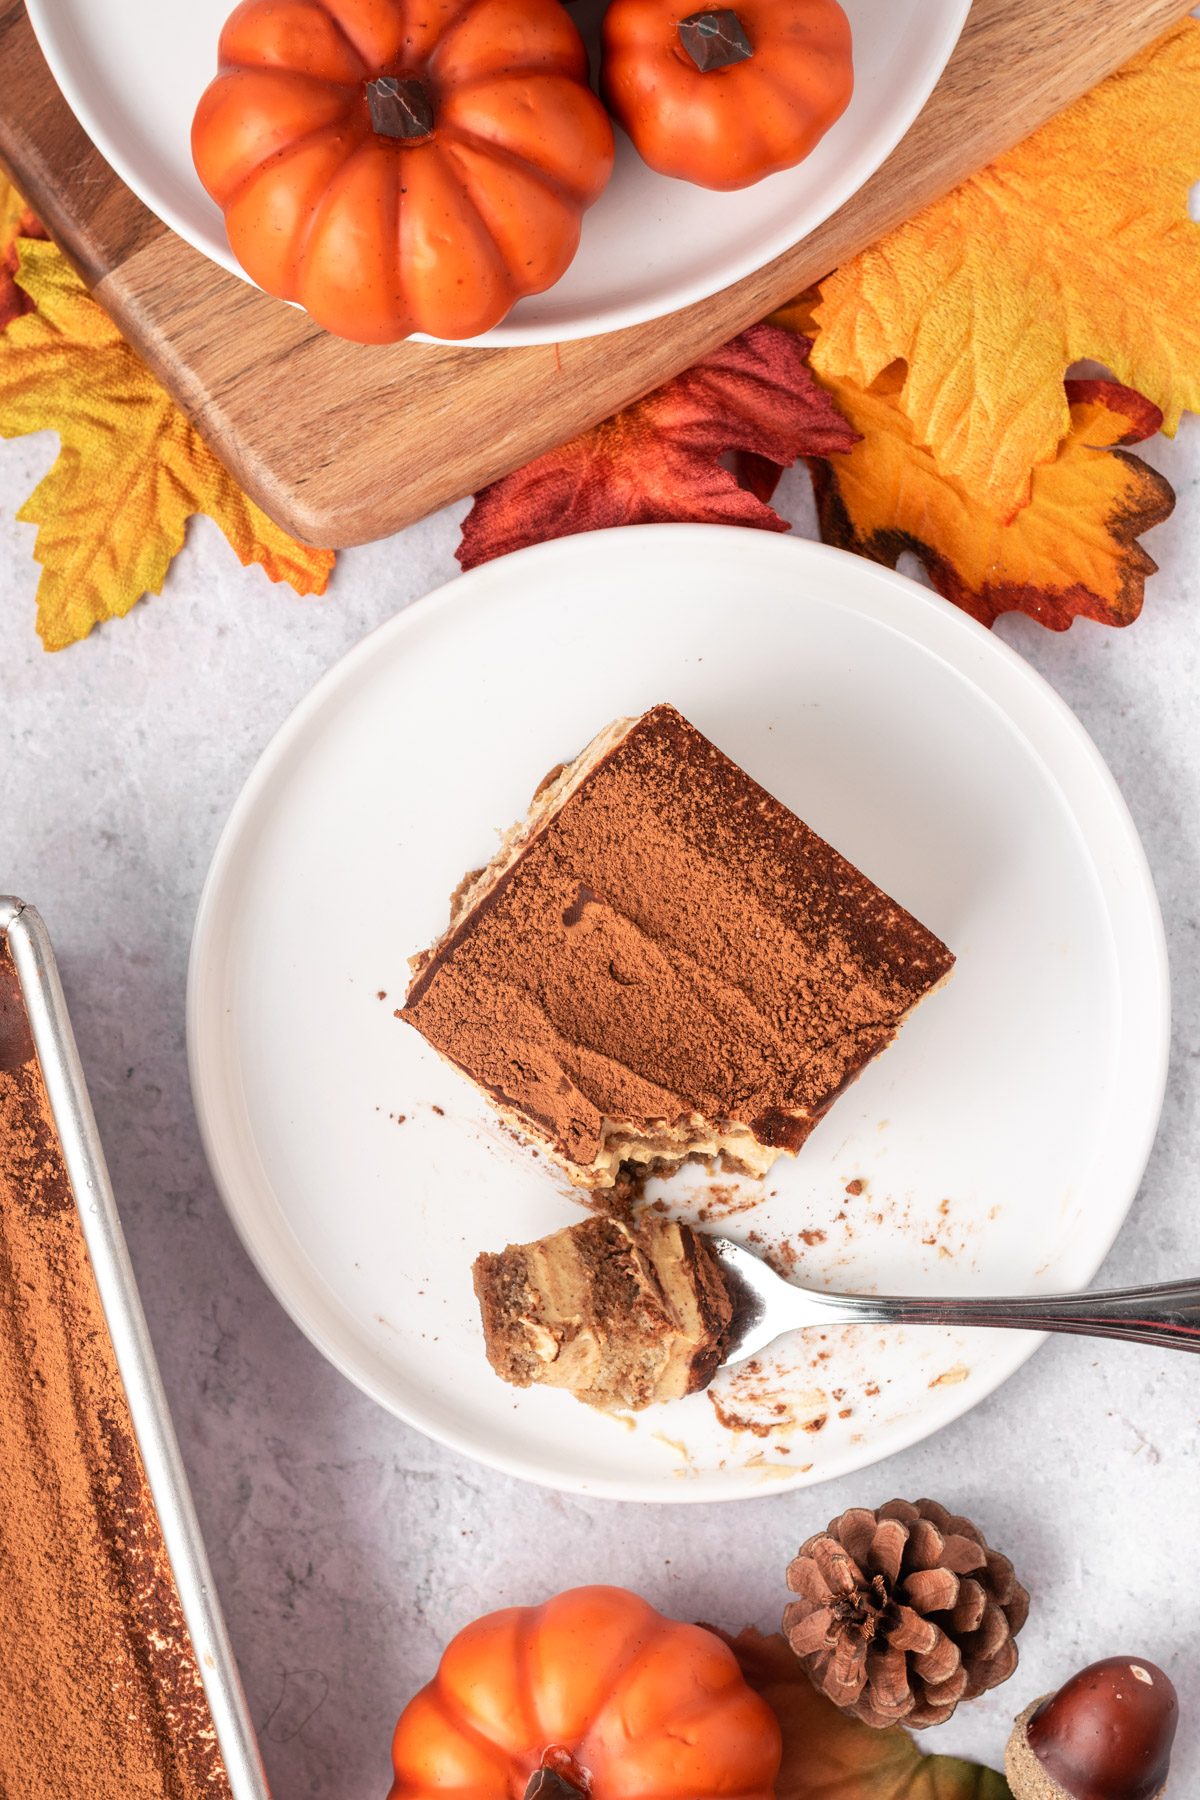
The perfect combination of a pumpkin spice latte with your favorite Italian dessert, this gluten-free and dairy-free pumpkin spice tiramisu is creamy, rich, and delicious—all without gluten and dairy.

This Gluten-Free and Dairy-Free Pumpkin Spice Tiramisu combines your favorite fall drink with your favorite Italian dessert—all without gluten and dairy. A rich coconut-cashew pumpkin cream layered between espresso-soaked gluten-free ladyfingers topped with cocoa and cinnamon dusting is the perfect fall dessert.
With just 30 minutes of hands-on time (and a little patience afterward), you too can make this decadent dessert with mainly pantry staples. No one will even think to question whether this could be gluten and dairy-free—it's that good!
You'll be sure to impress guests, friends, or family when you present them with this show-stopping gluten-free dairy-free pumpkin spice tiramisu. Keep reading to find out all of my tips and tricks for how to make it pumpkin-perfect!

.png)
Why You'll Love This Recipe
- It's a treat for everyone. It's gluten-free and dairy-free—but no one will know when it tastes this good.
- Tastes like fall. Get your espresso kick at the same time as enjoying this creamy and decadent fall dessert. It's the perfect combination of pumpkin spice and Italian tiramisu.
- Easy to make. Just mix, layer, chill, dust, and enjoy.
- Small-ish batch recipe. This recipe makes enough for an 8"x8" or 9"x9" pan. Multiply the ingredients by 1.5 if you’re serving a crowd in a 9"13" pan.

How do you make dairy-free tiramisu?!
A traditional tiramisu looks very similar to this dish, with layers of espresso (and liqueur) soaked ladyfingers and a creamy mascarpone-egg mixture. But it's super easy to replicate to suit gluten and dairy dietary restrictions.
Using store-bought (or homemade) gluten-free ladyfingers is the easy part. I find them around me at large grocery stores. You could also check out Schar gluten-free online. Finding or making ladyfingers without eggs is the only substitution required to make these jars entirely vegan!
The mascarpone-egg mixture is replaced by a combination of sweetened cashew cream folded into whipped coconut milk. And it's delicious! I love how easy it is to make too. I always have a large bag of raw, unsalted cashews in my pantry for making dairy-free subs and I recommend you do too.
Ingredients Needed
This dairy-free pumpkin spice tiramisu is made creatively from very simple pantry ingredients. Here's what you'll need:
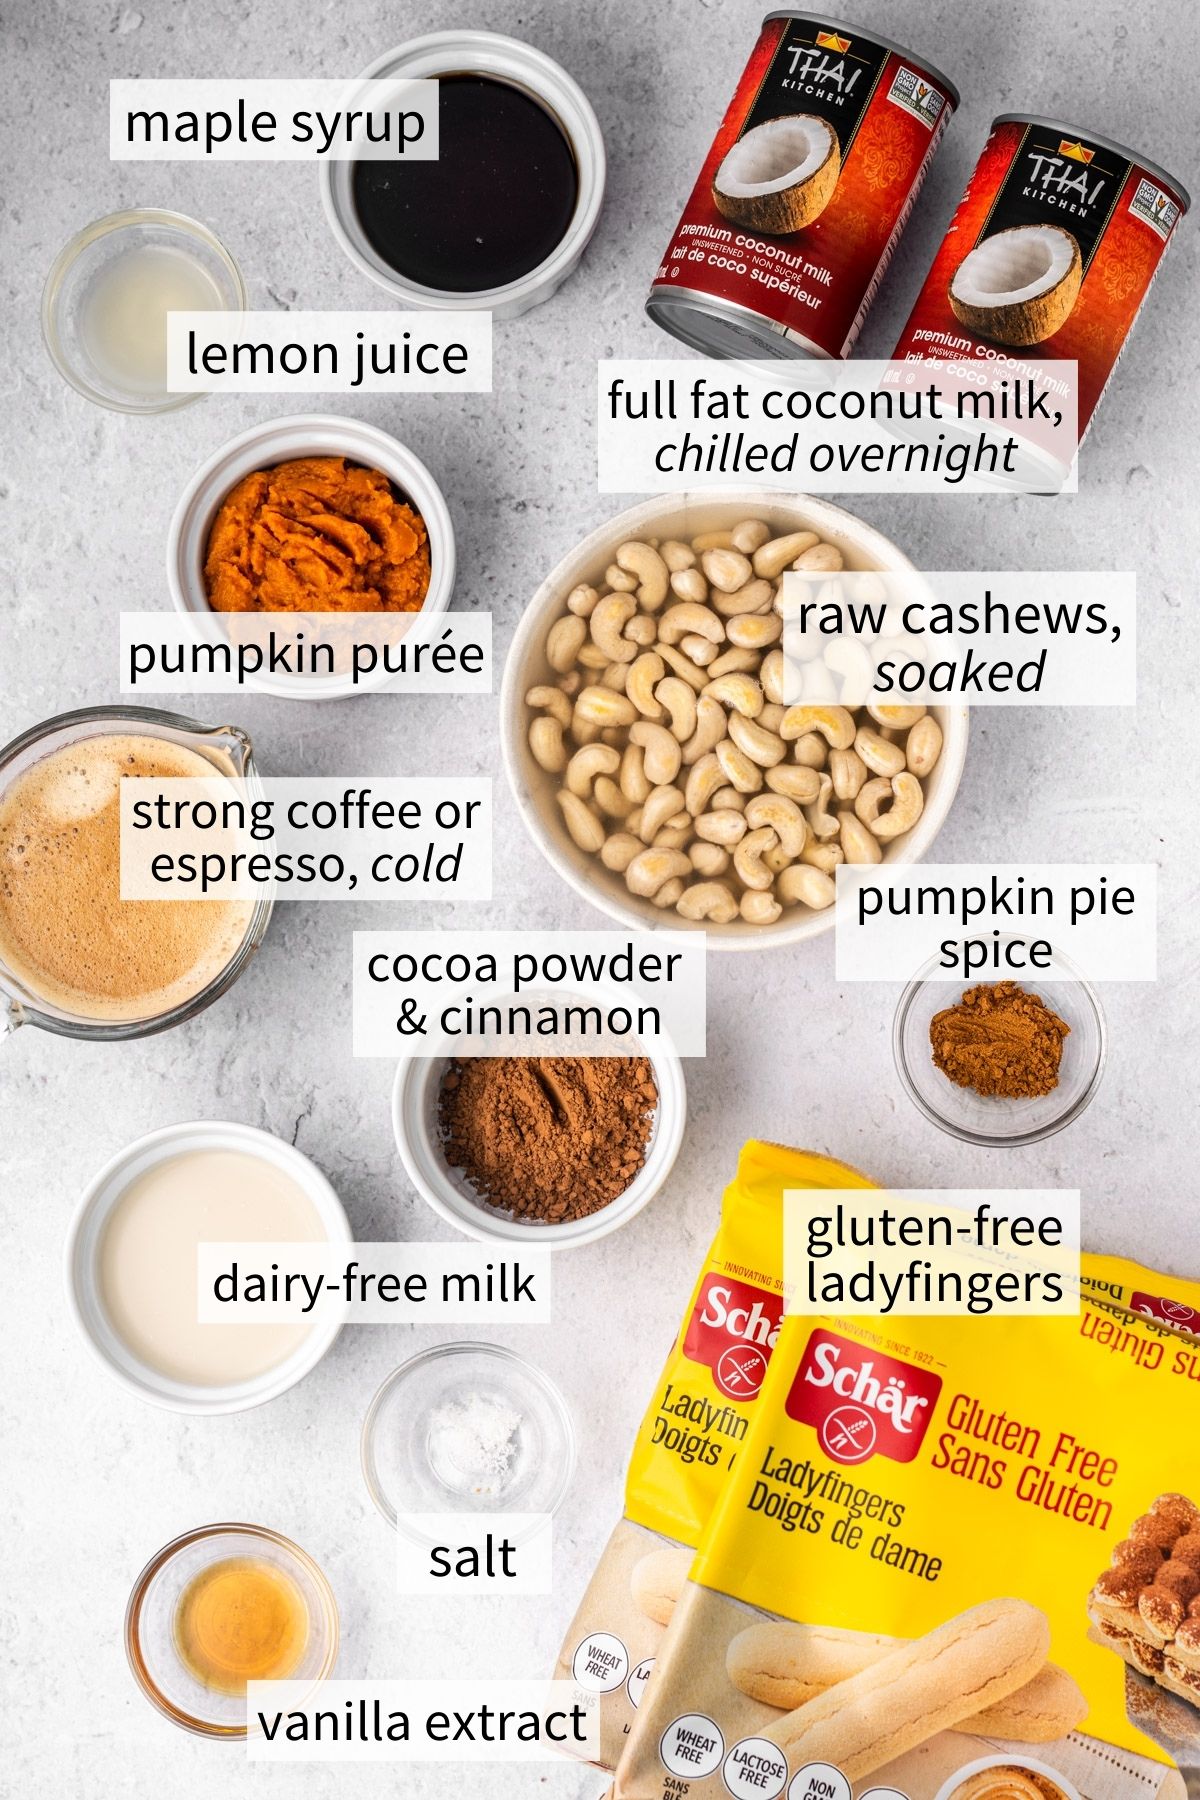
- Full-fat coconut milk: Ensure the cans are chilled in the fridge overnight before preparing tiramisu.
- Raw, unsalted cashews: Soak in boiling water for at least 15 minutes before preparing tiramisu. Then rinse and drain.
- Dairy-free milk: Use your favorite type—I use almond or cashew.
- Maple syrup: A natural sweetener for this dessert.
- Pumpkin purée: Because it's a pumpkin spice tiramisu!
- Lemon juice: Adds a slight tang and brightness to the cream.
- Vanilla extract: Enhances flavours
- Pumpkin pie spice: Or use a combination of cinnamon, nutmeg, ginger, cloves, and allspice.
- Fine salt
- Gluten-free ladyfingers: I use the Schar brand. I'm not aware of any others on the market at this time. The recipe calls for 2 packages, but you won't use all of the second package. 1 package may suffice depending on your pan shape and layering.
- Strong brewed coffee or espresso: Ensure it is cool or cold before dipping to avoid the ladyfingers falling apart instantly.
- Cocoa powder mixed with cinnamon: Traditional tiramisu is dusted with cocoa powder just before serving. This pumpkin spice version is dusted with mostly cocoa powder but with a hint of cinnamon spice.
Equipment Needed
You will likely have this equipment in your kitchen already:
- High-power blender: You could also use a food processor to blend the cashew mixture.
- Hand mixer: Or something to whip up the coconut cream.
- 8"x8" or 9"x9" pan: Multiply the ingredients by 1.5 if you’re serving a crowd in a 9"x13" pan.
Step-by-Step Instructions
Be sure to read the recipe card below for the full ingredient list and instructions.
(Prep) The night before you're going to make the tiramisu jars, place your cans of coconut milk in the fridge.
(Prep) 15 minutes before you're ready to begin, place the cashews in a bowl and cover with boiling water to soften them. Brew your coffee or espresso at the same time and place in the fridge to cool completely.
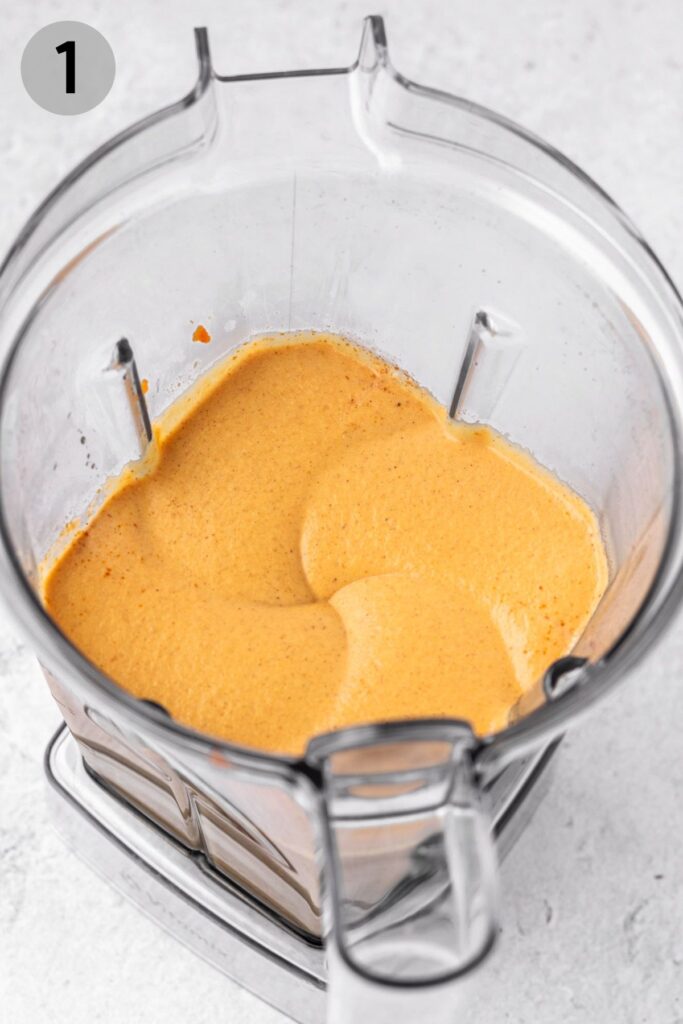
(1) Drain and rinse the cashews. Add to a high-powered blender with dairy-free milk, maple syrup, pumpkin purée, lemon juice, vanilla, pumpkin pie spice, and salt. Blend for 2 minutes until smooth and creamy. Set aside, and if there is room, place it in the fridge to cool while you perform the next step.
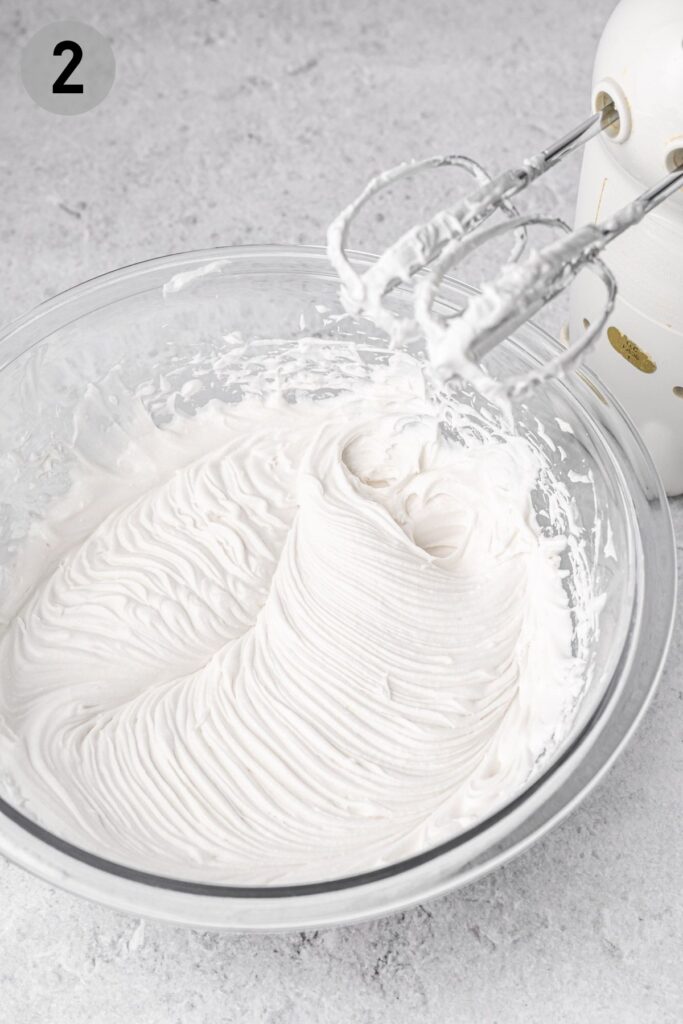

(2) In a large bowl, scoop out the thick white part of both coconut milk cans. It should be pretty solid after chilling. Discard the coconut water or save it for another recipe. Using a hand mixer, whip the coconut milk for 2-4 minutes until air has incorporated and it is light and fluffy.
(3) Pour the cashew mixture into the coconut milk bowl. Using a spatula, gently fold together until homogenous, being careful to not knock the air out of the whipped coconut milk.
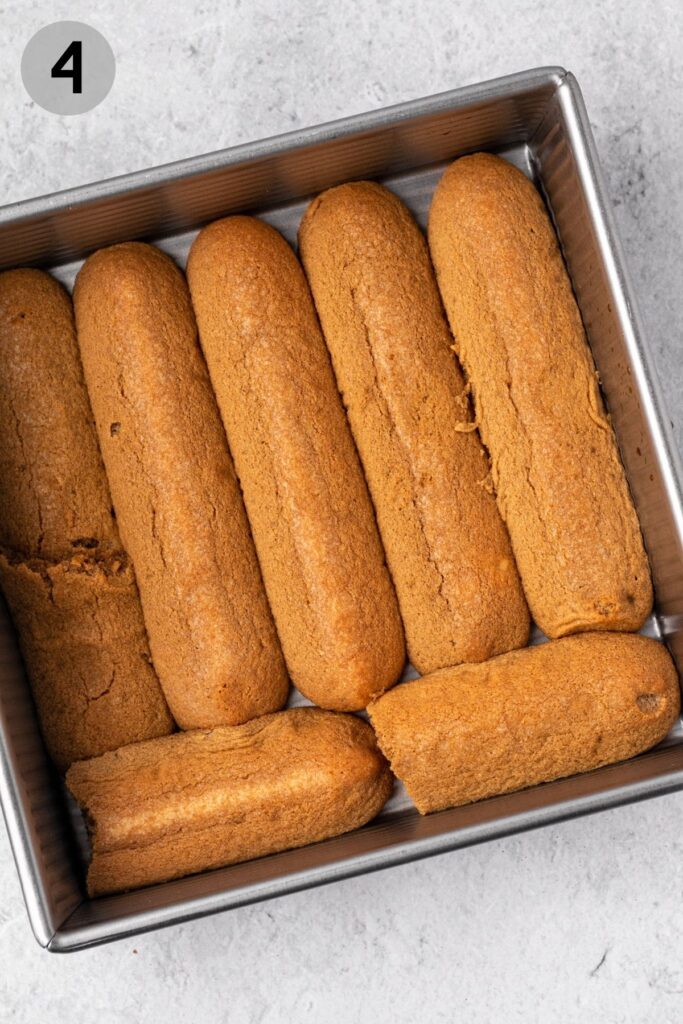
(4) Then it's time to layer! Grab your baking dish and begin with a layer of soaked ladyfingers. Dip the lady fingers into the cool espresso (quickly, they will absorb fast) and place on the bottom of the dish. Break pieces to fit so that the entire surface area of the dish is covered.
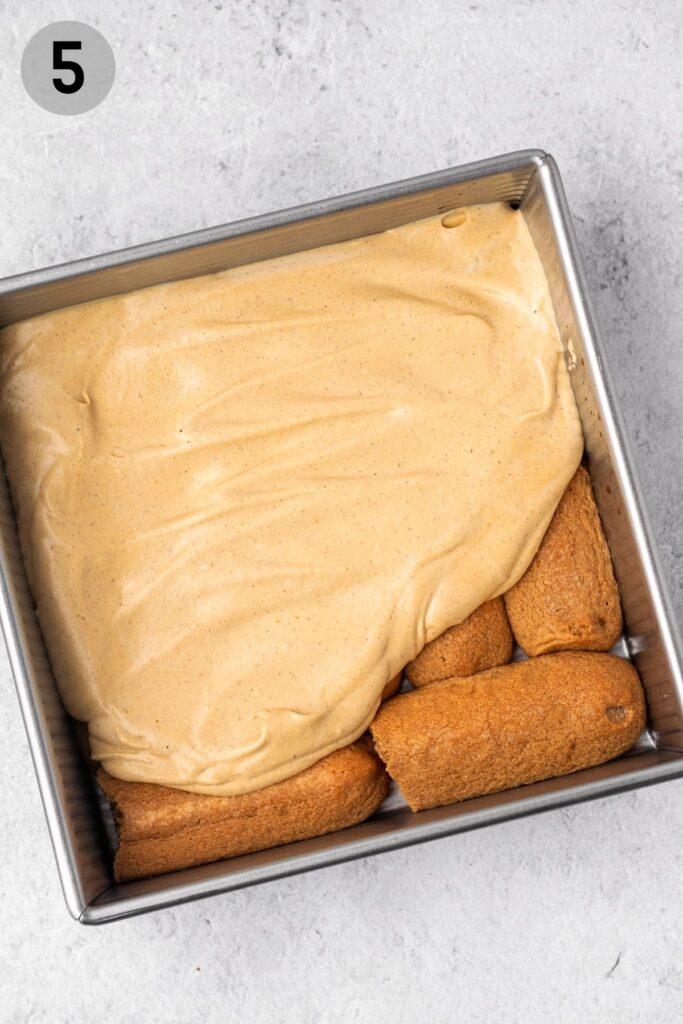
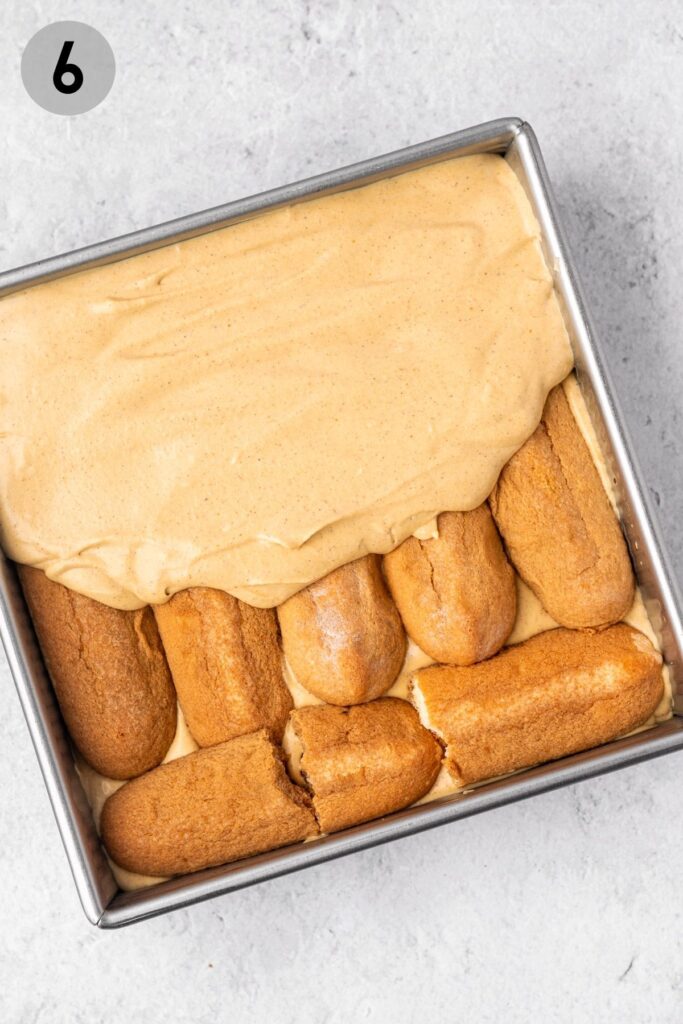
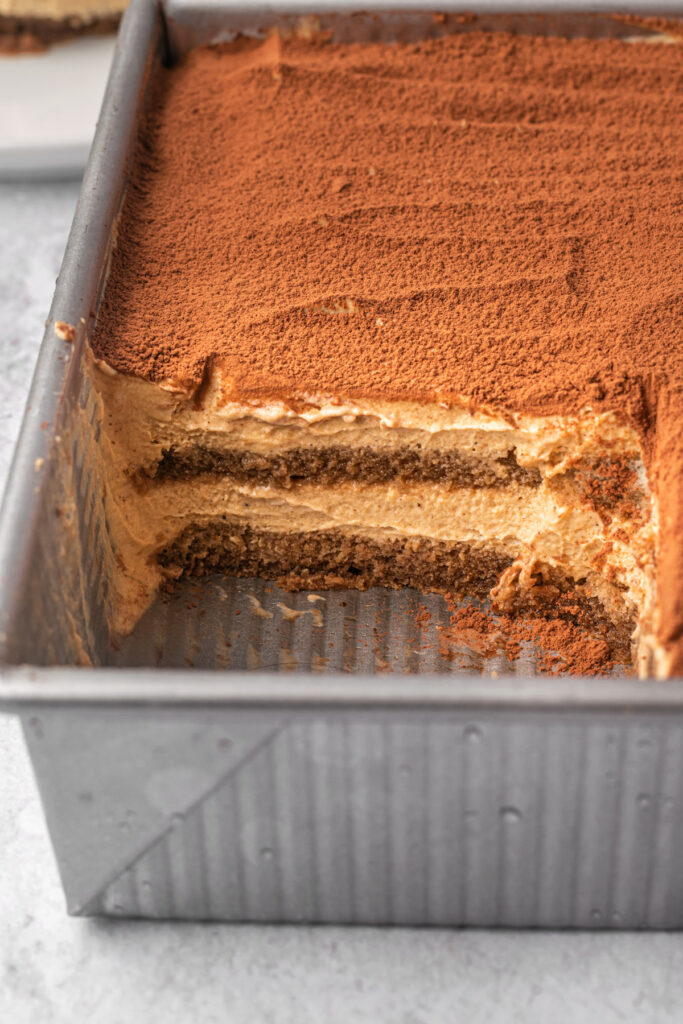
(5) & (6) Then spoon a thick layer of the cream mixture on top to completely cover the ladyfingers (about half the total cream amount). Repeat with another layer of ladyfingers, followed by another layer of cream until you reach the top of the dish. My 8"x8" pan fits 2 layers of each.

(7) Cover the dish with plastic wrap or aluminum foil and place in the fridge overnight.
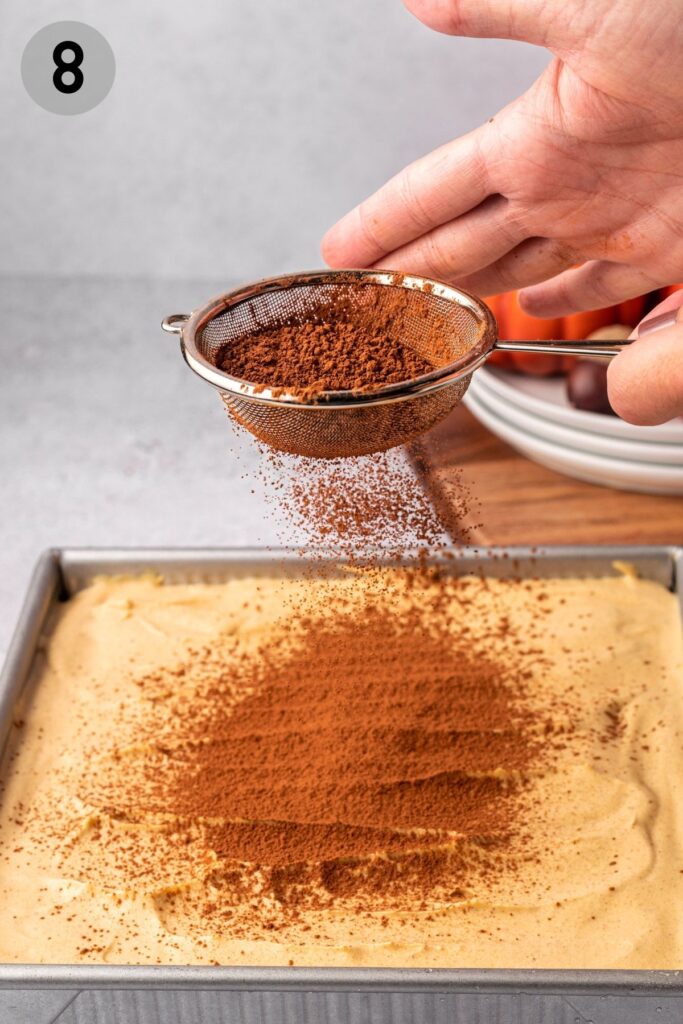
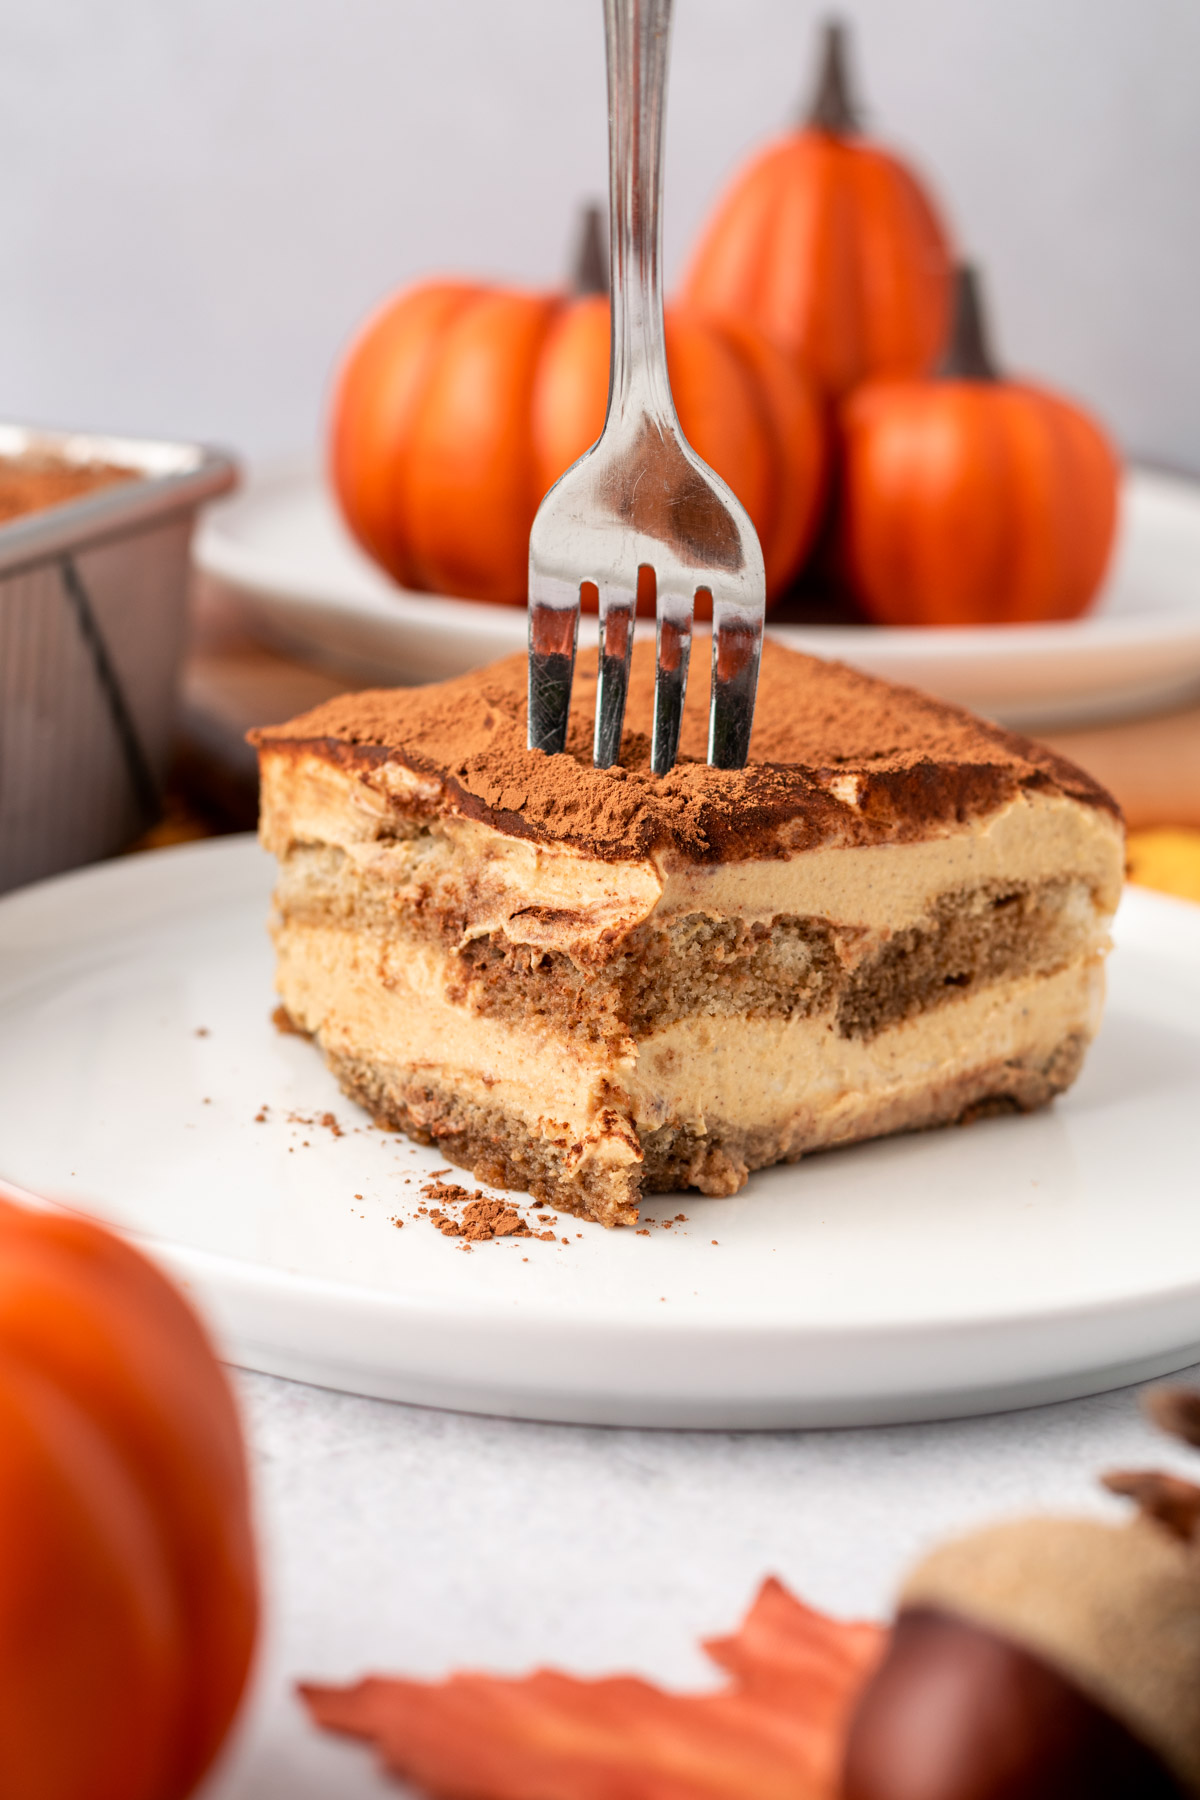
(8) When you are ready to serve, mix a little cinnamon into the cocoa powder and sift over the top. Slice into 9 squares and enjoy immediately!

Storage Instructions
Tiramisu can be left in the pan, re-covered, and stored in the fridge for 2-3 days. Note that once it's been dusted with cocoa powder, condensation can form a bit. That's totally fine. Just eat as is or dust with a fresh layer of cocoa powder and cinnamon before eating again!
Freezing Instructions
If you will not be eating the remaining tiramisu right away, individual slices can be put into freezer-safe containers and frozen for up to 1 month. To defrost, place the container in the fridge for a few hours, or overnight. Dust with some fresh cocoa powder and cinnamon before enjoying it again!
Customizations
This gluten-free and dairy-free pumpkin spice tiramisu recipe has been developed to taste delicious as is, however here are some suggested customizations you could make:
- To make this a regular tiramisu, simply omit the pumpkin purée, pumpkin spice, and cinnamon. Continue with the layering as normal and enjoy a delicious gluten-free and dairy-free tiramisu.
Expert Tips
Here are some of my top tips and tricks for a successful gluten-free and dairy-free pumpkin spice tiramisu:
- Ensure prep has been done. Chill the cans of coconut milk overnight, soak the cashews in boiling water for at least 15 minutes, and brew the espresso early so that it can cool.
- Work fast when preparing. Try to keep the cream mixture as cold as possible by working fast. Also, dip the ladyfingers in the espresso very quickly, as they will absorb fast and can fall apart if dipped even longer than a second.
- Don't rush the chilling. The pumpkin spice tiramisu needs a good 12 hours at least in the fridge. This allows the cream to solidify and all of the flavors to blend together wonderfully.
- Dust with cocoa and cinnamon just before serving. If dusted too early, cocoa powder can begin to form condensation and can look less pleasant—still great to eat though!
Frequently Asked Questions
The only part of this pumpkin spice tiramisu that is not vegan is the ladyfingers (which contain eggs). To make this vegan, you may have to make your own ladyfingers or use another soft biscuit.
Unfortunately, the cashews are integral to the texture of the cream mixture. You could try using another can of coconut milk to blend with the pumpkin cashew cream ingredients, then fold that into the whipped coconut cream, but I am not sure of the final result.
If you will not be eating the remaining tiramisu right away, individual slices can be put into freezer-safe containers and frozen for up to 1 month. To defrost, place the container in the fridge for a few hours, or overnight. Dust with some fresh cocoa powder and cinnamon before enjoying it again!
Note that once the tiramisu has been dusted with cocoa powder, condensation can form a bit. That's totally fine. Just eat as is or dust with a fresh layer of cocoa powder and cinnamon before eating again!
For a larger portion to feed a crowd, I recommend multiplying all ingredient quantities by 1.5.
And there you have this deliciously creamy, spicy, and decadent gluten-free and dairy-free pumpkin spice tiramisu. Your guests are sure to fall in love with the flavors and textures. Perfect for those with food allergies, no one will guess that this is gluten and dairy-free!
- GET YOUR COOKBOOK
.png)
Equipment
- High-power blender
- Hand mixer
- 8"x8" or 9"x9" baking dish
Ingredients
- 2 cans of full-fat coconut milk chilled in the fridge overnight before preparing tiramisu
- 1½ cups raw, unsalted cashews soaked in boiling water for at least 15 minutes before preparing tiramisu
- ½ cup dairy-free milk
- ½ cup maple syrup
- ½ cup pumpkin purée
- 2 teaspoons lemon juice
- 2 teaspoons vanilla extract
- 1½ teaspoon pumpkin pie spice a combination of cinnamon, nutmeg, ginger, cloves, allspice
- ⅛ teaspoon fine salt
- 2 packages of gluten-free ladyfingers (I use Schar brand) you won't use all of the second package. 1 package may suffice depending on your pan shape and layering.
- 1½ cups strong brewed coffee or espresso cool/cold
- 2 tablespoons cocoa powder mixed with ½ teaspoon cinnamon for dusting
Instructions
- The night before you're going to make the tiramisu jars, place your cans of coconut milk in the fridge.
- 15 minutes before you're ready to begin, place the cashews in a bowl and cover with boiling water to soften them. Brew your coffee or espresso at the same time and place in the fridge to cool completely.
- Drain and rinse the cashews. Add to a high-powered blender with dairy-free milk, maple syrup, pumpkin purée, lemon juice, vanilla, pumpkin pie spice, and salt. Blend for 2 minutes until smooth and creamy. Set aside, and if there is room, place it in the fridge to cool while you perform the next step.
- In a large bowl, scoop out the thick white part of both coconut milk cans. It should be pretty solid after chilling. Discard the coconut water or save it for another recipe. Using a hand mixer, whip the coconut milk for 2-4 minutes until air has incorporated and it is light and fluffy.
- Pour the cashew mixture into the coconut milk bowl. Using a spatula, gently fold together until homogenous, being careful to not knock the air out of the whipped coconut milk.
- Then it's time to layer! Grab your baking dish and begin with a layer of soaked ladyfingers. Dip the lady fingers into the cool espresso (quickly, they will absorb fast) and place on the bottom of the dish. Break pieces to fit so that the entire surface area of the dish is covered.
- Then spoon a thick layer of the cream mixture on top to completely cover the ladyfingers (about half the total cream amount). Repeat with another layer of ladyfingers, followed by another layer of cream until you reach the top of the dish. My 8"x8" pan fits 2 layers of each.
- Cover the dish with plastic wrap or aluminum foil and place in the fridge overnight. When you are ready to serve, mix a little cinnamon into the cocoa powder and sift over the top. Slice into 9 squares and enjoy immediately!


0 Comments