Soft homemade gluten-free bread is easier to make than you think! Simple and delicious, it's perfect for sandwiches or with butter and jam. Most importantly, you'll be amazed that it's gluten-free!
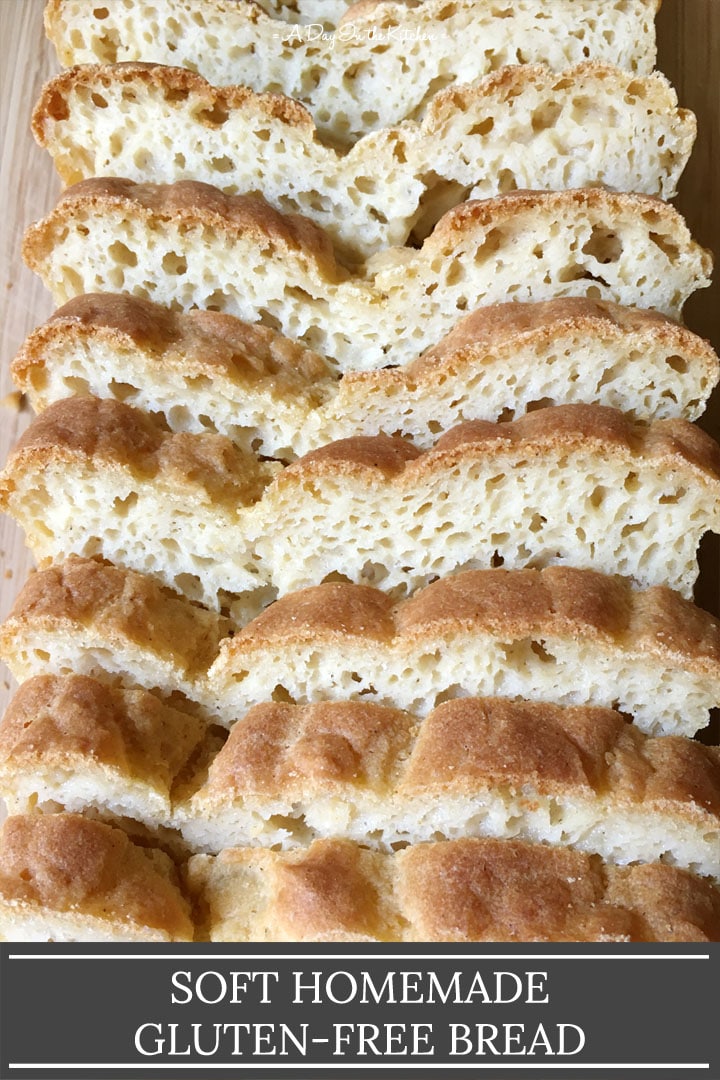
Believe it or not, I still need help convincing some people that gluten-free bread can act good.
Crazy, right?
I've been doing gluten-free baking for a long time...
...and if you know me, you know I won't actually post a recipe unless it ticks all the boxes.
For bread, it's got to be SOFT...
...and delicious...
...and good enough and close enough to "real bread" that you don't realize it's gluten-free.
Bonus points if it's also easy to make!
Well, this bread recipe ticks all the boxes and is just another example of how good gluten-free bread can actually be!
The Dry Ingredients
I like to keep the ingredients fairly simple, and this bread recipe is no exception. The dry ingredients are made up of rice flour, tapioca starch, sorghum flour (which can be substituted with buckwheat or oat flour), xanthan gum, and salt. That's it! The rice flour provides the bulk, the tapioca starch provides the moisture, and the sorghum flour gives the wheat-like smell and taste. The xanthan gum acts as the "glue", if you will, giving the bread that chews that we want from bread.
I prefer not to use pre-made gluten-free flour blends as they often contain other ingredients that I do not want, so I like to create my recipes from scratch with the core ingredients. However, be rest assured that the gluten-free flours I use are commonly found and affordable, so anyone can make these recipes.
Now on to the other dry ingredient...yeast.
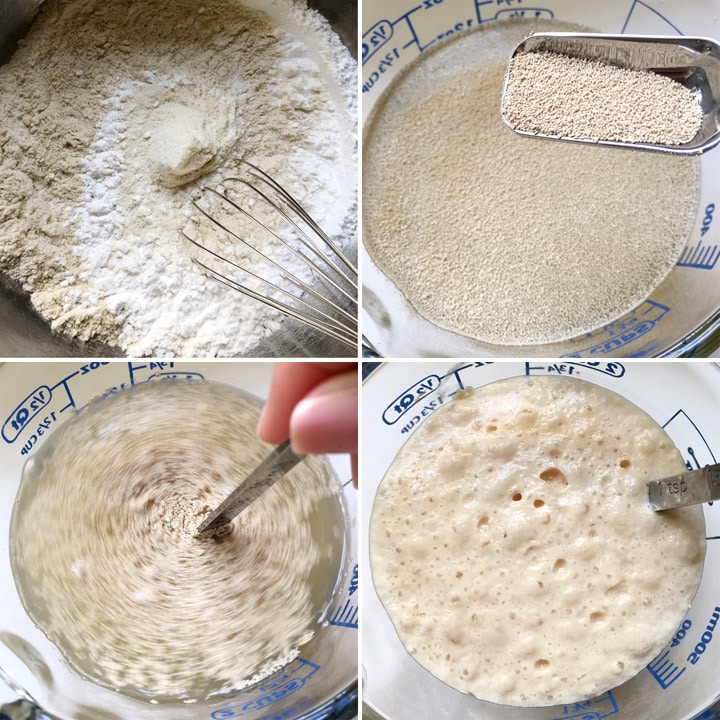
Contrary to common thinking, you do not have to prove yeast before adding it to the rest of the ingredients. If you are confident that the yeast is active (or if you want to live life on the edge!), you can simply add it dry to the rest of the dry ingredients. I have done this and the bread has always worked out without any issue. Keep in mind that I also store my yeast in the fridge to facilitate it staying active longer.
If you aren't sure if your yeast is active, or if you just want to make sure it is before you combine it with all the other ingredients, there is nothing wrong with proofing it first. For proofing the yeast for this recipe, I simply take ¼ cup of the required amount of warm water, mix it with the 2 tablespoons of honey, and add the yeast.
Creating the Batter
Yes, I said batter.
One major difference from regular wheat bread is that gluten-free bread dough is more like a batter and doesn't require any kneading. It is as simple as mixing all the wet and dry ingredients together with a mixer, pouring the batter into a pan and let, ing it rise once before baking. In that respect, making gluten-free bread simpler than wheat bread!
The wet ingredients are also very straightforward, being composed of eggs, honey (which you may have already used for proofing your yeast), warm water, oil, and apple cider vinegar.
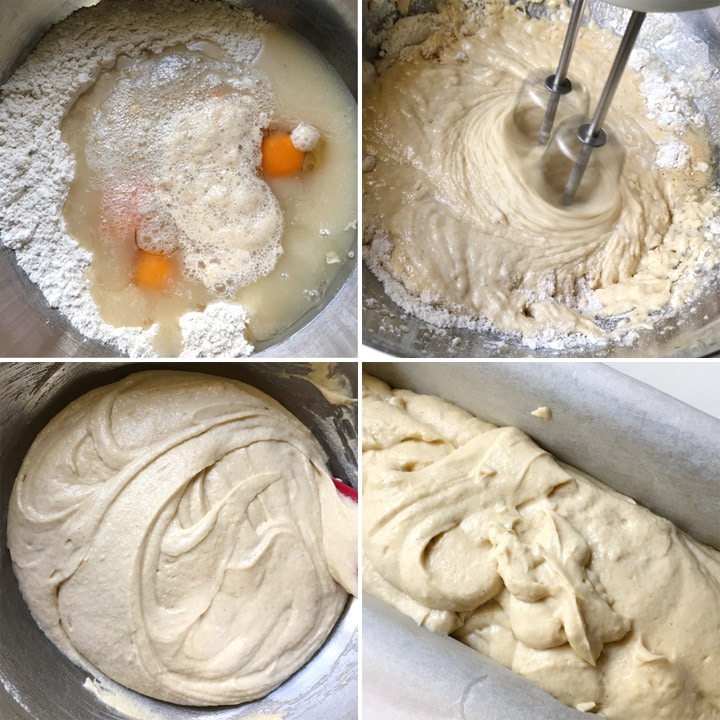
The dry, the wet, and the yeast mixture (if proofing ahead of time) all get combined into a mixing bowl. Whether you are using a stand or hand mixer, it only takes about a minute for the bread batter to come together.
The Rise
Scoop the bread dough batter into a parchment-lined loaf pan and now you just have to let it rise. (See Recipe Notes below regarding pan sizes.) If my kitchen is already warm (like during the summer months), I will simply leave it on the counter. Otherwise, during the colder months, I will often put the bread pan in the oven with just the oven light on and that creates a perfect warm environment for the bread to rise.
Once the bread is no more than ¼" above the edge of the pan, it is ready to bake. I know it may be tempting to let it rise just a *little* bit more until it reaches, what you think, is the perfect height. However, take it from someone who has done just that...don't. 🙂
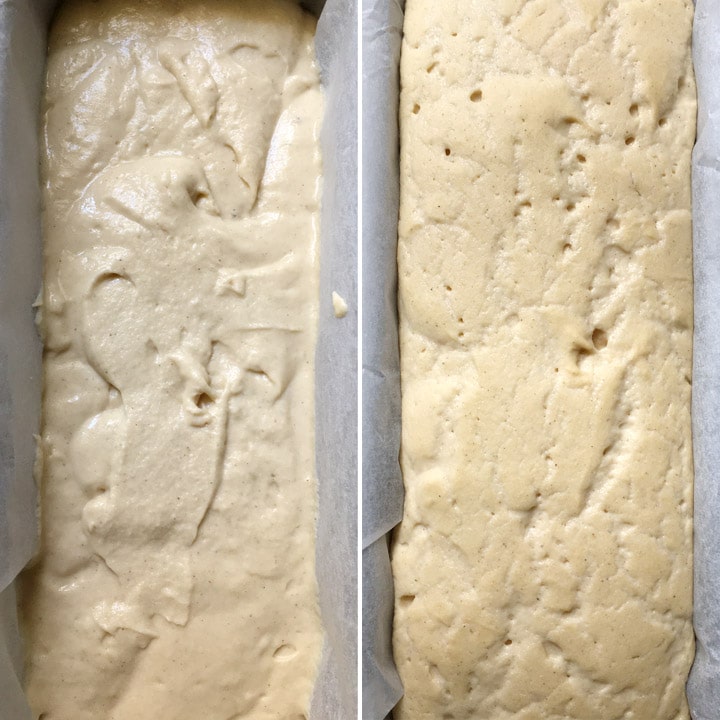
The bread batter continues to rise a bit once it goes into the oven and that can result in your bread having a "ledge" or, even worse, the batter may spill over the edge of the pan. So err on the side of being conservative.
Bread Magic
After the bread dough has risen, it's time to bake and let the heat do its magic. Before you know it, the wonderful aroma of fresh bakfreshlyead will be wafting through your home! In 45 minutes, you'll have a beautiful loaf of bread..that looks and smells like "real" bread!
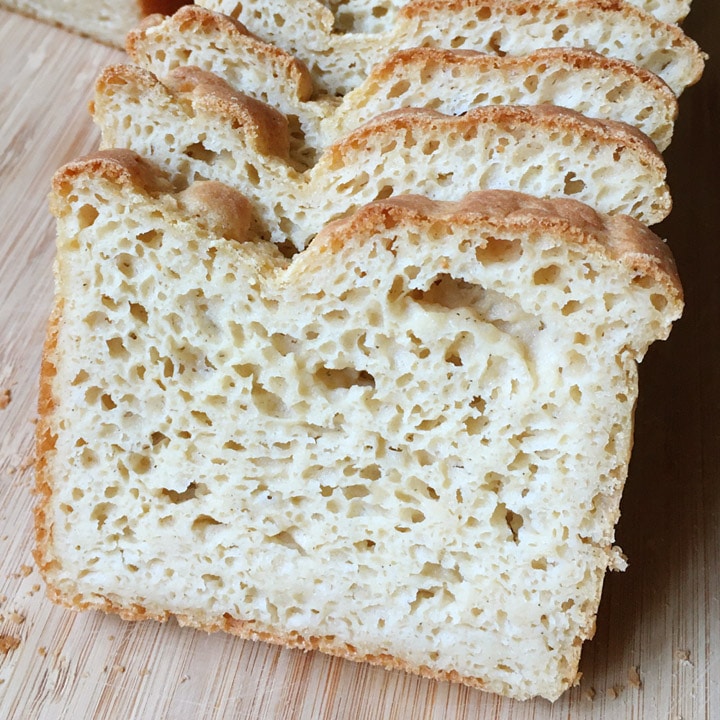
I know it will be difficult, but it's best to let the bread cool completely before slicing. Your patience will be rewarded when you make those first slices, see the beautiful airy bubbles, and take your first bite!
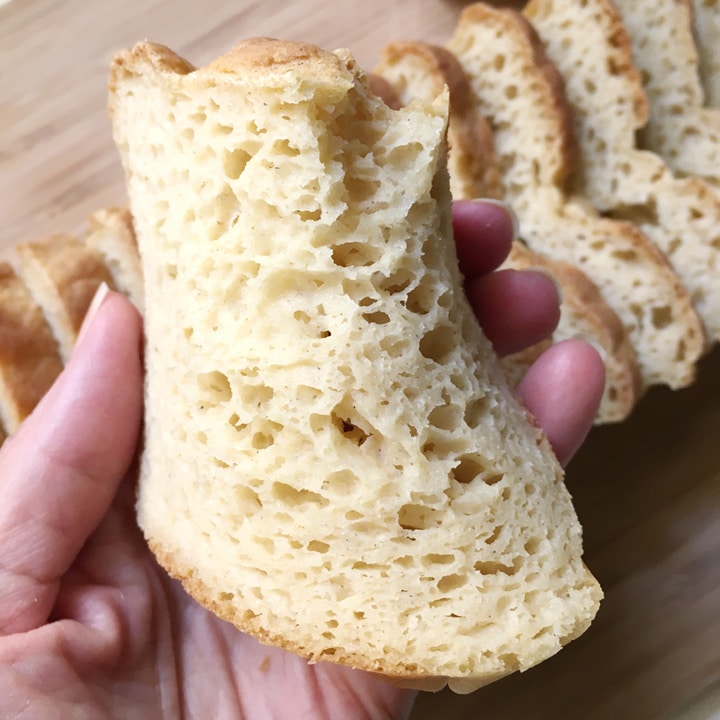
And of course, no gluten-free bread recipe of mine is complete without a shot of the "bend" test! It's softness you can see!
Here alHey'rehtly different, and each delicious in its own way. It's definitely worth trying any, or all of them to see which one you like best! If you're like my family, we actually love all of them, and I find having different recipes a nice way to have some variety.
So back to this recipe, just as the name says, it's soft. It has a tender crumb, good structure, lots of air bubbles, just the right amount of moisture, and it is just plain GOOD. It is also very easy to make...what's not to love?
Soft Homemade Gluten-Free Bread
Ingredients
(Volume measurements in Recipe Notes below, but weight measurements are highly recommended)
Proofing the Yeast (see Recipe Notes below):
- ¼ cup warm water (about 100F/37C)
- 2 tbs honey
- 4.5 grams of active yeast
Dry Ingredients:
- 260 g rice flour (white or brown is fine)
- 80 g tapioca starch (same as tapioca flour)
- 60 g sorghum flour (can substitute with buckwheat or oat flour)
- 4.5 grams of xanthan gum
- 2 grams salt
Wet Ingredients:
- 3 eggs at room temperature
- 1 tbs apple cider vinegar
- 1 ¼ cup water (about 100F/37C)
- ¼ cup light olive oil (or any neutral flavored oil)
Equipment
Instructions
- Combine ¼ cup warm water with 2 tbs honeytbspd stir well. Mix in the yeast and let sit for 10 minutes to proof.
- Combine all dry ingredients in a large mixing bowl and whisk together well.
- Add yeast mixture, 1 ¼ cups warm water, ¼ cup oil, eggs, and apple cider vinegar to the dry ingredients.
- Using a hand or stand mixer, beat mixture for 1-2 minutes, scraping down the sides of the bowl halfway. The dough will be doughlike batter.
- Scoop the bread batter into parchment parchment-lined and tap the pan on the e counter a couple of times to help the dough fill the corners.
- Place bread dough in a warm location to rise for approximately 1 hour, checking after 45 minutes. The center of the loaf should be no more than ¼" above the edge of the loaf pan. (See note below.)
- Preheat oven to 350 deg F (180 C).
- Bake uncovered for 45-60 minutes, until internal temperature taken with an instant-read thermometer registers at least 200F/93C.
- Let bread rest in the pan for 5 minutes before transferring to a cooling rack. Let cool completely before slicing.
Notes
- Volume Measurements for Dry Ingredients:
- 1 ½ teaspoons active yeast
- 1 ½ teaspoons xanthan gum
- 2 ¼ cups + 2 tbs brown rice flour
- ¾ cup + 2 tbs + 1 teaspoon tapioca starch
- ½ cup + 1 tbs + 1 teaspoon sorghum flour
- ½ teaspoon salt
- Please note that gluten-free recipes work best with weight measurements because they are more precise than volume measurements. Gluten-free baking requires more precision and can be less forgiving than baking with regular all-purpose wheat flour.
- These volume measurements were made by spooning each of the flours into the measuring cups/spoons (so they are not packed) and leveling them off.
- The volume measurements are approximate. Make slight adjustments to the recipe as needed, adding a bit more water or taptarch,, or brown, rice flour to achieve the correct dough consistency.
- Can this be made in a bread maker?
- Yes! Be sure to check the manual for your bread maker as it may come equipped with a gluten-free setting. The most important thing is that the dough only go through ONE proof/rise before baking.
- This recipe works in different sizes: 5 x 9, Pullman tall style all-styles 11.5 long pans.
- Depending on your environment, the dough may take longer than an hour to rise. In this case, simply monitor how high the dough has risen in the pan, making sure that the center of the loaf does not rise more than ¼" above the edge of the pan.
- For the tall Pullman style pans, let the bread proof until doubled in size. Because the Pullman pans have much taller sides than standard loaf pans, do not let it rise above the edge of the pan.
- Depending on your environment, the dough may take longer than an hour to rise.
- It is not necessary to proof the yeast. You can also simply add the dry active yeast to the dry ingredients and whisk together and simply add the 1 ½ cups warm water and the honey to the bowl with the rest of the wet ingredients. I have done it both ways without any issues.
- Millet, buckwheat, or oat flour can be used in place of sorghum flour.
- I have used sparkling mineral water in place of regular water, but have found that both yield similar results. You can use whatever you prefer!
- It is important to not let the bread rise too much before baking it. It is best to bake it when the rise looks just less than the "perfect" height, to her, the dough, may end up spilling over the edge.
- Keeps well in a sealed bag or container on the counter for a couple of days, in the refrigerator for a few days (if it lasts that long!). If you refrigerate the bread, the slices taste better toasted.
- Freeze slices of the bread in a resealable freezer bag. Remove only the number of slices you will be eating. Toast in the toaster, or wrap a slightly damp paper towel around the slice(s) of bread and microwave for 10-20 seconds to soften.
- Nutritional info is approximate and based on a serving of one slice, assuming you can get about 12 slices from a loaf.
0 Comments