
Luscious Gluten-Free Lemon Bars: A Citrus Dream
Indulge in these delightful gluten-free lemon bars, featuring a buttery almond flour crust and a tangy lemon curd filling. Perfect for a bright dessert that’s surprisingly simple to make. If you’re new to gluten-free baking, don’t worry! These bars are a great starting point, much like our 10 Easy Gluten-Free Recipes for Beginners.
These lemon bars are proof that gluten-free desserts can be both elegant and easy. The combination of textures and flavors is irresistible, and they’re a wonderful treat for any occasion. For another easy dessert, try our Gluten-Free Peanut Butter Cookies.
Mastering the Gluten-Free Lemon Bar
Creating the perfect lemon bar involves balancing the sweet and tart elements, and ensuring a tender, not tough, crust. Gluten-free baking can sometimes be tricky, but with the right blend of flours, achieving that perfect texture is easy. We use a blend of almond, oat, and sweet rice flours in this recipe for the best results.
The key to a great gluten-free crust is often using a mix of flours to mimic the properties of gluten. If you’re looking to explore more gluten-free baking techniques, you might enjoy our Gluten-Free Lemon Blueberry Muffins recipe, which showcases the versatility of gluten-free flours in another delicious treat. And if you’re after something even more decadent, our Flourless Chocolate Cake Bites are a must-try.
Gluten-Free Lemon Bars with Almond Flour Crust
Enjoy these delightful gluten-free lemon bars featuring a buttery, golden almond flour crust and a luscious lemon curd topping. They’re surprisingly simple to make with just a few ingredients!
Ingredients
- Crust: Almond flour, sweet rice flour, oat flour, tapioca flour, sugar, salt, butter, vanilla extract
- Filling: Butter, lemon zest, sugar, salt, eggs, egg yolks, lemon juice
- Optional Garnishes: Powdered sugar, lemon wheels, whipped crème fraîche
Step-by-Step Instructions
Part 1: Preparing the Almond Flour Crust
- Preheat and Prep: Position a rack in the center of your oven and preheat to 350°F (175°C). Line an 8-inch square baking pan with parchment paper, ensuring it extends up all sides to easily lift the bars out later.
- Combine Dry Ingredients: In the bowl of a food processor or a stand mixer fitted with the paddle attachment, combine the almond flour, sweet rice flour, oat flour, tapioca flour, sugar, and salt. This blend of gluten-free flours ensures a crisp yet tender crust.
- Incorporate Butter and Vanilla: Scatter the cold, diced butter over the flour mixture. Drizzle with vanilla extract. Process until the butter is incorporated and the dough starts to form large, moist clumps. This usually takes about 15-30 seconds in a food processor or 3-5 minutes in a stand mixer on medium speed.
- Press into Pan: Dump the dough into the prepared baking pan and press it evenly across the bottom to form a thin, uniform layer.
- Pre-bake the Crust: Bake the crust until it’s golden brown all over, approximately 25-30 minutes.
- Press Again: Remove the crust from the oven and, while it’s still hot, use the back of a large spoon to firmly press it down. This step is crucial as it helps the crust hold together once cooled and filled.
Part 2: Making the Creamy Lemon Curd Filling
- Lower Oven Temperature: Reduce the oven temperature to 325°F (160°C).
- Prepare Butter and Zest: Place the sliced butter and lemon zest in a heatproof bowl. Position a mesh strainer over the bowl and set aside. This will be used to strain the curd for a smooth texture.
- Combine Wet Ingredients: In a medium, heavy-bottomed saucepan, whisk together the sugar, salt, eggs, and egg yolks until well combined. Gradually whisk in the lemon juice.
- Cook the Curd: Place the saucepan over medium-low heat and cook, stirring constantly with a heatproof silicone spatula. Ensure you scrape the entire bottom and corners of the pan to prevent scorching and ensure even heating. Cook until the mixture thickens slightly and reaches 160-165°F (71-74°C) on an instant-read thermometer, about 5–10 minutes. The mixture will initially be thick and cloudy, then become thin and translucent, and finally thicken and turn cloudy again as the eggs cook. Reduce the heat to very low as it nears completion. If the mixture starts to curdle or bubble rapidly, immediately remove it from the heat.
- Strain and Finish the Curd: Immediately pour the hot curd through the strainer and into the bowl containing the butter and lemon zest. This stops the cooking process and removes any egg solids, resulting in a silky-smooth curd. Whisk until the butter is fully incorporated and the lemon zest is evenly distributed.
- Pour Over Crust: Pour the cooked lemon curd evenly over the pre-baked and pressed crust.
Part 3: Baking and Cooling the Lemon Bars
- Bake the Bars: Bake the bars at 325°F (160°C) until the sides are just puffed and the center wobbles slightly like firm Jell-O when gently shaken, approximately 15–20 minutes. Be careful not to underbake (wet or watery appearance) or overbake (puffed center or cracking).
- Cooling Process: Remove the bars from the oven and allow them to cool to room temperature for about 30–60 minutes. Then, chill in the refrigerator until firm, about 2–3 hours or preferably overnight. This chilling time is essential for the curd to set properly.
Part 4: Finishing and Serving
- Remove from Pan: Once the bars are thoroughly chilled, grasp the parchment paper and lift the bars out of the pan onto a cutting board. Gently peel away the parchment paper from the sides.
- Cut into Bars: Trim away the outer edges of the bars for a neat appearance. Use a large, sharp chef’s knife to cut the bars into 16 squares. For the cleanest cuts, dip the knife in very hot water and wipe the blade clean between each cut.
- Garnish (Optional): Just before serving, dust the lemon bars with powdered sugar or garnish with lemon wheels and/or a dollop of whipped crème fraîche, if desired.
Storage Instructions
These bars are best kept refrigerated for up to 3 days. The crust maintains its crispness best within the first 1-2 days.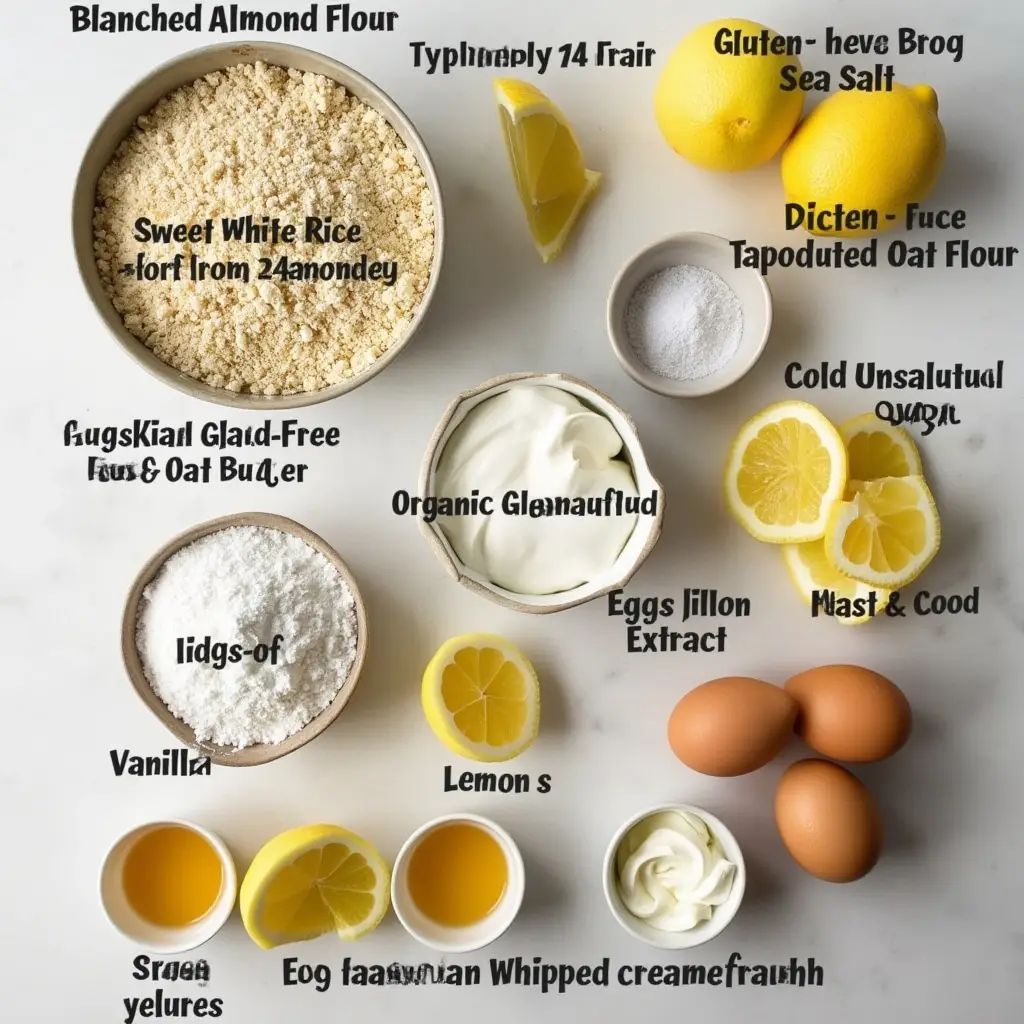
Ingredients
- ½ cup (60 g) blanched almond flour (such as Bob’s Red Mill)
- ½ cup (78 g) sweet white rice flour (such as Bob’s Red Mill, or GF all-purpose flour)
- ½ cup (45 g) GF oat flour (such as Bob’s Red Mill)
- 2 tablespoons (13 g) tapioca flour
- ¼ cup (50 g) organic granulated sugar
- ¼ teaspoon plus 1⁄8 teaspoon fine sea salt
- 6 tablespoons (85 g) Vermont Creamery unsalted cultured butter, cold and in 1⁄2-inch dice
- 1 teaspoon vanilla extract
Filling:
- 10 tablespoons (140 g) Vermont Creamery unsalted cultured butter, sliced
- 1 tablespoon firmly packed finely grated lemon zest (from about 2 large lemons)
- 1 ½ cups (340 g) organic granulated cane sugar (or 1 ¼ cups / 275 g for extra tangy bars)
- ⅛ teaspoon fine sea salt
- 4 large eggs
- 2 large egg yolks
- 1 cup (235 ml) strained lemon juice (from about 6 large lemons)
Optional garnishes:
- powdered sugar, lemon wheels, and/or whipped creme fraiche
Gluten-Free Lemon Bars: Nutritional Insights & Tips
Nutritional Information
Each serving of these delightful gluten-free lemon bars provides a balance of flavors and nutrients. Here’s a quick overview:
- Calories: 267kcal
- Carbohydrates: 32g
- Protein: 3g
- Fat: 15g
- Saturated Fat: 8g
- Cholesterol: 95mg
- Sodium: 73mg
- Potassium: 49mg
- Fiber: 1g
- Sugar: 23g
- Vitamin A: 442IU
- Vitamin C: 6mg
- Calcium: 21mg
- Iron: 1mg
Gluten-Free Benefits
These lemon bars are crafted with a blend of gluten-free flours, making them a perfect treat for those with gluten sensitivities or celiac disease:
- Almond Flour: Provides healthy fats, fiber, and a slightly nutty flavor.
- Sweet Rice Flour: Adds a delicate sweetness and helps create a tender crust.
- Oat Flour: Contributes a slightly chewy texture and additional fiber.
- Tapioca Flour: Acts as a binder, giving the crust its structure and preventing it from being crumbly.
Tips and Variations for Dietary Needs
Customize these lemon bars to fit your dietary preferences and needs:
- Dairy-Free Option: Substitute the Vermont Creamery butter with a high-quality dairy-free butter alternative. Ensure it behaves similarly to butter for the crust and filling.
- Lower Sugar: Reduce the sugar in the filling as indicated in the ingredients for extra tangy bars. You can also experiment with natural sweeteners like erythritol or stevia, but be mindful of the taste and texture changes.
- Vegan Option: Replace the eggs with a vegan egg replacement.
- Citrus Variations: Experiment with different citrus fruits like blood orange or lime for a unique twist on the classic lemon flavor. Adjust the zest and juice quantities accordingly.
Make-Ahead and Storage Tips
- Make-Ahead: These lemon bars are best within two days of baking when the crust is crisp. They keep well in the fridge for up to 4 days.
- Freezing: While freezing the bars once baked can sometimes affect the curd’s texture, you can freeze leftover bars in a pinch. Ensure they are well-wrapped to prevent freezer burn.
- Crust Preparation: You can prepare the crust ahead and freeze it – baked or unbaked – until you’re ready for bars. This is a great time-saver!
- Ingredient Prep: The lemon zest and juice can be prepared a day or two ahead and refrigerated until you’re ready to bake.
- Curd Preparation: You can also cook the curd ahead of time, chill it for up to 3 days, and soften it in a bain-marie before pouring it into the baked crust and proceeding with the recipe.
Enjoying Your Gluten-Free Lemon Bars
These lemon bars are perfect as a dessert, afternoon treat, or for special occasions. The combination of the buttery, gluten-free crust and tangy lemon curd is sure to be a crowd-pleaser. Enjoy!
Essential Equipment for This Recipe
To prepare this delicious recipe, you’ll need the following kitchen tools:
- Mixing Bowls – A set of good mixing bowls is essential for combining wet and dry ingredients.
Find Mixing Bowls on Amazon - Measuring Cups and Spoons – Accurate measurements are key to successful baking.
Find Measuring Cups and Spoons on Amazon - Baking Sheets – For baking cookies or roasting vegetables, a reliable baking sheet is a must-have.
Find Baking Sheets on Amazon - Whisks – Perfect for whipping cream or egg whites to create light and airy textures.
Find Whisks on Amazon - Spatulas – Ideal for mixing ingredients and scraping the sides of bowls.
Find Spatulas on Amazon - Food Processors – Quickly chop, slice, and shred ingredients.
Find Food Processors on Amazon - Saucepans – Use to heat liquids or make sauces.
Find Saucepans on Amazon - Chef’s Knives – A good knife makes all the difference in the kitchen.
Find Chef’s Knives on Amazon - Cutting Boards – Protect your counters and easily prep ingredients.
Find Cutting Boards on Amazon




6 Comments