The Sweet Relief of Strawberry Chia Pudding: A Gluten-Free Morningsaver
We’ve all been there, right? That chaotic morning rush when you tumble out of bed, the clock is ticking, and your stomach is already rumbling. For those of us navigating the gluten-free world, finding something **quick, healthy, and genuinely *delicious*** to grab can sometimes feel like hitting the jackpot. For years, I struggled with breakfasts that were either bland, packed with questionable ingredients, or took way too long to prepare. I longed for something that felt like a little indulgence but fueled me properly.
I remember one particularly frantic Tuesday, staring into the fridge with exactly zero exciting gluten-free options in sight. The thought of another plain rice cake sent a shiver down my spine. That’s when the seed of an idea, or maybe a *chia* seed of an idea, was planted. I had seen chia pudding recipes online, but many seemed overly complicated or just didn’t sound appealing. Could I create something truly wonderful from these tiny powerhouses?
My kitchen became a little lab of experimentation. I tried different milks, sweeteners, and flavorings. Some attempts were… let’s just say *less than successful*. But then, I combined creamy coconut milk with the vibrant sweetness of strawberries, and something magical happened. The chia seeds transformed into a luscious, satisfying pudding, cradling pockets of bright strawberry puree. This wasn’t just food; it was a moment of calm in the storm, a little cup of happiness ready and waiting.
Discovering this simple, make-ahead **strawberry chia pudding** recipe was a game-changer. It became my secret weapon for busy mornings, a perfect afternoon pick-me-up, and even a light, healthy dessert. It’s packed with fiber and omega-3s, keeps me full, and tastes like a treat. Knowing I have a few jars of this **strawberry chia pudding** stashed in the fridge brings a surprising amount of peace of mind. It’s proof that gluten-free eating doesn’t have to be about compromise; it can be about discovering new, delicious ways to nourish ourselves. If you love easy, make-ahead options like PB&J Overnight Oats or crave a little fruit in your morning like in these Blueberry Oatmeal Cups, I have a feeling you’re going to fall in love with this **strawberry chia pudding** just as much as I have. It truly is quick, delicious, and a little ray of gluten-free sunshine.
Have you ever wondered how a simple mix of ingredients can transform into a perfectly thick, creamy, and utterly delicious treat like this strawberry chia pudding? There’s a brilliant kind of kitchen magic happening here, and understanding it will make you a pro at making amazing, naturally gluten-free desserts and breakfasts!
Why This Strawberry Chia Pudding Recipe Works
The secret to making a truly wonderful strawberry chia pudding isn’t complex flour blends or tricky techniques; it’s about harnessing the natural power of a few hero ingredients. Here’s the fascinating science at play:
The Gel-Forming Power of Chia Seeds: What’s truly remarkable about chia seeds is their ability to absorb liquid – up to 10-12 times their weight! When chia seeds come into contact with the liquids in this recipe (canned coconut milk and non-dairy milk), the soluble fiber on their outer coating dissolves and forms a gelatinous layer. This natural gelling process is exactly what creates that signature pudding texture without needing any gluten or artificial thickeners. The recipe carefully balances the liquid-to-seed ratio to ensure optimal thickening.
Creaminess from Coconut Milk: Using canned coconut milk (especially light) provides a base that is inherently richer and creamier than carton milks. This contributes significantly to the luxurious mouthfeel of the finished strawberry chia pudding, mimicking the richness you might expect from traditional dairy puddings, but in a completely plant-based way. The addition of regular non-dairy milk helps achieve the perfect consistency alongside the thicker canned milk.
Natural Flavor Boost from Strawberry Puree: The homemade strawberry puree isn’t just about adding flavor; it adds dynamic texture. Cooking the strawberries concentrates their flavor, while the touch of lemon juice brightens it. Simmering with corn starch (or its gluten-free allies, arrowroot or tapioca) creates a beautifully smooth, thick sauce that layers wonderfully with the strawberry chia pudding, elevating the whole dish beyond just seeds and milk.
Effortless Thickening: Unlike some gluten-free recipes that require careful whisking or cooking to activate thickeners, making strawberry chia pudding is incredibly low-fuss. The chia seeds do all the work for you as they sit in the fridge. This “set-it-and-forget-it” aspect makes this strawberry chia pudding recipe perfect for meal prep.
Nutritional Wins: Beyond being delicious and easy, this strawberry chia pudding stacks up nutritionally. Chia seeds are packed with fiber and healthy fats. This recipe is not just a tasty treat but a genuinely nourishing one, proving that gluten-free eating can be both simple and incredibly good for you.
By understanding how these ingredients work together – the gelling power of chia seeds, the richness of coconut milk, and the natural thickening of the fruit puree – you can see the simple elegance of this strawberry chia pudding recipe. It’s a perfect example of how delicious and effective gluten-free cooking can be when you embrace the unique properties of plant-based ingredients!
Newly Diagnosed? Start Every Morning Right!
Start your gluten-free journey with 33 handpicked breakfast recipes that are safe, simple, and full of flavor.
Whether you’re struggling with what to eat or just want new ideas, this guide is made for you.
Feel confident. Eat happily. Live healthier.

No spam. No credit card. Just delicious gluten-free breakfasts—delivered instantly.
Ingredients for Strawberry Chia Pudding
Creating this delightful strawberry chia pudding is simple with just a handful of wholesome ingredients. Each component plays a role in achieving that perfect creamy texture and vibrant flavor. Here’s what you’ll need:
Essential Ingredients (Chia Pudding Base)
- ½ cup chia seeds: These tiny powerhouses are the magic behind your strawberry chia pudding! When soaked, they absorb liquid and create the pudding-like consistency thanks to their soluble fiber content. They’re also packed with omega-3s, protein, and antioxidants. Find quality chia seeds here.
- 1 can light coconut milk: This provides the rich, creamy base for the pudding, giving it a lovely tropical flavor. Using canned coconut milk (the kind found near the Thai food) results in a much thicker pudding than carton versions.
- ½ cup regular non-dairy milk: (The recipe creator used almond milk). This helps achieve the ideal chia-to-liquid ratio for perfect thickening. Feel free to use your favorite non-dairy milk like almond, soy, oat, or cashew.
- 2 tablespoons maple syrup: A natural sweetener that complements the flavors beautifully. Adjust the amount to your personal sweetness preference.
- 1 teaspoon vanilla extract: Adds a warm, comforting depth of flavor that enhances both the coconut and strawberry notes.
Essential Ingredients (Strawberry Puree Layer)
- 2 cup strawberries: (Fresh or frozen). The star ingredient for the vibrant puree! Peak season fresh strawberries are amazing, but frozen work perfectly well for cooking down into a sauce any time of year. They’re loaded with Vitamin C and antioxidants.
- 2 tablespoons maple syrup: Sweetens the strawberry puree. Again, feel free to adjust to taste.
- 1 tablespoons lemon juice: A splash of acidity brightens the strawberry flavor and balances the sweetness.
- 2 teaspoons corn starch: This acts as a thickener for the strawberry puree, ensuring it has a lovely, spoonable consistency.
Quick Tip!
Worried about the pudding not thickening enough? The recipe notes that the longer your strawberry chia pudding sits, the thicker it gets. If after a couple of hours it’s not quite right, stir in an extra tablespoon of chia seeds and give it more time!
Nutrition & Benefits of This Strawberry Chia Pudding
Beyond tasting like a treat, this strawberry chia pudding is truly good for you! By choosing these naturally gluten-free ingredients, you’re creating a breakfast or snack that fuels your body and satisfies your taste buds.
Nutrition Highlights
Based on 1/4 of the recipe, this delicious strawberry chia pudding offers:
- Calories: 259kcal
- Carbohydrates: 34g
- Protein: 5.4g – Helping to keep you feeling full and satisfied.
- Fat: 13.3g (includes healthy fats from chia and coconut)
- Fiber: 11.3g – Almost half of your daily recommended fiber intake in one serving! This is fantastic for digestive health.
- Sugar: 14g (mostly from the fruit and natural sweetener)
Packed with fiber from the chia seeds and strawberries, this strawberry chia pudding is a fantastic choice for supporting digestive wellness and maintaining stable energy levels. The chia seeds also contribute valuable protein and healthy omega-3 fats, making it a nutrient-dense option.
Smart Substitutions & Creative Variations
- Corn Starch Swap: Don’t have corn starch? No problem! The recipe suggests that arrowroot starch or tapioca starch can be used as direct substitutes for thickening the strawberry puree. Find gluten-free thickeners here.
- Sweetener Alternatives: While maple syrup is lovely, you could experiment with other liquid sweeteners like agave or date syrup, keeping the amounts similar.
- Milk Options: Any regular unsweetened non-dairy milk will work for the secondary liquid. Choose based on your preference for flavor and creaminess (almond, oat, soy, cashew).
- Berry Bliss: Not just for strawberries! Try this pudding with other cooked fruit purees like raspberries, blueberries, or a mixed berry blend for different flavor profiles.
- Spice it Up: Add a pinch of cinnamon or cardamom to the chia pudding base for a touch of warmth.
- Topping Fun: Elevate your strawberry chia pudding with fun toppings! Think shredded coconut, chopped nuts or seeds, a drizzle of nut butter, or gluten-free granola for crunch.
By making this easy and delicious strawberry chia pudding, you’re choosing a nourishing, naturally gluten-free option that’s versatile and packed with benefits!
Essential Equipment for This Recipe
To prepare this delicious recipe, you’ll need the following kitchen tools:
- Mixing Bowls – A set of quality mixing bowls is crucial for combining ingredients.
Find Mixing Bowls on Amazon - Measuring Cups and Spoons – Accurate measurements are key to baking success!
Find Measuring Cups and Spoons on Amazon - Baking Sheets – Ensure even baking and perfect browning with reliable baking sheets.
Find Baking Sheets on Amazon - Whisks – Essential for incorporating air and blending ingredients smoothly.
Find Whisks on Amazon - Spatulas – Perfect for scraping bowls and spreading batter evenly.
Find Spatulas on Amazon - Food Processors – For quick chopping and blending of ingredients.
Find Food Processors on Amazon - Saucepans – Needed for heating sauces and other liquid components.
Find Saucepans on Amazon - Chef’s Knives – A good chef’s knife makes prep work a breeze.
Find Chef’s Knives on Amazon - Cutting Boards – Protect your countertops and simplify chopping.
Find Cutting Boards on Amazon
- Prepare the Strawberry Chia Pudding Base: Get a medium to large mixing bowl ready. Add all the ingredients for the chia pudding: ½ cup of chia seeds (these little powerhouses are naturally gluten-free!), 1 can of light canned coconut milk, ½ cup of your favorite plain non-dairy milk (like almond, oat, or soy – just be sure it’s unsweetened plain), 2 tablespoons of maple syrup, and 1 teaspoon of vanilla extract.
- Mix and Initial Rest: Grab a whisk or spoon and stir everything together really well. Make sure there are no big clumps of chia seeds sticking together at the bottom – you want them evenly distributed! Now, let this mixture sit right on your counter for 10 minutes. This waiting time is important! During these 10 minutes, stir the mixture again every 2-3 minutes. You’ll notice the chia seeds starting to absorb the liquid and swell slightly. This initial stirring prevents them from clumping into one big blob.
- Thicken in the Fridge: After the 10-minute rest and final stir, cover the bowl (plastic wrap works great) and transfer it to the refrigerator. This is where your strawberry chia pudding base really thickens up! Let it chill for at least 1 hour. For the best, most luxurious texture, leaving it overnight is ideal. When it’s ready, it should be thick and creamy, like a pudding. If after an hour or two it seems too thin, don’t worry! Just stir in an extra tablespoon of chia seeds and let it sit for another 30-60 minutes or until it reaches your desired consistency.
- Start the Strawberry Puree: While the chia pudding is chilling (or before!), let’s make the gorgeous strawberry layer. Get a small saucepan and add 2 cups of strawberries (fresh or frozen work perfectly), 2 tablespoons of maple syrup, and 1 tablespoon of fresh lemon juice. Place the pan over low heat. Stir gently as the strawberries start to soften and release their juices. This usually takes about 5-10 minutes, especially for frozen berries.
- Mash or Blend the Strawberries: Once the strawberries are really soft and jammy, it’s time to make them into a puree (or a delicious sauce!). You have a few options here:
- For a chunkier sauce: Use a fork or a potato masher right in the pot to mash the warm strawberries to your desired consistency.
- For a smoother puree: Carefully transfer the contents of the pan to a regular blender and process until silky smooth.
- For ultimate ease and a mostly smooth texture: Use an immersion blender right in the saucepan (off the heat!) to blend the strawberries until smooth. This is often the easiest method for minimal cleanup!
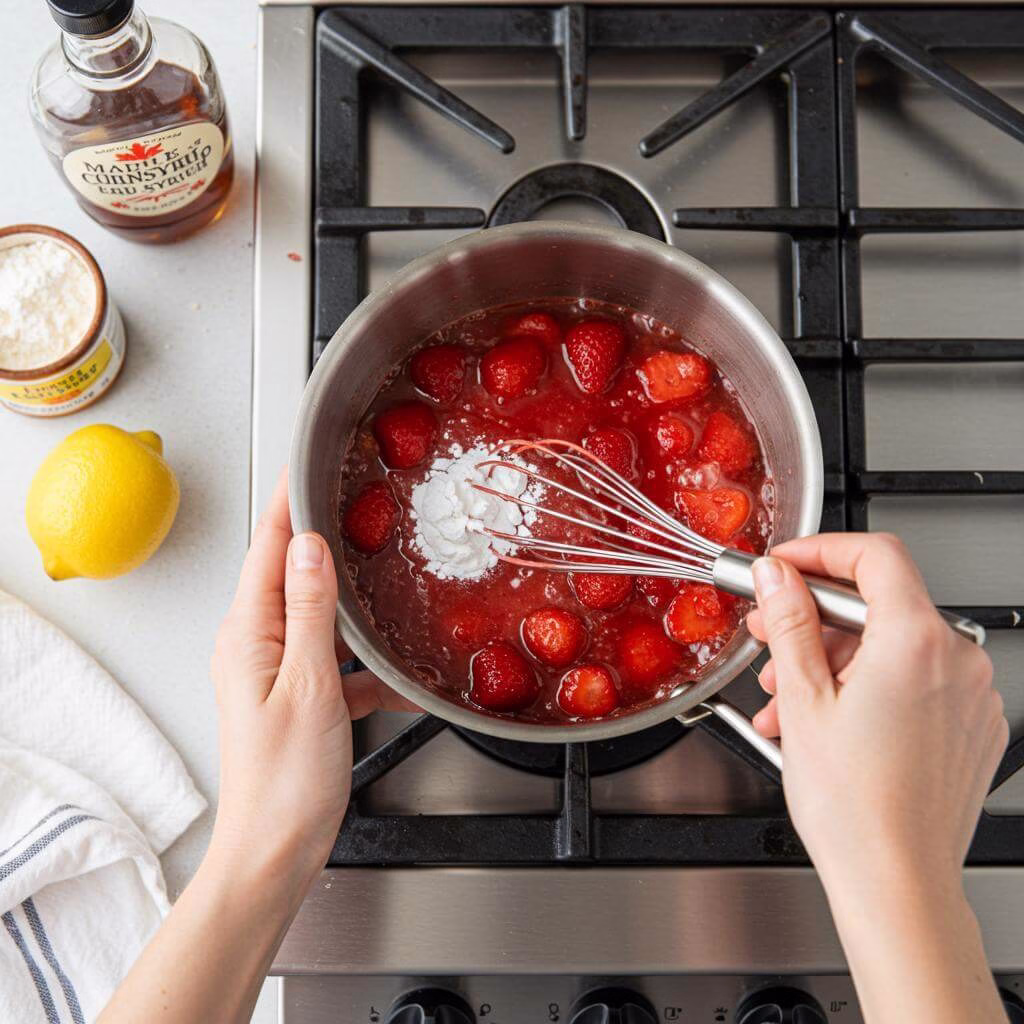
- Thicken the Strawberry Puree: If you transferred the mix to a regular blender, pour it back into the saucepan. Now, add 2 teaspoons of cornstarch – or a gluten-free alternative like arrowroot starch or tapioca starch – to the pan. Whisk it smoothly into the strawberry mixture until there are no lumps. Turn the heat back on to low and bring the mixture to a gentle simmer, stirring constantly. Let it simmer gently for 2-3 minutes. You’ll see it visibly thicken, becoming more like a sauce than a juice. It should coat the back of a spoon slightly.
- Cool the Strawberry Puree: Remove the thickened strawberry puree from the heat. Transfer it to a heatproof bowl or container and let it cool completely. You can speed this up by placing it in the fridge for about 15-20 minutes. Cooling is important so it doesn’t warm up your lovely chilled strawberry chia pudding!
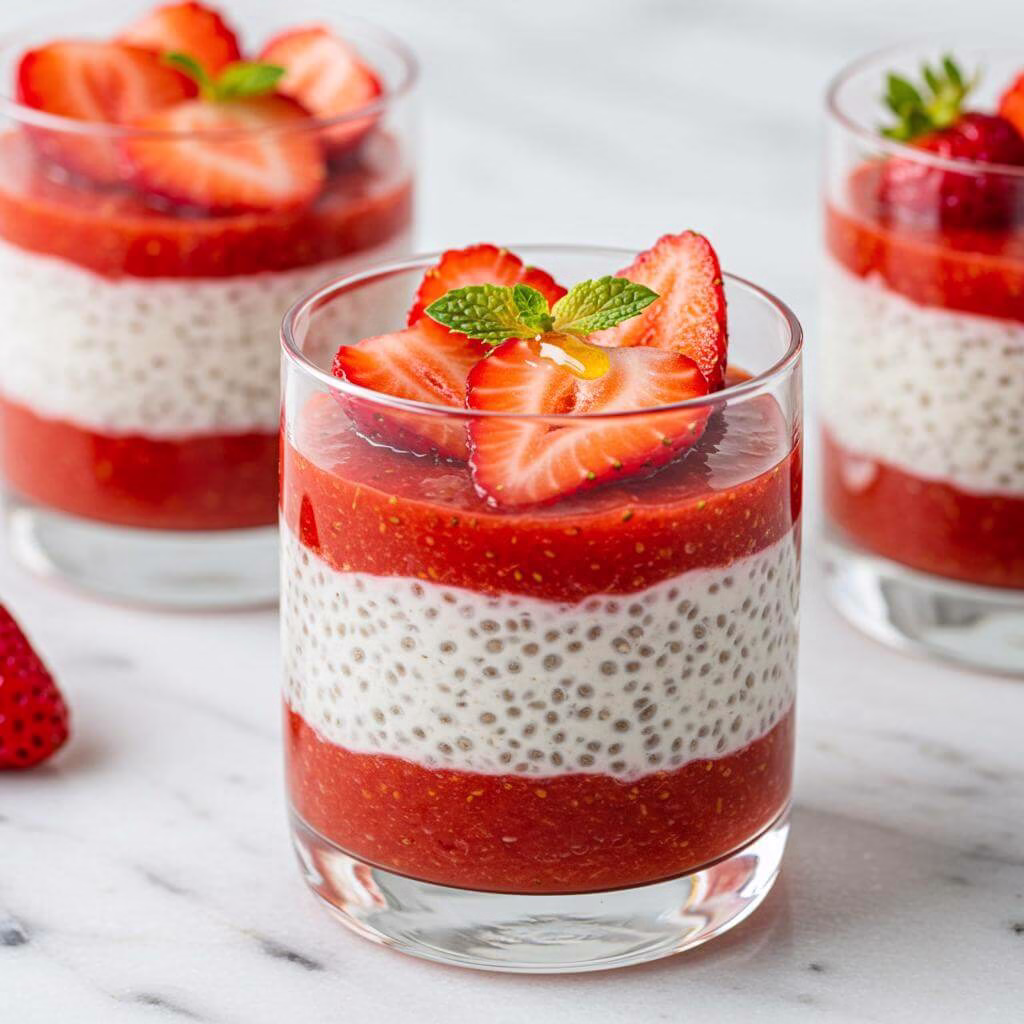
- Assemble Your Strawberry Chia Pudding: Now for the fun part – putting it all together! You can assemble your strawberry chia pudding in individual jars (mason jars are perfect for this!) or a larger dish. Spoon some of the chilled strawberry puree into the bottom, then add a generous scoop of the thickened chia pudding. You can layer them for a beautiful look, or simply scoop both into a bowl and stir them together – both ways taste amazing!
- Add Toppings & Enjoy: Finish off your strawberry chia pudding with your favorite toppings. Some ideas include a dollop of creamy coconut yogurt, fresh chopped strawberries, or a sprinkle of granola (check for gluten-free!). Take a moment to admire your creation – you made this delicious, healthy, gluten-free treat!
- Storage: Your assembled strawberry chia pudding, or the components stored separately, will keep beautifully in the refrigerator for up to 5 days. This recipe is fantastic for meal prep, so make a big batch and have a healthy, satisfying breakfast or snack ready to go each day!

Tips for Perfect Results
- Master the Initial Stir: The Clump-Free Secret! This single step is the most critical for perfect strawberry chia pudding texture. When you first combine the chia seeds and liquid, they *will* clump. Stir vigorously for the first 1-2 minutes, then let it rest for 10 minutes as the recipe suggests, but stir again every 2-3 minutes during that initial 10-minute rest period. This second round of stirring ensures the seeds stay suspended evenly as they begin to gel, preventing pockets of dry seeds or thick clumps at the bottom. Trust me, this small effort upfront makes all the difference in achieving that silky smooth consistency.
- Understand Your Liquids: Canned Coconut Milk is Your Richness Ally. This recipe specifically calls for canned light coconut milk plus an additional non-dairy milk (like almond or oat), and there’s a reason for it. Canned coconut milk, even light, has a higher fat content and creamier body than carton milks. It provides the luxurious base for your strawberry chia pudding. The added non-dairy milk helps balance the overall liquid ratio (aiming roughly for that 1:4 chia to liquid guide) and ensures the pudding doesn’t become *too* thick or dense, giving you that ideal scoopable texture.
- Control Your Strawberry Puree Texture. The recipe offers different methods (fork, immersion blender, regular blender) for the strawberry puree, and each yields a unique result. Using a fork gives you a chunkier, more rustic ‘jam-like’ consistency with noticeable strawberry pieces. An immersion blender or regular blender will produce a smoother, more uniform sauce. Choose the method that suits your texture preference! Remember to heat the strawberries over low heat initially to gently break them down and release their juices before mashing or blending.
- Properly Thicken and Cool Your Puree. The cornstarch (or arrowroot/tapioca) step is essential for giving the strawberry puree body so it doesn’t just turn watery when mixed with the pudding. Whisk it in *after* cooking the strawberries down, and simmer over low heat for just 2-3 minutes, stirring constantly, until you see it visibly thicken. The professional secret here is to always cool the strawberry puree completely in the fridge before assembling your parfaits or stirring it into the pudding. Adding warm puree can partially ‘melt’ or thin the chilled pudding, ruining the texture you worked hard to achieve.
- Give it Time – The Patience Payoff. While the recipe says 1 hour is enough, for the absolute best, thickest, and creamiest strawberry chia pudding, overnight chilling is truly ideal. This gives the chia seeds maximum time to absorb the liquid and create that perfect gel structure. If after the recommended chilling time it’s still too thin, stir in just one extra tablespoon of chia seeds at a time, stir well, and let it sit for another 30-60 minutes before checking again. Don’t add too much at once!
- Adjust Sweetness and Flavor Layers. Maple syrup adds natural sweetness, but taste both your chia pudding base and your strawberry puree separately before combining. You can add a tiny bit more maple syrup if needed. The lemon juice in the strawberry puree isn’t just for tartness; it brightens the strawberry flavor and balances the sweetness. Vanilla extract in the pudding similarly enhances the overall aroma and taste. Don’t skip these flavor boosters!
- Storage Strategy: Individual Jars are King. prepping this strawberry chia pudding for the week? Store it in individual jars right after chilling (either layered or pre-mixed). This makes grabbing a healthy breakfast or snack effortless and also helps preserve the texture. The pudding will stay fresh and delicious for up to 5 days in the fridge when stored this way.
Common Mistakes to Avoid
- Not Stirring Enough Initially: This is the most frequent mistake. If you just stir once and walk away, you’ll end up with a frustratingly clumpy pudding with dry seeds sunken at the bottom. Prevention: Follow Tip #1 rigorously – stir thoroughly right away, and then stir again every few minutes during the first 10-minute rest period.
- Adding Warm Strawberry Puree to Cold Pudding: Introducing heat to the chilled, set pudding will cause it to become thinner and potentially separate. Prevention: Always allow the strawberry puree to cool completely in the refrigerator (about 15-20 minutes, or longer if needed) before layering or stirring it into the chilled chia pudding.
- Impatience with Thickening: Expecting the pudding to be perfectly set after only an hour, especially if your fridge isn’t super cold or your specific chia seeds take longer. Prevention: Plan ahead and ideally make the pudding the night before you want to eat it. If it’s still too thin after a few hours, give it more time first before adding more seeds (as per Tip #5).
Frequently Asked Questions
Why isn’t my strawberry chia pudding thickening properly?
Great question! This is one of the most common things folks wonder about with chia pudding. Usually, it just needs more time! While it can be ready in about an hour, the best, thickest texture comes from letting it sit overnight in the fridge. Also, make sure you’re using canned coconut milk (the thick kind!) for the primary liquid, as carton milks are too thin on their own. If after a few hours it’s still not quite right, try stirring in an extra tablespoon of chia seeds and giving it another 30-60 minutes to work its magic. The chia seeds need time to really absorb the liquid and swell up!
Can I use a different type of non-dairy milk for this recipe?
Absolutely! For the ½ cup of “regular non-dairy milk” in the chia pudding base, you can use your favorite – almond, soy, oat, or cashew milk all work well. Just make sure it’s an unsweetened, plain variety so it doesn’t add unexpected flavors or sweetness. The key to the creamy texture is the canned coconut milk, so stick with that for the main liquid, but feel free to experiment with the second milk!
Can I use frozen strawberries instead of fresh ones for the puree?
Yes, definitely! Frozen strawberries work perfectly for the puree and can even be easier to use year-round. They’ll just take a little longer to break down when you heat them in the saucepan compared to fresh berries. Follow the recipe instructions as written – heating them gently until they soften before mashing or blending.
My strawberry puree didn’t get thick after adding the cornstarch. What went wrong?
Don’t worry, this can happen! The thickening power of cornstarch (or arrowroot/tapioca) is activated by heat. Make sure you whisk the cornstarch into the cooled strawberry mixture *before* putting it back on the heat. Then, gently simmer the mixture over low heat for the full 2-3 minutes, stirring constantly. You should see it visibly thicken as it simmers and coats the back of a spoon. If it’s still thin after simmering, you might need to simmer for another minute or two, ensuring it reaches a gentle bubble.
How long does this strawberry chia pudding last in the fridge? Can I make it ahead?
This strawberry chia pudding is perfect for meal prep! It will keep beautifully in the refrigerator for up to 5 days. You can store the chia pudding base and the strawberry puree separately and combine them when you’re ready to eat, or layer them together in individual jars beforehand. It makes busy mornings so much easier!
Is this recipe safe for someone with celiac disease?
Yes, absolutely! The ingredients listed in this strawberry chia pudding recipe – chia seeds, coconut milk, non-dairy milk, maple syrup, vanilla extract, strawberries, lemon juice, and cornstarch (or arrowroot/tapioca) – are all naturally gluten-free. As with any gluten-free recipe, if you have severe celiac disease, be mindful of potential cross-contamination with your ingredients (e.g., buy certified gluten-free products if needed) and ensure your kitchen surfaces and utensils are clean.
Can I swap the cornstarch for something else to thicken the strawberry puree?
You sure can! The recipe specifically mentions that arrowroot starch or tapioca starch are excellent, gluten-free alternatives to cornstarch for thickening the strawberry puree. Use the same amount (2 teaspoons) and follow the instructions for whisking it in and simmering to thicken. These starches work very similarly to cornstarch in this application.
What are the best toppings or mix-ins for this strawberry chia pudding?
Get creative! This strawberry chia pudding is delicious on its own, but toppings take it to the next level. We love adding a dollop of creamy coconut yogurt, some fresh chopped strawberries, or a sprinkle of gluten-free granola for crunch. Other tasty ideas include shredded coconut, chopped nuts or seeds, a drizzle of almond butter, or even some extra maple syrup if you like it sweeter!