We’ve all faced it, right? That unique frustration of trying to recreate a classic, beloved dessert in the gluten-free world, only to be met with… disappointment. Maybe it was a gluten-free chocolate cake that ended up dense, or a gluten-free carrot cake that didn’t quite rise. But perhaps one of the most elusive textures to capture is that of a truly airy, cloud-like angel food cake.
For years, the idea of a homemade gluten-free angel food cake felt like chasing a culinary unicorn. I pictured the delicate, spongy crumb, the way it gently yields under the fork, the whisper-light sweetness that pairs so perfectly with just a handful of fresh berries or a dollop of whipped cream. But my early attempts? Let’s just say they ranged from rubbery doorstops to collapsed puddles. It felt like the very essence of angel food cake – its ethereal lightness – was fundamentally incompatible with gluten-free flours. The structure, the rise, the fragile nature of it all seemed impossible to replicate without that sticky, stretchy protein.
I refused to surrender! Angel food cake isn’t just a dessert; it’s a feeling. It’s sunshine on a plate, a gentle end to a meal, pure, unadulterated sweetness without being heavy. I knew there had to be a way. My journey involved countless egg whites, different flour blends (oh, the flour blends!), varying sugar ratios, and endless hours tweaking techniques specifically for a gluten-free angel food cake. I learned just how critical every step is – from the temperature of the eggs when separating to the gentle folding of the flour, and perhaps most importantly, the upside-down cooling method that is non-negotiable for any successful angel food cake, gluten-free or not.
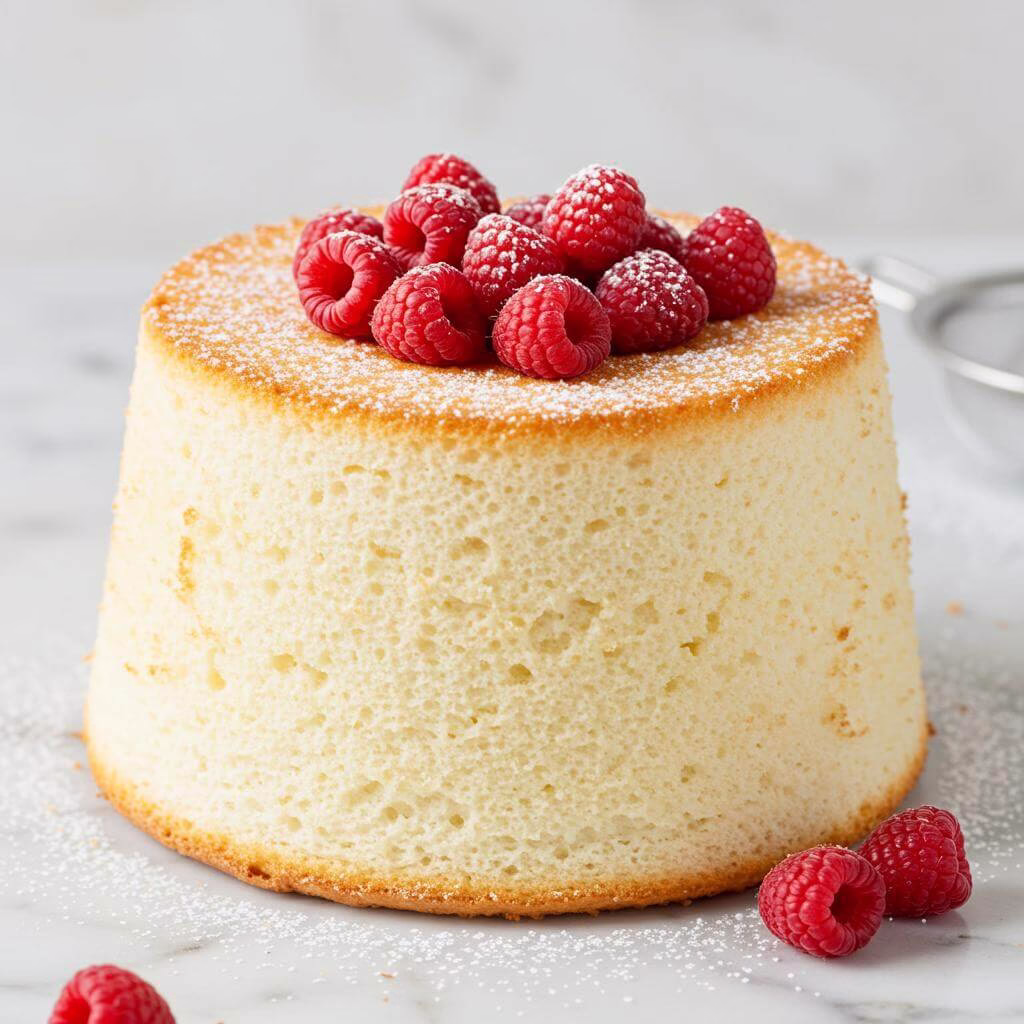
This recipe is the culmination of that persistence. It’s proof that you don’t have to settle for second best just because you’re eating gluten-free. This isn’t just a gluten-free angel food cake; it’s the gluten-free angel food cake I spent years dreaming of. It achieves that dreamy, airy texture that defines the classic, with a delicate sweetness and a subtle hint of almond and vanilla. It’s a cake that proudly stands tall, doesn’t crumble into oblivion (when cut properly, of course!), and truly feels like biting into a cloud.
If you’ve ever felt limited by gluten-free baking, if you’ve longed for those light, elegant desserts that seemed out of reach, this recipe is for you. It’s an invitation to step into your kitchen with confidence and create something truly special. Whether you’re serving it for a holiday gathering (it’s always a hit at Easter and Mother’s Day!), topping it with a simple moist gluten-free tres leches cake inspired sauce, or just enjoying a slice with a sprinkle of berries, this gluten-free angel food cake is a triumph.
I’ll walk you through every step, sharing the crucial tips I learned along the way to ensure your meringue is stable, your cake rises beautifully, and you achieve that perfect, tender crumb. Get ready to bake a genuinely light and fluffy gluten-free angel food cake that will surprise everyone, most importantly, yourself. Let’s make some magic!
Dreaming of Perfect Gluten-Free Cakes? Master Your Flours!
This Gluten-Free Angel Food Cake is a testament to how amazing gluten-free baking can be! But let’s be honest, fellow gluten-free friends, getting the texture just right across all your bakes can be a real challenge, especially when it comes to flours. Don’t let confusing flour blends hold you back from baking masterpieces!
- ✔ Unlock the secrets to choosing and combining GF flours for perfect cakes (just like this airy angel food cake!), breads, and more.
- ✔ Learn to create your own versatile, all-purpose gluten-free flour blend that ensures fantastic results every time.
- ✔ Say goodbye to disappointing, dense, or gritty textures and hello to consistently light, fluffy bakes.
- ✔ Bake with newfound confidence, knowing your gluten-free creations will delight everyone.
Ready to banish baking fails and embrace gluten-free success? Download your FREE ‘Gluten-Free Flour Blend Guide’ today and transform your baking from frustrating to fantastic!
We respect your inbox and promise to only send you valuable gluten-free tips and recipes. No spam, ever!
Why This Gluten-Free Angel Food Cake Recipe Works
Crafting a truly light and airy **gluten-free angel food cake** can feel like a baking challenge, but this recipe reveals the fascinating science and smart techniques that guarantee success! Forget everything you thought you knew about gluten-free limitations; here’s how we achieve that signature ethereal texture without a single gram of gluten.
The Meringue Magic: Structure Without Gluten
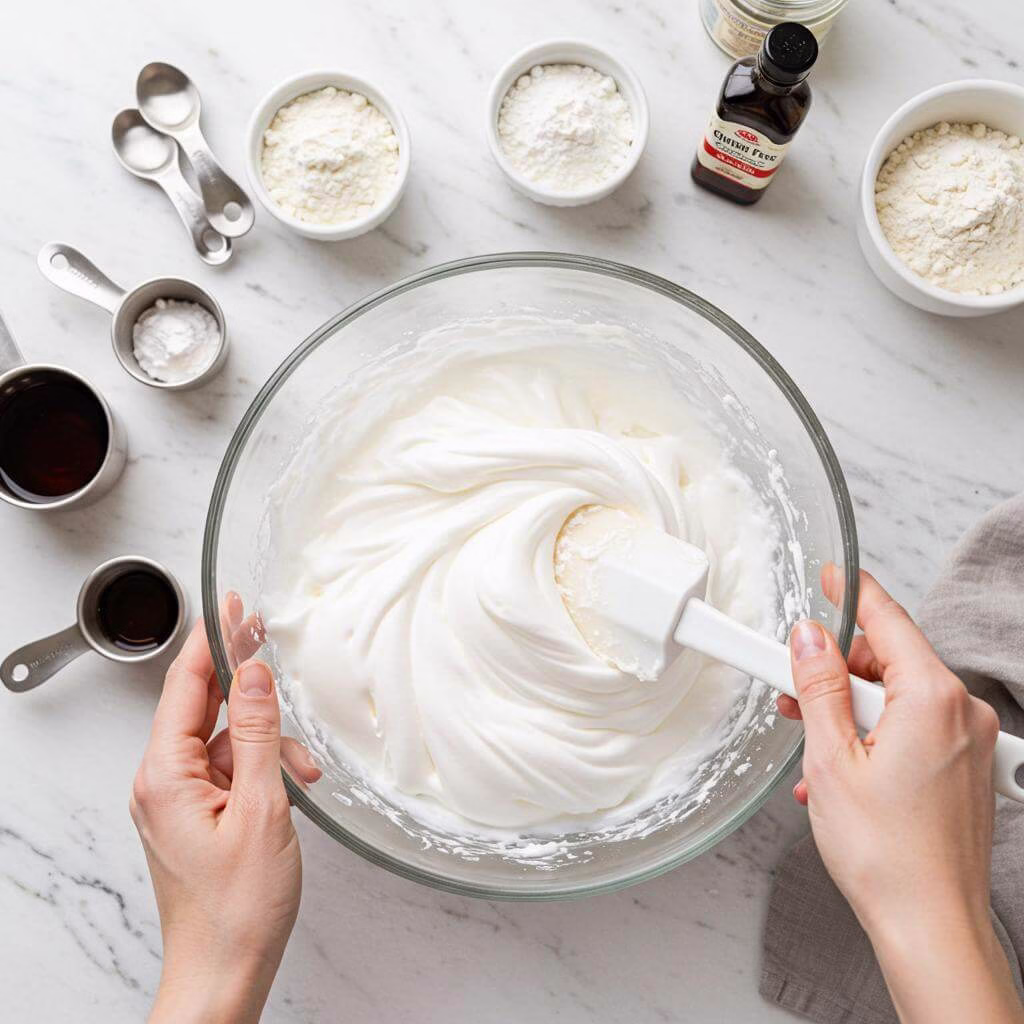
The absolute secret weapon in any **gluten-free angel food cake** is the **egg white meringue**. Unlike traditional cakes that rely on gluten’s elastic network for structure, angel food cake builds its height and delicate crumb almost entirely on the strength of whipped egg whites. This recipe guides you to create the perfect meringue by:
- Starting with **cold egg whites** for easier, yolk-free separation (because even a tiny bit of yolk can deflate your meringue!).
- Whipping at **room temperature** for maximum volume – warming those proteins allows them to stretch further and capture more air.
- Adding **cream of tartar**: This acidic salt is a chemist’s best friend in meringue! It *stabilizes* the whipped egg whites, making them stronger and less likely to collapse. Think of it as reinforcing the tiny air bubble walls.
- Gradually incorporating **granulated and powdered sugar**: The sugar not only sweetens but also strengthens the meringue structure. It dissolves and creates a stable, glossy foam, preventing the egg whites from drying out or breaking down. Beating to **soft peaks** is key – stiff peaks make folding difficult and can lead to a tougher cake.
This focus on meringue stability is paramount for a successful **gluten-free angel food cake**, as the egg whites are doing heavy lifting that gluten normally would assist with.
The Flour Blend Brilliance: Getting Structure *and* Tenderness
Since there’s no gluten to provide chewiness and structure, the flour blend needs to step up. This recipe uses a powerful combination of **all-purpose gluten-free flour with xanthan gum** and **cornstarch**.
- The **gluten-free flour blend** provides the necessary bulk and some structural support. Using a blend *with xanthan gum* is crucial because **xanthan gum** acts as a binder, mimicking the elasticity and binding properties of gluten. It helps hold the cake together and prevents that crumbly texture often associated with gluten-free baking.
- Adding **cornstarch** lightens the blend significantly. Cornstarch is a pure starch that contributes to the cake’s tender, soft texture while also adding some structure through gelatinization during baking. It helps create that delicate, melt-in-your-mouth quality expected from a classic angel food cake.
The magic happens when these are combined and, importantly, folded **gently and gradually** into the stable meringue. Adding the flour mixture just ¼ cup at a time and beating only until combined is essential to avoid deflating the precious air bubbles captured in the egg whites. This delicate folding technique ensures the batter remains light and airy, which is critical for the rise and final texture of this **gluten-free angel food cake**.
The Gravity-Defying Cool Down: Securing the Structure
The final, non-negotiable step for any angel food cake, and especially this **gluten-free angel food cake**, is cooling it upside down. Why? Because the cake’s incredibly light, open structure is still delicate when hot. Cooling it inverted allows gravity to work *for* you, stretching the cake and preventing it from collapsing under its own weight as it cools and sets. Skipping this step is the most common reason angel food cakes (gluten-free or not) shrink and become dense.
By mastering the meringue, understanding the role of the gluten-free flour blend and cornstarch, and employing the essential inverted cooling technique, this recipe demystifies baking a beautiful **gluten-free angel food cake**. It empowers you to create a dessert that’s not just “good for gluten-free,” but simply, wonderfully light, fluffy, and delicious!
Making This Recipe Your Own
Ready to customize your perfect, light, and airy gluten-free angel food cake? Whether you need a simple substitution or want to get creative with flavors, these ideas will help you make this delightful cake uniquely yours while keeping it perfectly gluten-free!
Easy Swaps
Don’t have everything on hand? Need to make a simple switcheroo? No problem! Here are some easy swaps that work well for this gluten-free angel food cake recipe:
- All-Purpose Gluten-Free Flour Blend: The recipe calls for an all-purpose gluten-free flour blend with xanthan gum, like Pillsbury. If you use a different blend that *does not* contain xanthan gum, you may need to add 1/2 teaspoon of xanthan gum to the flour mixture. Results can vary slightly between blends, but a good cup-for-cup blend should work beautifully. You can find many reliable options like King Arthur Baking Gluten-Free Measure for Measure Flour or Bob’s Red Mill 1-to-1 Baking Flour using this link.
- Cream of Tartar: No cream of tartar? You can substitute with an acidic liquid! Use 1 teaspoon of fresh **lemon juice** or **white vinegar** for every 1 ½ teaspoons of cream of tartar called for in the recipe. Add it at the same time you would add the cream of tartar to the egg whites. It helps stabilize the meringue just like cream of tartar.
- Almond Extract: While almond extract adds a lovely classic flavor note, feel free to swap it out! You can use an equal amount (1/2 teaspoon) of **lemon extract** for a brighter cake, or simply use a total of 2 teaspoons of pure **vanilla extract** for an even stronger vanilla flavor.
- Granulated Sugar: If you have access to super-fine sugar (also known as caster sugar), you can swap it 1:1 for the granulated sugar. Super-fine sugar dissolves more quickly into the egg whites, sometimes resulting in a slightly smoother meringue, but regular granulated sugar works perfectly fine as written!
- Cornstarch: Cornstarch is key for the cake’s tender crumb. If you don’t have it, you can usually substitute with **arrowroot starch** or **tapioca starch** at a 1:1 ratio. The texture might vary ever so slightly, but it will still create a wonderfully light gluten-free angel food cake.
Creative Variations
Ready to shake things up? Here are some fun and delicious ways to add a unique twist to your next perfect gluten-free angel food cake:
- Citrus Burst Angel Food: Infuse your cake with fresh citrus! Finely grate the zest of one large lemon or orange and add it to the sugar before whipping it into the egg whites. The zest will release its oils and permeate the cake with a lovely aroma and flavor. Serve with fresh berries and lemon curd!
- Chocolate Swirl or Marble: For a subtle chocolate variation, whisk 2 tablespoons of unsweetened cocoa powder into 1/4 cup of the mixed gluten-free flour and cornstarch *before* folding it into the meringue. When adding the flour mixture, alternate between the plain mixture and the cocoa mixture, giving it just a few gentle swirls with a spatula after all is incorporated (don’t overmix!).
- Spiced Angel Food: Add warmth and complexity by whisking 1/2 teaspoon of cinnamon or 1/4 teaspoon of cardamom into your gluten-free flour mixture before folding it in. This is especially lovely for a fall or holiday twist on this classic gluten-free angel food cake.
- Mini Angel Food Cupcakes: Instead of a large tube pan, you can bake this batter as individual cupcakes! Line a standard muffin tin with paper liners. Fill liners about 2/3 to 3/4 full. Bake at 350°F for 18-25 minutes, or until golden brown and a toothpick inserted comes out clean. Immediately invert the muffin tin onto a cooling rack until completely cool (the cupcakes will hang upside down). This makes adorable individual gluten-free angel food cake servings!
- Angel Food Trifle or Shortcake Base: Cut cooled gluten-free angel food cake into cubes. Layer the cubes in a large bowl or individual glasses with whipped cream (or dairy-free whipped topping like So Delicious Dairy Free CocoWhip) and fresh fruit like strawberries, raspberries, or peaches. This creates a stunning and effortless layered dessert!
- Elevated Toppings: Beyond the classic berries and whipped cream, try drizzling slices with a simple **raspberry coulis** (blend raspberries with a little sugar and strain), a warm **chocolate ganache**, or a vibrant **passion fruit sauce** for an exotic touch. A sprinkle of toasted coconut flakes or slivered almonds can also add great texture.
Tips for Perfect Results
- Master the Egg Whites: This is the absolute cornerstone of a perfect gluten-free angel food cake. Start with cold eggs when separating – the yolks are firmer and less likely to break into the whites. However, allow the separated whites to come to a full room temperature (this can take 30-60 minutes, or speed it up slightly in a bowl of warm water for 10-15 minutes). Room temperature whites whip to maximum volume and stability, creating the airy structure your cake depends on.
- Achieve the Right Meringue Consistency: The recipe calls for soft peaks, and this is crucial. Beating to stiff, dry peaks can actually make your meringue fragile and prone to breaking when the flour is added, resulting in a dry, tough cake. The secret is to beat just until the peaks hold their shape loosely but still droop slightly at the tip. Your meringue should look glossy and smooth, not curdled or granular.
- Gradual Sugar Addition is Non-Negotiable: Don’t dump the sugar in all at once! Gradually adding both the granulated and powdered sugar while beating allows the sugar to dissolve and stabilize the meringue. This creates a strong, flexible protein structure that can support the weight of the flour without collapsing. Think of it as building a sturdy framework for your light-as-air cake.
- Handle the Gluten-Free Flour with Care: Unlike wheat flour, gluten-free blends can be denser and absorb liquid differently. Always use the “spoon and level” method to measure your flour and cornstarch accurately – scooping directly can compact the flour, adding too much weight. When incorporating the flour mixture into the meringue, add it in the small increments specified. After the initial rapid beating suggested in the recipe to get it started, the professional secret is to switch to *gently* folding it in with a large spatula. Overmixing at this stage is the fastest way to deflate your precious meringue and end up with a dense cake.
- Pan Preparation is Counterintuitive (But Essential!): NEVER grease an angel food cake pan. The batter needs to cling to the sides of the ungreased tube pan as it rises in the oven. If the sides are slick with butter or oil, the cake won’t be able to climb and will collapse. Ensure your pan is clean and completely dry before adding the batter.
- The Cooling Method is Your Cake’s Lifesaver: This step is the single most critical factor in preventing your beautiful gluten-free angel food cake from collapsing. As the cake cools, its delicate structure is still setting. By inverting the pan immediately after removing it from the oven, you allow gravity to stretch and set the cake’s crumb, preventing it from sinking under its own weight. Cool it completely, upside down, for the full 2 hours before attempting to remove it from the pan.
- Know Your Gluten-Free Flour Blend: Different all-purpose gluten-free blends (even those with xanthan gum) can have varying compositions and absorption rates. If your first attempt isn’t perfect, consider trying a different reputable blend. Consistency is key in gluten-free baking, and sometimes finding the blend that works best for *your* oven and technique takes a little experimentation. Stick to blends specifically designed as “all-purpose” for baking.
- Cut with Precision: When it’s time to serve, resist the urge to slice with a regular knife. The delicate, airy texture of gluten-free angel food cake is easily compressed. Use a long serrated knife or even an electric knife for clean slices that preserve the cake’s fluffy structure, just like you would with fresh bread.
Common Mistakes to Avoid
- Allowing Any Yolk into the Egg Whites: Even a tiny speck of egg yolk (which contains fat) will prevent your egg whites from whipping up into a stable meringue. The fat interferes with the protein chains needed for volume. Prevention: Separate cold eggs very carefully, breaking them into a separate small bowl one at a time before adding the white to your large mixing bowl. If any yolk gets in, discard that white and start again with a clean bowl and egg.
- Greasing the Pan (Any Part of It!): As mentioned in the tips, greasing an angel food pan is fatal. The cake needs to grip the sides to rise properly. Prevention: Ensure your angel food cake pan is completely grease-free and dry before adding the batter. This includes the tube and the sides.
- Not Cooling Upside Down (or Not Long Enough): This is arguably the most common mistake that leads to a sunken cake. The cake’s structure is fragile while hot. Prevention: Immediately upon removing the cake from the oven, invert the pan onto a heatproof support (like a bottle, funnel, or the pan’s built-in feet). Cool the cake completely upside down for the full recommended time before attempting to unmold. Patience here is rewarded with a beautifully risen cake.
Common Mistakes to Avoid
It’s completely normal to encounter a few bumps when baking, especially when mastering something as light and delicate as a gluten-free angel food cake! Don’t get discouraged – learning what can go wrong is half the battle. Here are some common pitfalls and how to steer clear of them.
Not Getting Your Meringue Right
The Problem: Your cake falls flat, is dense, or doesn’t rise much. This is likely due to issues with the egg white meringue, which is the sole leavening agent in angel food cake. If egg yolks sneak in, or if the whites aren’t whipped properly (not enough volume, or whipped too stiffly and become brittle), the structure needed to hold the cake up simply won’t be there.
Why it happens: Any fat from egg yolk (or even traces of grease on your bowl/whisk) can prevent egg whites from whipping to their full volume and stability. Under-whipping means you haven’t incorporated enough air; over-whipping (to stiff, dry peaks) can break down the protein structure, making the meringue fragile and prone to collapsing when flour is added.
Prevention: Separate cold eggs meticulously, ensuring not a single drop of yolk gets into the whites. Use a very clean, grease-free metal or glass bowl (plastic can sometimes retain grease). Let your egg whites come to room temperature before whipping – they whip higher. Beat the whites and cream of tartar until foamy, then gradually beat in the sugars on high speed until you reach soft, glossy peaks. The peaks should hold their shape but gently curl over.
Pro Tip: If you accidentally get yolk in your whites, the best bet is to discard that white and get a fresh one. It’s worth it for a perfect gluten-free angel food cake!
Incorrectly Adding the Gluten-Free Flour Mixture
The Problem: You see streaks of unmixed flour, or worse, the beautiful meringue you created immediately deflates as soon as the flour goes in. The delicate air bubbles trapped in the meringue are easily destroyed by heavy-handed mixing or adding too much weight too quickly.
Why it happens: Unlike conventional baking where gluten provides structure and resilience, the structure here *is* the meringue. Gluten-free flour blends, while necessary, add weight without contributing elasticity. Dumping a lot of flour in at once or beating vigorously collapses the air pockets, resulting in a heavy cake.
Prevention: Measure your gluten-free flour blend and cornstarch accurately using the spoon & level method. Always add the flour mixture gradually, just 1/4 cup at a time, as specified in the recipe. Mix on medium speed *just until* the flour is *barely* combined. Avoid overmixing once the flour is added.
Pro Tip: Think of this step as gently integrating, not beating. Some bakers even prefer to gently fold the flour in by hand after the initial bit is mixed, to be extra careful not to deflate the meringue for their gluten-free angel food cake.
Not Cooling the Cake Upside Down (The Most Common Angel Food Mistake!)
The Problem: Your gorgeous, tall cake comes out of the oven looking perfect, but within minutes, it starts to shrink dramatically or completely collapses in the center. This is heartbreaking after all your effort!
Why it happens: Angel food cake is essentially a set foam. While it’s hot, its structure is fragile. If you cool it right-side up, gravity simply pulls down on that delicate structure before it’s fully set, squishing out the air and causing it to deflate. Cooling upside down uses gravity to *stretch* the structure as it cools and stabilizes.
Prevention: This step is NON-NEGOTIABLE! As soon as the cake comes out of the oven, immediately invert the pan. Use the pan’s built-in feet, or rest the center tube on a heatproof bottleneck (like a soda bottle) or funnel. Cool the cake completely upside down for the full 2 hours specified. Do not skip or shorten this cooling time.
Recovery: Unfortunately, a collapsed angel food cake isn’t really “recoverable” in terms of restoring its height. However, it’s still delicious! Cut it into cubes and use it in a trifle, make bread pudding, or just enjoy it as is – it will still taste good, even if the texture isn’t perfect.
Greasing Your Angel Food Cake Pan
The Problem: The cake doesn’t rise well along the sides of the pan and may even slip down as it cools. Or, paradoxically, it can become difficult to remove.
Why it happens: Angel food cake batter needs to *cling* to the sides of the ungreased pan as it bakes and rises. This grip helps it climb up the pan. Greasing prevents this crucial adhesion, causing the cake to struggle to rise and stay lifted. An ungreased pan allows the cake to stick just enough to support itself during baking and cooling (upside down), then you release it carefully once fully set.
Prevention: Always use an ungreased angel food cake pan (a tube pan with a removable bottom is ideal). Ensure the pan is clean and completely dry before pouring in the batter.
Pro Tip: If using a very old or well-seasoned pan, sometimes they can become non-stick over time. A classic aluminum pan often works best for that essential grip needed for a successful gluten-free angel food cake.
You’ve got this!
Essential Equipment for This Recipe
To prepare this delicious recipe, you’ll need the following kitchen tools:
- Mixing Bowls – A set of sturdy mixing bowls is essential for combining wet and dry ingredients.
Find Mixing Bowls on Amazon - Measuring Cups and Spoons – Accuracy is key in baking! Use these for precise measurements.
Find Measuring Cups and Spoons on Amazon - Baking Sheets – Perfect for even baking and crisp results.
Find Baking Sheets on Amazon - Whisks – For beating eggs and incorporating air into your batter, a good whisk is a must.
Find Whisks on Amazon - Spatulas – Ideal for folding and mixing without scratching your bowls.
Find Spatulas on Amazon - Food Processors – Saves time for chopping and pureeing ingredients.
Find Food Processors on Amazon - Saucepans – Use for heating liquids or preparing sauces.
Find Saucepans on Amazon - Chef’s Knives – A sharp knife is essential for chopping vegetables and herbs.
Find Chef’s Knives on Amazon - Cutting Boards – Protect your countertops while prepping ingredients.
Find Cutting Boards on Amazon
Frequently Asked Questions
Why did my beautiful gluten-free angel food cake collapse after taking it out of the oven?
Great question! This is actually the most common issue people face with *any* angel food cake, whether it’s gluten-free or not. The absolute key to preventing collapse is cooling it **upside down immediately** after taking it out of the oven. This allows the delicate, airy structure (held up by all that whipped air!) to set properly against gravity. If you cool it right-side up, the soft crumb can’t support its own weight and will sadly deflate. **Always cool your gluten-free angel food cake upside down for at least 2 hours!** If your pan has feet, rest it on those. If not, use the neck of a glass bottle or a heatproof funnel to suspend it.
My egg whites didn’t whip up properly or became watery. What went wrong?
Oh no! Whipping egg whites into a stable meringue is the foundation of a light **gluten-free angel food cake**. The most likely culprits if they don’t whip are: 1) **Even a tiny trace of egg yolk (fat) getting into the whites.** Fat prevents whites from whipping. Be extra careful when separating! 2) **Using a bowl or beaters that aren’t perfectly clean.** Any grease residue will also hinder whipping. 3) **Egg whites that are still too cold.** While separating is easier with cold eggs, letting them warm up to room temperature (30-60 minutes) before whipping gives you much better volume and stability. Make sure your equipment is spotless and your whites are at room temp for the best results!
Can I use any gluten-free all-purpose flour blend for this recipe?
You can use different blends, but keep in mind that results can vary! Some blends absorb liquid differently than others. For this **gluten-free angel food cake**, we highly recommend using a certified **gluten-free all-purpose flour blend that already contains xanthan gum**. If your preferred blend does *not* contain xanthan gum, you will need to add 1/4 to 1/2 teaspoon to your dry mix before combining it with the cornstarch. Also, remember to use the **”spoon & level” method** when measuring your flour (gently spoon flour into the measuring cup and level off the excess with a straight edge) – this is crucial in gluten-free baking to avoid adding too much weight, which can result in a denser cake.
Why do I need to use an ungreased angel food cake pan?
This might seem counterintuitive, but it’s essential for **gluten-free angel food cake** (and traditional ones!). Angel food cake doesn’t use chemical leaveners like baking powder or soda; it relies entirely on the lift and structure provided by the whipped egg white meringue. The batter needs to be able to cling to the sides of the pan as it bakes to climb and achieve its signature height. If the pan is greased, the batter can’t get a grip, and your beautiful `gluten-free cake` won’t rise properly or maintain its airy structure.
The recipe says to beat to “soft peaks,” not “stiff peaks.” What’s the difference and why is it important here?
That’s a great point! Soft peaks are when you lift the whisk attachments and the peaks form but curl over gently, like a wave. Stiff peaks stand straight up without drooping. For delicate cakes like **gluten-free angel food cake**, stopping at soft peaks is crucial. The meringue is stable enough to hold its shape but still has enough flexibility that you can gently fold in the dry ingredients without easily deflating all that precious air. Over-beating to stiff peaks makes the meringue more fragile and harder to incorporate the flour without losing volume, which would result in a less lofty cake.
How should I store leftover gluten-free angel food cake? Can I freeze it?
This cake is delightful fresh, but stores quite well! To keep leftovers moist, wrap the completely cooled cake tightly in plastic wrap or place it in an airtight container. It will keep at room temperature for up to 2 days, or you can refrigerate it for up to a week. Absolutely, you can freeze it! Ensure the cake is entirely cooled. Wrap it tightly in plastic wrap, then aluminum foil, or place in a freezer-safe bag or container. It can be frozen whole or in individual slices for up to 4 months. Thaw frozen cake at room temperature before serving.
I don’t have cream of tartar. Can I still make this cake?
Cream of tartar is a highly recommended ingredient for this **gluten-free angel food cake** because it acts as a critical stabilizer for the egg white meringue. It helps the foam reach its maximum volume and prevents it from collapsing while you’re folding and baking. While it’s theoretically possible to make angel food cake without it if your egg whites are whipped perfectly and folding is *extremely* gentle, the cake will be much more prone to shrinking or collapsing. For the best results and the most reliable rise and texture, we strongly advise using cream of tartar.
How do I cut this delicate cake without squishing it?
Good question – that beautiful airy texture is easy to compress! The best way to slice your **gluten-free angel food cake** evenly without smashing it is to use a **serrated knife**. Just like you would use a serrated knife for bread, gently saw through the cake rather than pressing down. Some people even use an electric knife or a special angel food cake cutter (which resembles a comb) for perfectly clean slices. A sharp serrated knife will work perfectly!
Gluten-Free Angel Food Cake (Naturally Dairy-Free)
Gluten-Free Angel Food Cake (Naturally Dairy-Free)
This recipe is the culmination of that persistence. It’s proof that you don’t have to settle for second best just because you’re eating gluten-free. This isn’t just a gluten-free angel food cake; it’s the gluten-free angel food cake I spent years dreaming of. It achieves that dreamy, airy texture that defines the classic, with a delicate sweetness and a subtle hint of almond and vanilla. It’s a cake that proudly stands tall, doesn’t crumble into oblivion (when cut properly, of course!), and truly feels like biting into a cloud.
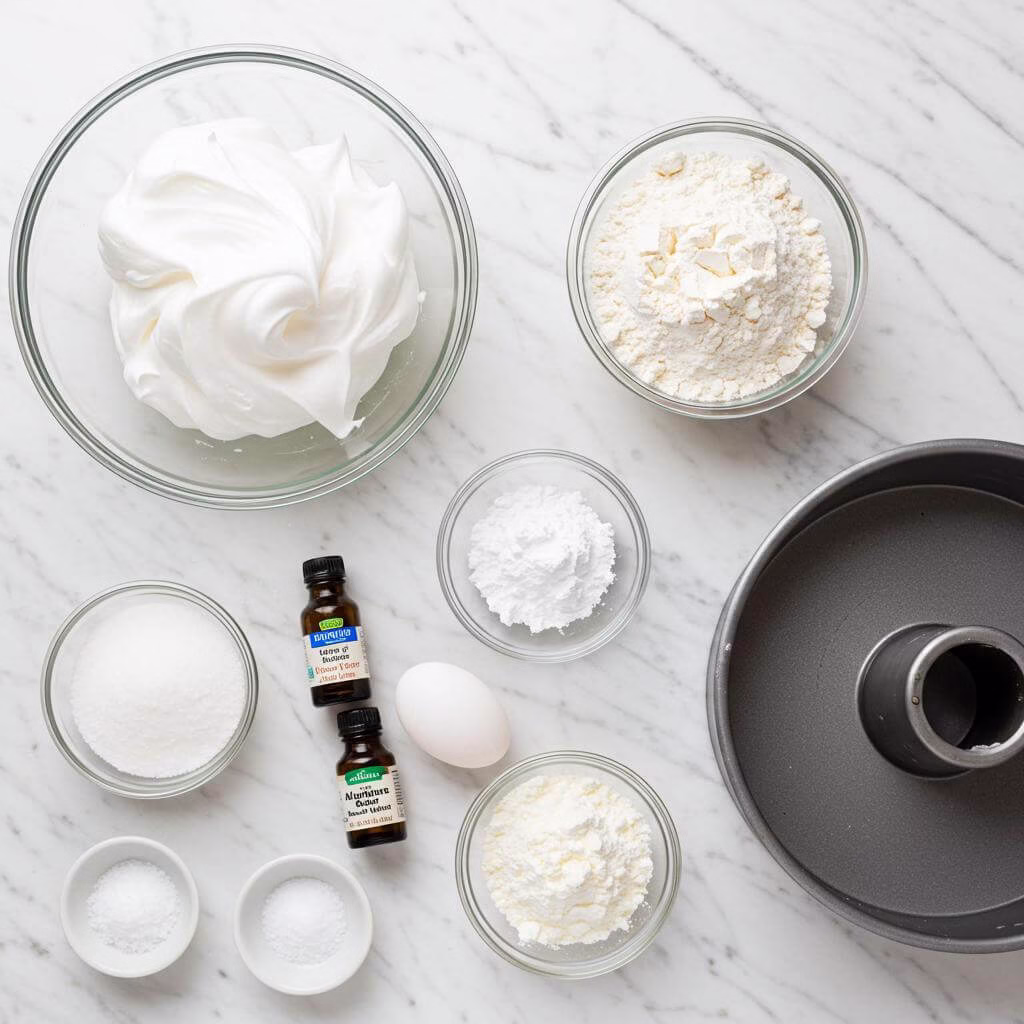
Ingredients
12
- 12 large egg whites, cold (allow to come to room temperature before whipping)
- 1 1/2 tsp cream of tartar
- 3/4 cup granulated sugar
- 3/4 cup powdered sugar (also known as confectioners’ sugar)
- 1 1/2 tsp pure vanilla extract
- 1/2 tsp pure almond extract
- 1/4 tsp salt
- 3/4 cup all-purpose gluten-free flour blend (with xanthan gum), use spoon & level method
- 1/4 cup cornstarch
Equipment
- Small bowl
- Whisk
- Angel Food Cake Tube Pan (10-inch x 4-inch, ungreased, with feet & removable bottom recommended)
- Measuring cups and spoons
- Stand Mixer (or Hand Mixer)
- Spatula
- Butter knife or thin spatula (for releasing air bubbles)
- Heatproof surface (e.g., heatproof cutting board) or glass bottle/funnel (for cooling)
- Angel food cake spatula (for releasing cake)
- Serrated knife (for slicing)
Instructions
Get ready to bake your amazing gluten-free angel food cake! Before you start, gather all your ingredients and equipment. Having everything measured and ready makes the process smooth and fun.
Prepare your oven and pan. Move one oven rack to the lowest position in your oven. This ensures the delicate cake bakes properly without getting too close to the top heating element. Now, preheat your oven to 350°F (175°C). Grab your ungreased 10-inch x 4-inch angel food cake pan (also called a tube pan). It’s important that this pan is not greased! The batter needs to cling to the sides to climb and get that signature height. Consider using a tube pan with a removable center and legs for easiest cooling later.
Mix your dry ingredients. In a small bowl, whisk together ¾ cup of your favorite all-purpose gluten-free flour blend (with xanthan gum) and ¼ cup cornstarch until they are well combined. Using the “spoon and level” method to measure your flour is key in gluten-free baking to avoid adding too much, which can make your cake dense. Set this flour mixture aside for now.
Separate your cold eggs CAREFULLY. You’ll need 12 large egg whites. It’s easiest to separate eggs when they are cold, as the yolks are firmer. Work carefully to ensure absolutely no trace of yolk gets into the egg whites. Even a tiny bit of fat from the yolk can prevent your egg whites from whipping up properly into a stable meringue, which is essential for a light and fluffy gluten-free angel food cake! Place the egg whites into a very large, clean bowl – ideally the bowl of your stand mixer, but a large mixing bowl for a hand mixer works too. Let these egg whites sit at room temperature for about before whipping. Room temperature egg whites whip to a much greater volume and stability!
Start whipping the egg whites. Once your egg whites are at room temperature, add 1 ½ teaspoons of cream of tartar to the bowl. Cream of tartar helps stabilize the egg whites as they whip, giving your meringue strength. Start beating on medium speed using your stand mixer or hand mixer until the mixture looks foamy, like bubbles on top of dish soap. This takes just .
Gradually add the sugars and flavorings. With the mixer running on high speed, begin adding ¾ cup granulated sugar and ¾ cup powdered sugar very gradually, a tablespoon or two at a time. This slow addition allows the sugar to dissolve into the egg whites, creating a strong, glossy meringue. Add in 1 ½ teaspoons pure vanilla extract, ½ teaspoon pure almond extract, and ¼ teaspoon salt.
Beat to glossy soft peaks. Continue beating on high speed. Watch the egg whites transform! They will become thick, white, and very glossy. Beat until “soft peaks” form. This means when you lift the whisk or beaters, the meringue forms peaks that curl over, like a gentle wave. Do not beat to stiff peaks, as this can make the meringue fragile and harder to fold ingredients into without deflating. The meringue should be smooth and beautiful! You’ve created the airy base for your amazing gluten-free angel food cake – great job!
Carefully incorporate the dry mixture. This step is crucial for keeping that glorious volume! Sprinkle the reserved gluten-free flour and cornstarch mixture over the meringue, exactly ¼ cup at a time. After each addition, gently beat on medium speed just until the flour mixture is combined and no dry streaks are visible. Mixing on medium speed for these short bursts helps to gently incorporate the flour without overmixing or collapsing the delicate meringue structure. You’ll repeat this about 4 times until all the flour mixture is incorporated.
Transfer batter to the pan. Pour the light, airy gluten-free angel food cake batter into your prepared (ungreased!) 10-inch tube pan. Use a spatula to gently smooth the top of the batter evenly in the pan.
Release air bubbles. To help prevent large air pockets in your finished cake, gently run a butter knife or thin spatula through the batter in a circular motion once or twice. This helps redistribute the batter and encourages any trapped large air bubbles to release. Be gentle so you don’t deflate the batter too much!
Bake to golden perfection. Place the filled cake pan on the lowest rack in your preheated 350°F (175°C) oven. Bake for . You’ll know your gluten-free angel food cake is done when the top is a beautiful golden brown color and it springs back lightly when you gently touch it with your fingertip. This spring-back indicates the structure is set.
Cool the cake UPSIDE DOWN immediately! This is perhaps the most critical step for preventing your gluten-free angel food cake from collapsing. As soon as the cake comes out of the oven, it MUST be cooled upside down. If your pan has little feet, simply invert the pan onto a heatproof surface (like a heatproof cutting board or countertop) resting on the feet. If your pan doesn’t have feet, carefully invert it onto the neck of a glass bottle or a heatproof funnel so the cake is suspended and air can circulate around it. Let the cake cool completely upside down for . This allows the delicate crumb structure to set properly against gravity. Don’t skip this step – patience here means a perfectly lofty cake!
Release the cooled cake from the pan. Once the cake is completely cool (after about 2 hours), turn the pan right-side up. Carefully run a thin, sharp knife or a specific angel food cake spatula around the inner and outer edges of the pan to loosen the cake. Be gentle to avoid tearing the cake unduly.
Invert onto a serving platter. Place your serving platter or cake stand over the top of the pan. Holding the pan and platter together tightly, carefully flip them over to invert the cake onto the platter. If you used a pan with a removable bottom, you can often push up from the bottom ring first, then separate the bottom from the cake on the platter. Ta-da! Your beautifully baked gluten-free angel food cake is ready!
Slice and enjoy! When you’re ready to serve your gorgeous gluten-free angel food cake, use a serrated knife (like you would use for bread) to slice it into portions. A serrated knife helps saw through the delicate crumb without squishing the cake. Serve it plain, or with your favorite toppings like fresh berries, whipped cream, or fruit sauce. Celebrate your GF baking success!
Recipe Notes
- This recipe is naturally dairy-free.
- Substitute cornstarch with an equal amount of tapioca starch or potato starch if needed.
- If you don’t have almond extract, omit it or add an extra 1/2 tsp vanilla extract.
- If your GF flour blend doesn’t have xanthan gum, add 1/4 to 1/2 tsp xanthan gum to the dry flour mix.
- For a citrus variation, fold in the zest of one large lemon or orange.
- For a spiced variation, whisk 1/4 tsp ground cardamom, cinnamon, or ginger into the dry flour mixture.