Okay, let’s be real. When you first go gluten-free, you mourn the classics, right? That moist, sweet, caramelized perfection of a pineapple upside-down cake? It feels like one of those "maybe someday" recipes. I remember trying early versions of gluten free pineapple upside-down cake that were either gummy or fell apart entirely. The dream of that buttery, brown sugar topping with tender cake seemed impossible. But I was determined! I spent ages tinkering, testing different flour blends, adjusting liquids, and trying every trick in the book to get that perfect crumb. Finally, after many attempts (and some less-than-perfect cakes!), I cracked the code. This isn’t just a gluten free pineapple upside-down cake; it’s the best gluten free pineapple upside-down cake I’ve ever made, gluten-free or not! The secret? A combination of sour cream and oil that gives it incredible moisture and a light, pillowy texture, unlike other gluten-free cakes that can be dense. Just like I use surprising tricks in my gluten-free lemon bars, fudgy gluten-free brownies, or my moist gluten-free banana bread, this gluten free pineapple upside-down cake has a little magic. Get ready for that stunning pineapple design and that irresistible caramel drip. This gluten free pineapple upside-down cake is everything you remember and more!
Tips for Recipe Success
- Sour Cream & Oil: The Secret to a Tender Crumb Using a blend of sour cream and oil rather than just butter provides richness while keeping the crumb of your gluten-free cake light and airy. Butterfat can sometimes weigh down gluten-free flours, leading to a denser result.
- Pat That Fruit Dry! This is a crucial step to prevent a soggy gluten-free pineapple upside-down cake. Excess liquid from the pineapple slices and cherries can seep into the cake batter during baking, creating a wet layer. blotting them thoroughly removes this moisture, ensuring the cake layer bakes up perfectly.
- Mix Ingredients Alternately for a Smooth Batter Adding your dry ingredients alternately with the liquid (milk and sour cream) helps the gluten-free flour blend incorporate evenly and absorb moisture properly. This technique prevents a grainy texture and ensures a consistent, moist gluten-free cake.
- Cool Before Flipping (But Not Too Long!) Resist the urge to flip the cake immediately out of the oven. Letting it cool on a wire rack for just 20 minutes allows the topping to set slightly but keeps the cake warm enough to release cleanly from the pan. Waiting too long can cause the caramel topping to harden and stick.
- Patience is Key for Final Cooling Once flipped, allow your classic pineapple upside down cake to cool completely to room temperature before slicing. Cooling it fully on the serving plate lets the structure set completely, resulting in the soft, pillowy crumb you want. Putting it in the fridge to speed this up can actually make the cake dense.
Essential Equipment for This Recipe
To prepare this delicious recipe, you’ll need the following kitchen tools:
- Mixing Bowls – A set of varying sizes is crucial for prepping and combining ingredients.
Find Mixing Bowls on Amazon - Measuring Cups and Spoons – Accuracy is key in baking, so a good set is a must.
Find Measuring Cups and Spoons on Amazon - Baking Sheets – Essential for even baking and perfectly browned results.
Find Baking Sheets on Amazon - Whisks – Perfect for incorporating air into mixtures and ensuring smooth batters.
Find Whisks on Amazon - Spatulas – Ideal for folding ingredients and scraping bowls clean.
Find Spatulas on Amazon - Food Processors – For getting the ingredients to the right consistency.
Find Food Processors on Amazon - Saucepans – Needed for the first steps of the recipe.
Find Saucepans on Amazon - Chef’s Knives – A sharp knife ensures precise and safe ingredient preparation.
Find Chef’s Knives on Amazon - Cutting Boards – Provides a safe and stable surface for all your chopping needs.
Find Cutting Boards on Amazon
Frequently Asked Questions
Help! My gluten-free pineapple upside-down cake turned out soggy! What went wrong?
Oh no, that’s a common frustration with upside-down cakes, especially gluten-free ones where excess moisture can be tricky! The most likely culprit is the fruit itself. Pineapple and cherries hold a lot of liquid.
The Fix: Did you pat the pineapple slices and maraschino cherries *very* dry with paper towels before placing them in the pan? This step is absolutely crucial for preventing a soggy cake bottom. Also, make sure you cool the cake for the exact 20 minutes before flipping and then let it cool completely at room temperature – refrigerating it too soon can also sometimes affect the texture.
You’ve got this! Next time, focus on blotting that fruit dry, and you’ll get that perfect, moist-but-not-soggy gluten free pineapple upside-down cake texture.
My go-to gluten-free flour blend doesn’t have xanthan gum. Can I still use it in this gluten free pineapple upside-down cake recipe?
That’s a great question and a common scenario! This recipe was developed using a 1:1 blend that *does* contain xanthan gum, as it provides important structure and binding for gluten-free cakes, preventing them from being crumbly.
Here’s what to do: If your blend lacks xanthan gum, you’ll need to add it separately. A good starting point for cake recipes like this is typically 1/2 to 1 teaspoon of xanthan gum per cup of gluten-free flour blend used in the recipe (this recipe uses about 1 ¼ cups). Whisk the xanthan gum thoroughly with your dry ingredients before combining them with the wet ingredients. This will help ensure your gluten free pineapple upside-down cake has the necessary structure and tender crumb!
Can I make this gluten-free pineapple upside-down cake dairy-free too?
Yes, you absolutely can adapt this recipe to be dairy-free! The main dairy component is the sour cream, and the milk.
Here are the swaps: For the milk, use your favorite unsweetened dairy-free milk like almond, soy, or oat milk in the same quantity. For the sour cream, you’ll need a dairy-free sour cream alternative. Many brands offer excellent plant-based versions that work well in baking. Use the same measurement as the sour cream called for in the recipe.
Keep in mind that results with dairy-free alternatives can sometimes vary slightly depending on the specific brand and blend, but these substitutions should allow you to enjoy a delicious gluten-free and dairy-free pineapple upside-down cake!
Why is the specific 20-minute cooling time before flipping the cake so important? Can’t I just flip it immediately or wait longer?
This is a CRITICAL step for a successful flip with any upside-down cake, but especially with gluten-free versions where structure can be more delicate!
Here’s the magic behind it: Cooling for *exactly* 20 minutes allows the caramelized butter and brown sugar topping to set up just enough to adhere firmly to the cake. If you flip it too soon (while still piping hot), the topping is still fully liquid and likely to run everywhere or stick to the pan instead of the cake. If you wait too long and the cake cools completely in the pan, the topping becomes too firm and acts like glue, making it very difficult to release the cake neatly without it breaking apart.
Sticking to that 20-minute window ensures the gluten free pineapple upside-down cake releases cleanly and beautifully onto your serving plate, revealing that gorgeous fruit topping!
How should I store leftover gluten-free pineapple upside-down cake? How long will it keep?
This delicious gluten free pineapple upside-down cake is definitely best enjoyed on the day it’s made for the freshest texture and flavor!
Storage: However, if you have leftovers, simply cover the cake tightly with plastic wrap or store it in an airtight container. It can be kept at room temperature for up to 24 hours. For longer storage, or after the first 24 hours, it’s best to store it in the refrigerator. It will keep well in the fridge for about 3-4 days.
Can I freeze this gluten free pineapple upside-down cake?
While it’s best fresh, you *can* freeze slices or even the whole cake if needed!
How to freeze: Make sure the cake is completely cooled first. For individual slices, wrap each slice tightly in plastic wrap, then again in foil, or place wrapped slices in a freezer-safe container. For a whole cake (cooled and unflipped), you can wrap it securely in plastic wrap and then foil.
To Thaw: When you’re ready to enjoy it, thaw the cake (or slices) overnight in the refrigerator. Avoid thawing it at room temperature or in the microwave for the best texture.
The recipe uses oil and sour cream instead of butter in the cake batter. Why?
Great observation! This is actually one of the key secrets to this particular gluten free pineapple upside-down cake’s incredible texture.
Here’s the science: While butter adds great flavor, the butterfat can sometimes interact with gluten-free flours in a way that leads to a denser, heavier crumb. Using liquid oil contributes moisture without solidifying, keeping the cake tender and moist. Sour cream adds richness, fat, and a touch of acidity (which also helps tenderize the crumb), but its composition allows for a lighter texture compared to using solid butter as the primary fat source. This combination results in that wonderfully soft, pillowy crumb that rivals traditional cakes, even without the gluten!
Gluten-Free Pineapple Upside-Down Cake
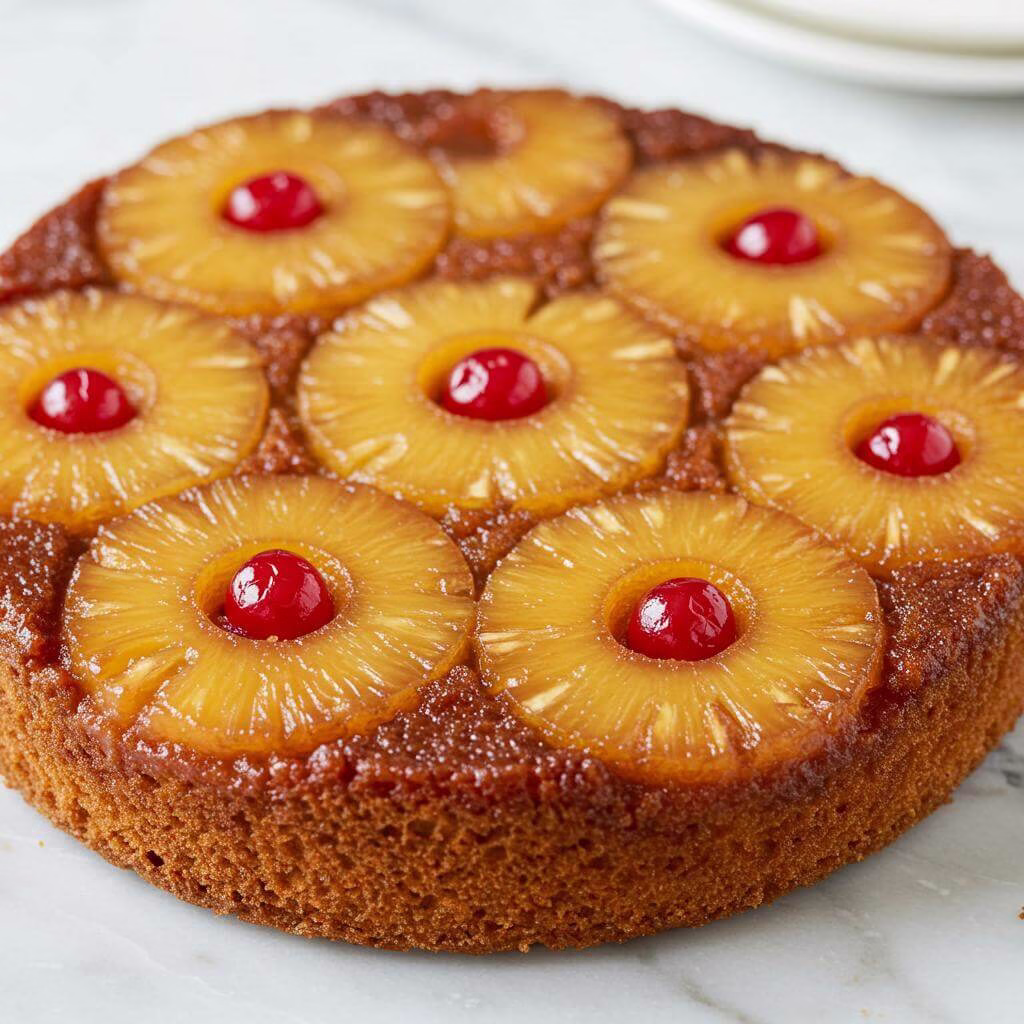
Gluten-Free Pineapple Upside-Down Cake
This isn’t just a gluten free pineapple upside-down cake; it’s the best gluten free pineapple upside-down cake I’ve ever made, gluten-free or not! The secret? A combination of sour cream and oil that gives it incredible moisture and a light, pillowy texture, unlike other gluten-free cakes that can be dense. Get ready for that stunning pineapple design and that irresistible caramel drip. This gluten free pineapple upside-down cake is everything you remember and more!
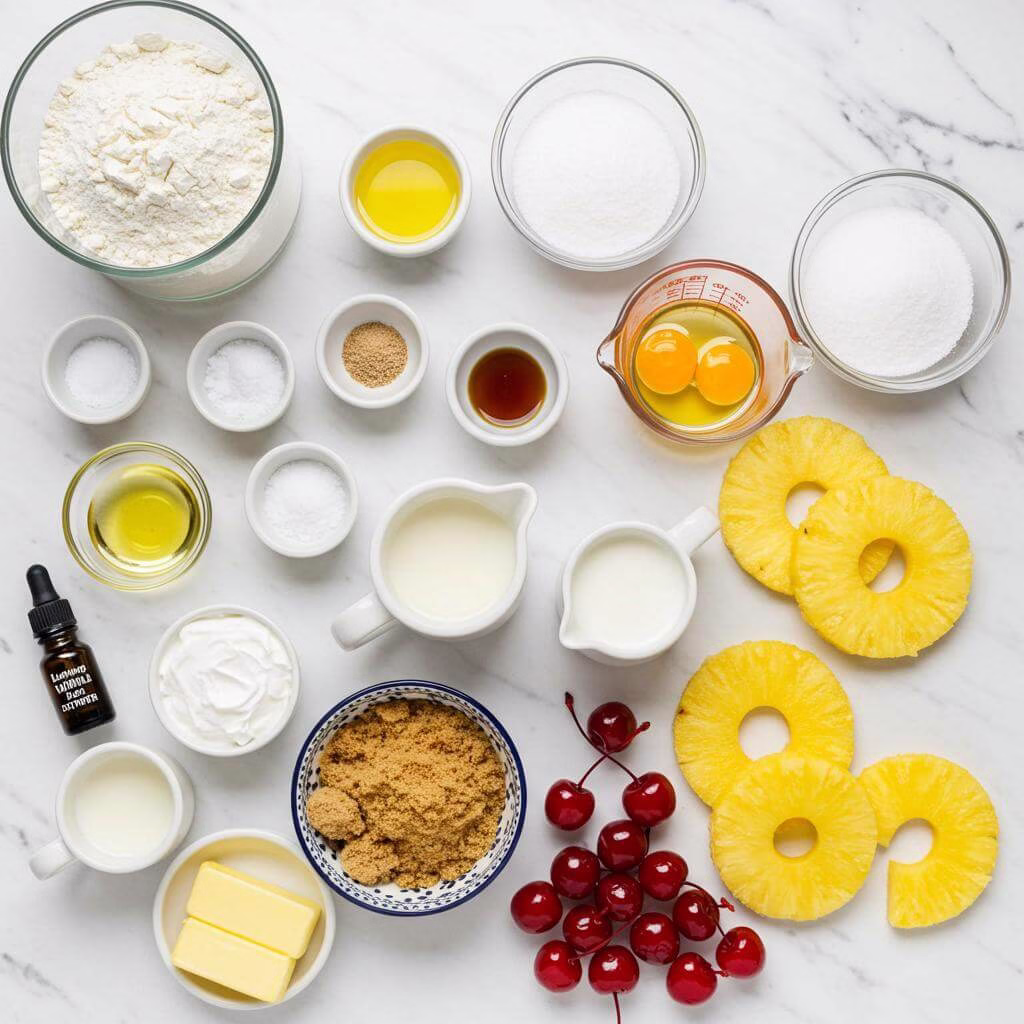
Ingredients
8
- 1/4 cup butter, melted (60g)
- 1/2 cup packed light brown sugar (100g)
- 8-10 pineapple slices, patted dry
- 15-20 maraschino cherries, patted dry
- 1 cup + 2 tbsp gluten-free 1:1 baking flour (175g, ensure it contains xanthan gum)
- 3 tsp baking powder
- 1 tsp salt
- 1 cup granulated sugar (200g)
- 2 large egg whites
- 1/4 cup vegetable oil (50g, or coconut oil)
- 1 tsp lemon juice
- 1 tsp pure vanilla extract
- 1/4 cup sour cream (60g)
- 1/2 cup milk (125g, 2% recommended)
Equipment
- 9×2 inch round cake pan (or pie dish, at least 2 inches deep)
- Paper towels
- Medium bowl
- Stand mixer (or large bowl with hand mixer)
- Wire cooling rack
- Serving plate or cake stand
Instructions
Let’s get that delicious topping ready! Start by melting the butter. Once it’s liquid gold, carefully pour it into the bottom of an ungreased 9×2 inch pie dish or round cake pan. Make sure your pan is at least 2 inches deep to hold everything nicely. Sprinkle the packed light brown sugar evenly right over the melted butter.
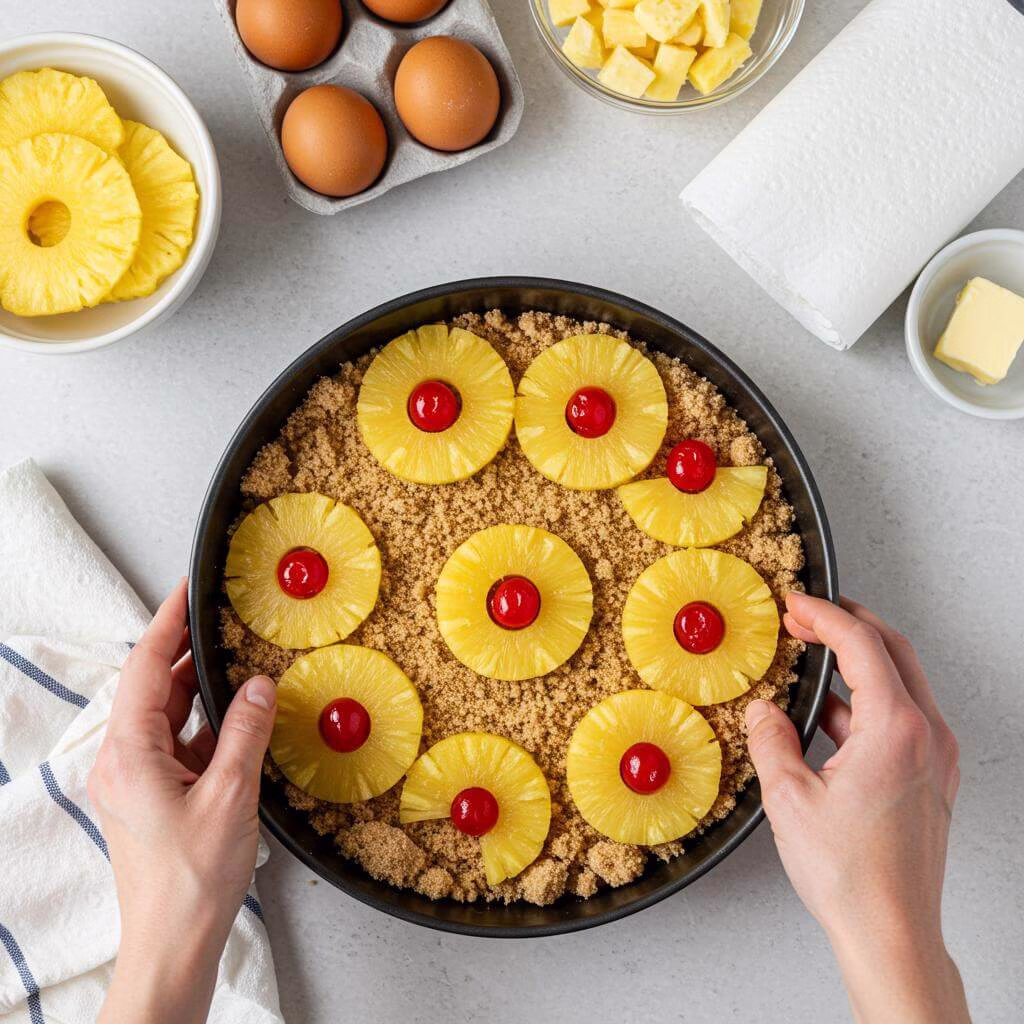
Now, time for the fruit! This next step is small but mighty important for preventing a soggy gluten free pineapple upside-down cake: pat your pineapple slices and maraschino cherries *very* dry using paper towels. Gently press them to absorb as much excess liquid as possible.
Arrange your dried pineapple slices and cherries artistically on top of the brown sugar layer. You’ll likely use 6-7 full pineapple rings. A classic touch is to place a bright red maraschino cherry right in the center of each pineapple ring. To fill in the edge, halve 3 more pineapple rings and tuck them snugly around the sides of the pan.
Once your fruit is perfectly placed, pop the entire pan into the refrigerator while you prepare the cake batter. This helps the butter, sugar, and fruit layer firm up and set beautifully.
Let’s get the oven ready! Preheat your oven to 375°F (190°C).
In a medium bowl, whisk together your dry ingredients: the gluten-free 1:1 baking flour, the baking powder, and the salt. Give it a good whisk to ensure everything is evenly distributed.
Now for the wet ingredients magic! In the bowl of your stand mixer (or a large bowl if using a hand mixer), add the egg whites and the granulated sugar. Whip these together on medium-high speed for . Watch as they transform into a light, airy, and fluffy mixture.
With the mixer still running on low speed, *slowly* drizzle in the vegetable or coconut oil. Take your time here – adding the oil gradually helps keep all that lovely air you just whipped in.
Next, mix in the pure vanilla extract and the lemon juice. Just mix until they are combined.
Time to bring it all together! With your mixer on low speed, begin adding the dry ingredients alternately with the wet ingredients. Start by adding one-third of the whisked dry ingredients. Mix it gently until *just* incorporated.
Add all of the sour cream and mix just until it’s combined into the batter.
Add the second one-third of the dry ingredients and mix until just incorporated again.
Now, add half of the milk and mix until the batter comes together.
Add the final one-third of the dry ingredients and mix until just combined.
Pour in the remaining milk and mix one last time until the batter is totally combined and looks smooth. The batter should have a smooth, pourable consistency.
Retrieve the chilled pan with the fruit layer from the fridge. Carefully and evenly pour the cake batter over the prepared fruit layer.
Place the pan in your preheated 375°F (190°C) oven. Bake for . The cake is done when a toothpick inserted into the center comes out clean. If it seems to be browning too quickly, loosely cover the top with aluminum foil during the last 10-15 minutes.
Once baked, carefully remove the cake from the oven and place it on a wire rack. CRUCIAL: let the cake cool on the rack for . Not longer, not shorter!
After exactly 20 minutes of cooling, place your serving plate or cake stand upside down over the cake pan. Holding them together securely, confidently flip! Gently lift the pan. Reposition any stuck fruit.
Hardest part: let it cool completely on the serving plate at room temperature (a couple of hours). **Do NOT refrigerate to speed cooling** to avoid a dense cake.
Once completely cooled, slice and serve plain or with whipped cream or vanilla ice cream. Enjoy!
Recipe Notes
- If your preferred gluten-free flour blend doesn’t contain xanthan gum, add about 1/2 to 1 teaspoon xanthan gum per cup of flour.
- Oil Swap: Coconut oil (refined) or other neutral oils like canola or grapeseed can replace vegetable oil.
- Dairy-Free: Use unsweetened dairy-free milk and a dairy-free sour cream alternative or thick plain dairy-free yogurt.
- Tropical Twist: Try sliced mango instead of pineapple and coconut sugar for brown sugar.
- Stone Fruit: Sliced peaches or plums (patted very dry) can be used in summer.
- Spice it Up: Add a pinch of cinnamon or nutmeg to the batter.
- Add Crunch: Sprinkle chopped pecans or walnuts (certified gluten-free) over the topping before adding fruit.
- Prevent Soggy Cake: Blot pineapple and cherries thoroughly dry with paper towels.
- Cooling is Key: Cool on a wire rack for exactly 20 minutes before inverting. Cool completely at room temperature.
- Mixing Method: Adding dry and wet ingredients alternately helps gluten-free flour absorb liquid evenly.
Nutrition (per serving)

My #1 Recommendation
KitchenAid Classic Series 4.5 Quart Tilt-Head Stand Mixer K45SS, Onyx Black
(10816 reviews)
Elevate your gluten-free baking with the iconic KitchenAid Classic Series Stand Mixer. Its powerful motor and 4.5-quart capacity handle everything from delicate meringues to dense doughs with ease, making it an indispensable tool for any serious home baker.
- Generous 4.5 Quart Capacity
- Easy-Access Tilt-Head Design
- Powerful Performance for Gluten-Free Baking
As an Amazon Associate, I earn from qualifying purchases. This helps support the blog at no extra cost to you.
Stop Guessing & Start Mastering Gluten-Free Baking!
Enjoyed making this incredible Gluten-Free Pineapple Upside-Down Cake? Imagine if all your gluten-free baking turned out this delicious! We know the journey can be tricky, which is why we want to help you, our fellow gluten-free friends.
Unlock the secrets with our FREE Gluten-Free Baking Substitutions Cheat Sheet!
- Say Goodbye to Crumbly Cakes: Learn exactly which gluten-free flours & starches create the perfect texture for any baked good.
- Master Binders like a Pro: Understand how to effectively use xanthan gum, psyllium husk, flax eggs, and more for ideal structure.
- Effortless Ingredient Swaps: Discover reliable gluten-free substitutions for dairy, eggs, sugar, and fats without sacrificing taste or texture.
- Bake with Confidence & Joy: Get consistent, bakery-quality results and fall in love with gluten-free baking all over again!
This essential guide is your ticket to stress-free, successful gluten-free baking. No more disappointments, just delicious creations!
Download Your FREE Cheat Sheet Now!
Your privacy is important to us. We only send valuable gluten-free tips and recipes. No spam, ever!