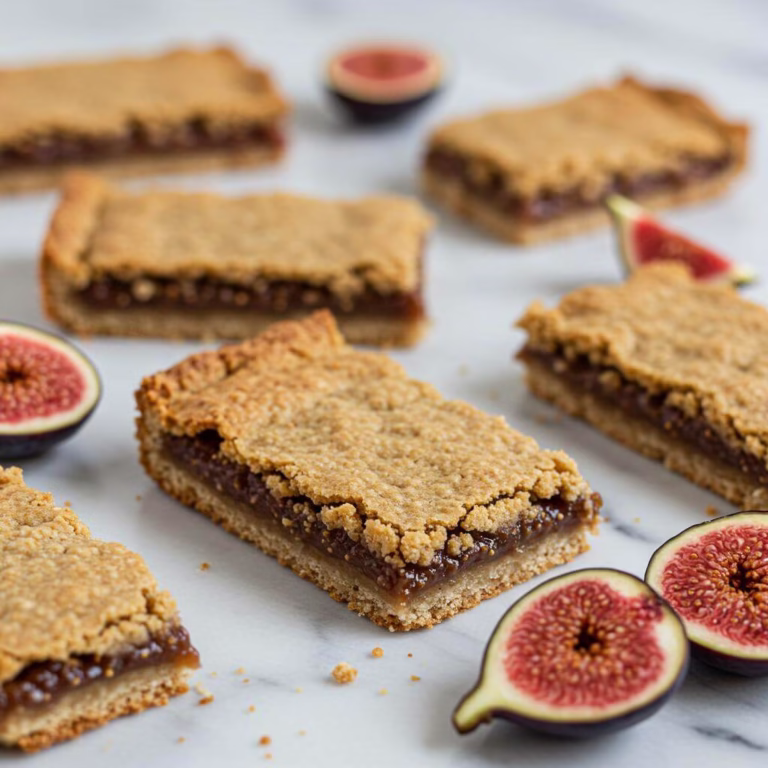
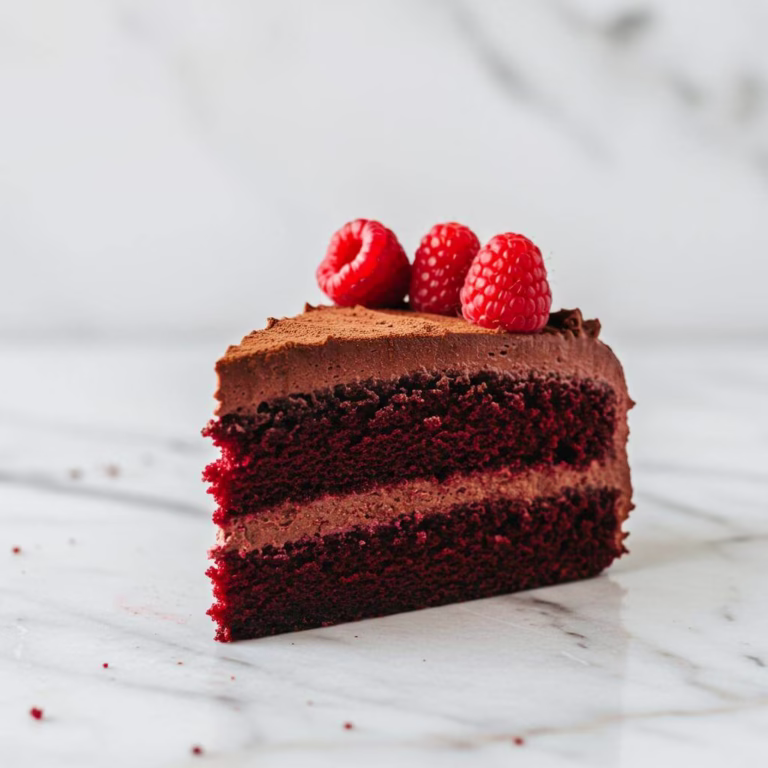
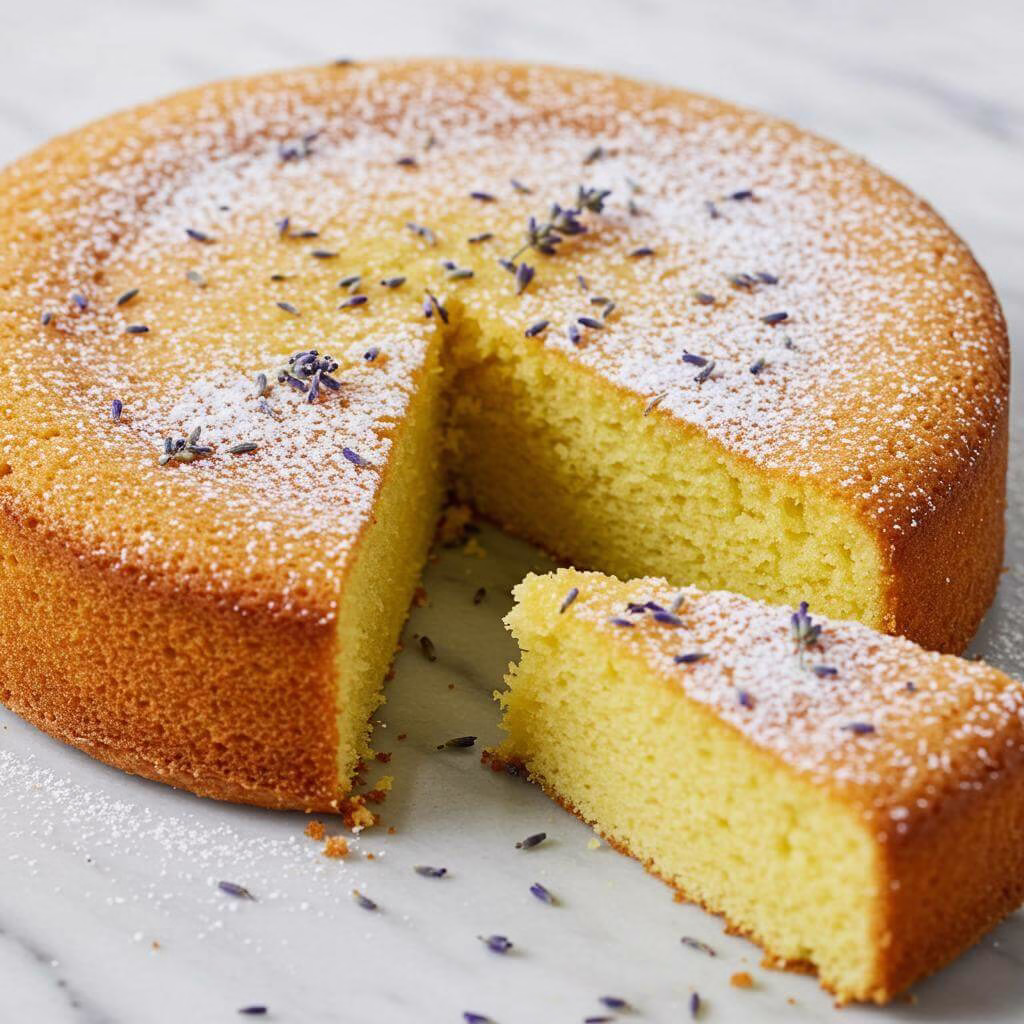
Remember Ginger & Fox Bake Shop? It felt like stepping into a sweet-smelling haven, and the undisputed star, the cake everyone asked for, was hands down the gluten free lemon lavender cake. It wasn’t just dessert; it was an experience – a cake that proved *gluten free* could mean absolutely divine. The bright, zesty burst of lemon perfectly balanced the subtle, calming whisper of lavender in every single moist, tender bite. We poured so much love into baking those hundreds of gluten free lemon lavender cake layers for birthdays, showers, and ‘just because’ moments. When the bakery closed, I knew I had to capture that magic, that specific combination of sunshine and calm, in a recipe you could make at home. It took attempts, testing different flours and ratios, but I finally perfected the ultimate gluten free lemon lavender cake. This recipe brings back that exact dreamy flavor and perfect texture. If you’re on a gluten-free baking adventure like me, don’t miss trying my fudgy gluten-free brownies or these vibrant zesty lemon bars. And for a quick treat, my chewy chocolate chip cookies are always a hit! But first, get ready to create your own legend with this gluten free lemon lavender cake recipe. It’s truly special and naturally gluten-free!
Tips for Recipe Success
- Bring Ingredients to Room Temperature: This isn’t just a suggestion! Room temperature butter, eggs, milk, and sour cream emulsify properly, creating a smooth batter that bakes evenly for a tender gluten-free lemon cake.
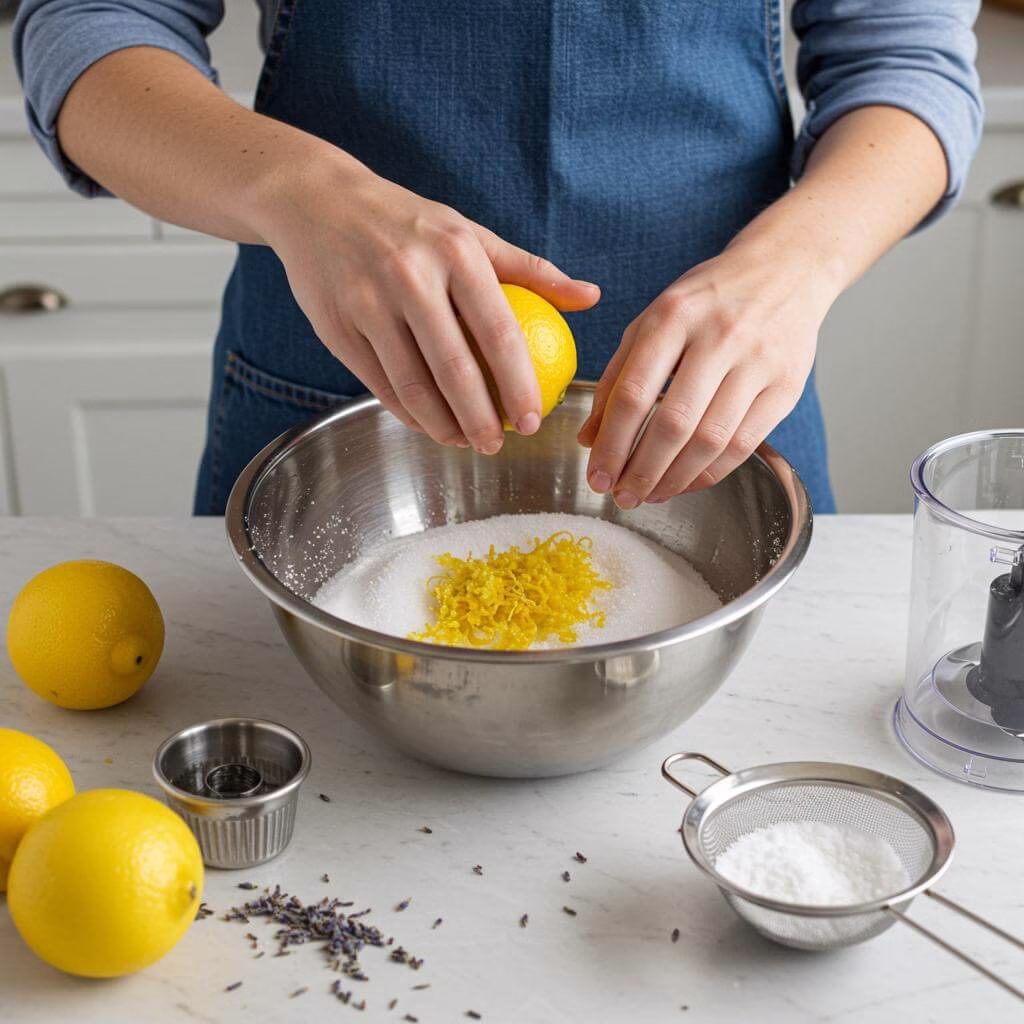
- Massage Your Lemon Zest into the Sugar: Don’t skip this step! Using your fingers to rub the zest into the sugar releases the flavorful oils directly into your sweetener, intensifying that bright lemon taste that’s crucial for this gluten-free lemon cake.
- Finely Grind the Lavender with Sugar: Pulsing the culinary lavender with the sugar in a food processor ensures the floral flavor is evenly distributed throughout the cake batter, preventing concentrated bits and providing that elegant balance.
- Cool Cakes Completely, Then Chill: Allow the cakes to cool fully on a wire rack before wrapping and refrigerating. This makes them much easier to handle, level, and frost neatly, helping you achieve a perfect presentation.
Essential Equipment for This Recipe
To prepare this delicious recipe, you’ll need the following kitchen tools:
- Mixing Bowls – A set of good quality mixing bowls is essential for any recipe.
Find Mixing Bowls on Amazon - Measuring Cups and Spoons – Accurate measurements are key to baking success.
Find Measuring Cups and Spoons on Amazon - Baking Sheets – For perfectly baked goods every time.
Find Baking Sheets on Amazon - Whisks – Perfect for whipping and blending ingredients smoothly.
Find Whisks on Amazon - Spatulas – Ideal for folding ingredients and scraping bowls clean.
Find Spatulas on Amazon - Food Processors – A food processor can make quick work of chopping and pureeing.
Find Food Processors on Amazon - Saucepans – Useful for heating sauces and other liquids.
Find Saucepans on Amazon - Chef’s Knives – A good chef’s knife is essential for chopping and slicing.
Find Chef’s Knives on Amazon - Cutting Boards – Protect your countertops while you prep ingredients.
Find Cutting Boards on Amazon
Frequently Asked Questions
What kind of gluten-free flour blend should I use for this Lemon Lavender Cake?
Great question! The success of a gluten-free cake often starts with the right flour blend. I highly recommend using a quality all-purpose gluten-free blend that is specifically formulated for baking cup-for-cup, like **Bob’s Red Mill 1 to 1** or **Cup4Cup**. These blends typically contain a mix of rice flours, starches, and binders like xanthan gum (though you’ll still add a little extra here for perfect structure). Using a standard blend ensures you get that wonderfully tender and moist texture that made the original Ginger & Fox gluten free lemon lavender cake so popular!
Do I really need culinary lavender? Can I just use dried lavender from my garden or potpourri?
Another excellent and important question! **Absolutely use only culinary-grade lavender.** Regular dried lavender, especially from craft stores or gardens not intended for consumption, can be sprayed with pesticides or other chemicals you definitely don’t want in your cake. Culinary lavender is grown specifically for cooking and baking, ensuring it’s safe and has the best flavor profile. You can find it in spice shops, some grocery stores, or easily online. A little goes a long way in this gluten free lemon lavender cake, providing that delicate floral note without tasting soapy.
My gluten-free cake batters sometimes turn out gummy or crumbly. How can I ensure this one is tender and moist?
This is a common concern in gluten-free baking, but don’t worry, this recipe is designed for success! There are a few key things that contribute to the perfect texture in this gluten free lemon lavender cake:
- Proper Measuring: Measure your gluten-free flour blend accurately, preferably by weight if possible (though volume is provided). Too much flour is a common cause of dryness.
- Added Xanthan Gum: Even if your blend has it, the small addition of xanthan gum provides structure and prevents crumbling.
- Room Temperature Ingredients: Ensure your butter, eggs, sour cream, and milk are genuinely at room temperature. This helps them emulsify smoothly, creating a better batter structure.
- Don’t Overmix: Once you add the dry ingredients, mix *only* until just combined. Overmixing can develop starches in a way that leads to a tougher or gummier texture in GF cakes.
- Sour Cream: The addition of sour cream adds incredible moisture and tenderness.
- Don’t Overbake: Bake just until a toothpick comes out clean. Overbaking will dry out any cake, especially gluten-free ones.
Follow the steps closely, and you’ll achieve a lovely, tender crumb!
The recipe says to chill the cakes overnight before frosting. Is this necessary?
While not strictly *necessary* to eat the cake, chilling the completely cooled cake layers (ideally after wrapping them well in plastic wrap) makes a **huge difference** for frosting and handling! Gluten-free cakes can sometimes be a little delicate. Chilling firms them up significantly, making them much easier to:
- Handle without breaking.
- Level neatly if needed.
- Frost with minimal crumbs mixing into your beautiful buttercream.
If you’re short on time, even a couple of hours in the fridge will help, but overnight chilling is the pro move for the cleanest frosting job on your gluten free lemon lavender cake!
My raspberry buttercream seems too thick/thin. What should I do? Can I use fresh raspberries instead of jam?
Perfectly normal! Buttercream consistency is easy to adjust.
- If it’s too thick: Add milk *one teaspoon at a time*, beating well after each addition, until it reaches your desired spreadable consistency.
- If it’s too thin: Add powdered sugar *1-2 tablespoons at a time*, beating well after each addition, until it thickens up.
Regarding fresh raspberries: While delicious, fresh or frozen raspberries contain a lot of water and seeds, which can make the buttercream watery, unstable, and seedy. Using a good quality **raspberry jam or preserves** is the way to go here! The jam provides concentrated flavor, color, and a smooth texture without the excess moisture and seeds. It truly makes this gluten free lemon lavender cake frosting shine!
Can I make this Gluten Free Lemon Lavender Cake dairy-free?
Yes, you absolutely can! This recipe is quite adaptable. To make it dairy-free, you will need to substitute the butter, whole milk, and sour cream with dairy-free alternatives.
- Butter: Use a good quality dairy-free baking stick or block that’s designed for baking (like Miyoko’s Kitchen or Country Crock Plant Butter).
- Milk: Use an unsweetened dairy-free milk like almond, soy, or oat milk.
- Sour Cream: Substitute with a dairy-free sour cream alternative or plain dairy-free yogurt (ensure it’s unsweetened and relatively thick).
The texture might vary slightly depending on the specific products you use, but you can still achieve a wonderfully moist and flavorful cake. Just be sure your frosting ingredients are also dairy-free!
How should I store the finished cake, and can I freeze it?
Once frosted, store the gluten free lemon lavender cake in an airtight container at room temperature for 2-3 days. If your home is very warm, or if the frosting contains fresh fruit (which this jam-based one doesn’t, but good to know for modifications), refrigeration is best, but can sometimes slightly alter the cake’s texture (it might become a little firmer). Let it come back to room temperature for the best flavor and texture before serving.
Yes, you can definitely freeze it!
- Whole or Half Cake: Freeze the frosted cake uncovered briefly until the frosting is firm. Then, wrap tightly in several layers of plastic wrap, followed by a layer of aluminum foil. Place in a sturdy container if possible.
- Individual Slices: Place slices on a baking sheet lined with parchment and freeze until solid. Wrap each slice tightly in plastic wrap and then foil.
Frozen cake keeps well for 1-2 months. Thaw overnight in the refrigerator, then bring to room temperature before serving. You can also freeze the unfrosted cake layers wrapped well; thaw completely before frosting.
Gluten-Free Lemon Lavender Cake
Gluten-Free Lemon Lavender Cake
A cake that proved gluten-free can be divine. Bright, zesty lemon perfectly balances subtle, calming lavender in every moist, tender bite. This recipe captures a dreamy flavor and perfect texture.
Ingredients
12
For the Cake:
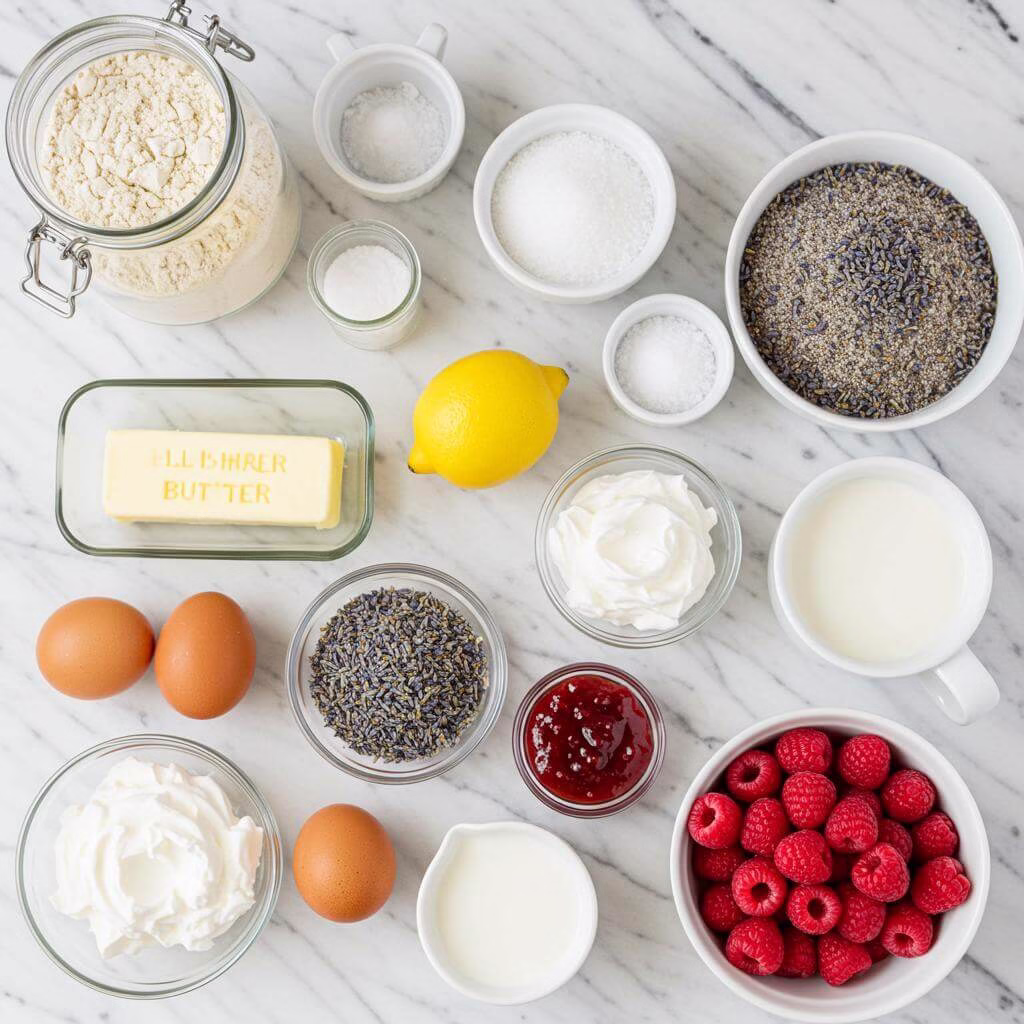
- 2 3/4 cups Gluten Free Flour Blend (all-purpose blend designed for baking like Bob’s Red Mill 1 to 1 or Cup4Cup recommended)
- 2 teaspoons baking powder
- 1 teaspoon baking soda
- 1 teaspoon xanthan gum (omit if your flour blend already contains it)
- 1/2 teaspoon sea salt
- 1 1/4 cups butter, at room temperature
- 1 1/2 cups cane sugar
- 1 tablespoon culinary lavender (ensure culinary-grade)
- 1 lemon (freshly zested and juiced)
- 2 large eggs, at room temperature
- 2 egg whites, at room temperature
- 1/4 cup sour cream, at room temperature
- 1 1/4 cups whole milk, at room temperature
- 2 teaspoons pure vanilla extract
For the Raspberry Buttercream:
- 1 cup butter, softened
- 4 cups powdered sugar, sifted
- 2-4 tablespoons milk
- 1/2 cup good quality raspberry jam (or blueberry)
- 1 teaspoon pure vanilla extract
- 1/8 teaspoon salt (or a pinch)
Equipment
- Two 8 or 9 inch cake pans
- Parchment paper rounds
- Gluten-free cooking spray
- Large mixing bowl
- Whisk
- Food processor (small one works)
- Fine-mesh sieve
- Stand mixer (or hand mixer)
- Rubber spatula
- Offset spatula
- Wire cooling rack
- Oven thermometer (optional)
- Bench scraper (optional for frosting)
Instructions
Prepare Your Pans & Oven: Preheat your oven to 350°F (175°C). Lightly spray two 8-inch or 9-inch cake pans with gluten-free cooking spray. Trace and cut out two rounds of parchment paper using one of the pans as a guide. Place a parchment round in the bottom of each sprayed pan and spray the parchment lightly as well. Set aside.
Whisk Together Dry Ingredients: In a large mixing bowl, measure out the gluten free flour blend, baking powder, baking soda, and sea salt. If your gluten-free flour blend doesn’t already contain it, whisk in the xanthan gum. Whisk these dry ingredients together thoroughly for about to ensure even distribution. Set aside.
Infuse Your Sugar with Lemon & Lavender: In a food processor, combine the sugar and culinary lavender. Pulse until the lavender is finely ground. Pour through a fine-mesh sieve into a small bowl, discarding any larger pieces. Add the lemon zest to the lavender sugar. Using your fingertips, massage the zest into the sugar until fragrant and pale yellow.
Cream the Butter: In the bowl of a stand mixer fitted with the paddle attachment, add the softened butter. Beat on medium speed until smooth and creamy, about .
Add the Flavored Sugar: Add the lemon lavender sugar mixture to the butter. Increase speed to medium-high and beat for , scraping the bowl as needed, until light in color and fluffy.
Incorporate the Eggs: Add room-temperature large eggs, one at a time, beating on medium speed after each just until incorporated. Do not overmix.
Add the Egg Whites: Add room-temperature egg whites, one at a time, beating on medium speed after each until combined.
Stir in Vanilla: Add pure vanilla extract and beat for a few seconds to incorporate. Scrape down the bowl.
Begin Adding Dry & Wet Ingredients (Alternating Method): Add about half of the reserved dry flour mixture to the butter mixture. Beat on low speed just until mostly incorporated.
Add Milk, Sour Cream, and Lemon Juice: In a small bowl, whisk together room-temperature whole milk, sour cream, and fresh lemon juice. With the mixer on low, slowly pour this wet mixture into the batter. Beat briefly just until combined.
Add Remaining Dry Ingredients: Add the remaining dry flour mixture. Mix on low speed just until combined and smooth. Scrape down the bowl. Do NOT overmix. Batter might be thicker than traditional batters; this is normal.
Divide Batter into Pans: Pour batter evenly into the prepared cake pans. Smooth the tops with an offset spatula.
Bake the Cakes: Place pans on the center rack of the preheated oven. Bake for , or until edges pull away and a toothpick inserted into the center comes out clean or with a few moist crumbs.
Initial Cooling in Pans: Remove cakes from oven. Let cool in pans on a wire cooling rack for to allow structure to set.
Cool Completely on Rack: Gently run a knife around pan edges. Invert cakes onto the wire rack, remove parchment, and let cool completely.
Optional Chilling Step: For best results, wrap completely cooled cake layers tightly in plastic wrap and refrigerate for at least a , or overnight. This firms them for easier handling and frosting.
Make the Raspberry Buttercream: In a stand mixer with paddle attachment, beat softened butter until smooth and creamy.
Add Powdered Sugar & Liquid: Add half the sifted powdered sugar and the milk. Beat on low until sugar is incorporated, then medium until smooth and slightly fluffy.
Stir in Jam and Remaining Sugar: Stir in the raspberry jam. Add remaining powdered sugar. Beat on low until incorporated, then medium until smooth.
Adjust Consistency & Finish Frosting: If too thick, add more milk (1 tsp at a time). If too thin, add more powdered sugar (1-2 tbsp at a time). Beat in vanilla extract and salt. Beat for a final until light and fluffy.
Frost Your Cooled Cakes: Place one cooled/chilled layer on a serving plate. Spread a generous layer of frosting. Top with the second layer. Frost top and sides as desired. Use an offset spatula or bench scraper for smooth sides.
Recipe Notes
- Ensure all refrigerated ingredients (butter, eggs, milk, sour cream) are at room temperature for best emulsification and texture.
- Use culinary-grade lavender; non-culinary lavender may contain pesticides or perfumes.
- Sift lavender sugar after processing to remove any woody bits.
- Do not overmix gluten-free batter once flour is added; mix only until just combined to prevent a tough cake.
- Gluten-free cakes can be prone to sticking; don’t skip greasing and parchment paper.
- Cool cakes completely before frosting to prevent melting and crumbling. Chilling wrapped layers makes frosting easier.
- Insider Tip: Gluten-free batters often benefit from a short rest (15-30 minutes) before baking to allow starches to hydrate.
- Dairy-Free Swap: Use dairy-free milk, sour cream/yogurt, and butter alternatives.
- Jam Swap: Strawberry, blueberry, or blackberry jam can be used in the buttercream.
- If you prefer a thickly frosted cake, consider doubling the buttercream recipe.
Nutrition (per serving)

My #1 Recommendation
Kitchen in the box Stand Mixer,3.2Qt Small Electric Food Mixer,6 Speeds Portable Lightweight Kitchen Mixer for Daily Use with Egg Whisk,Dough Hook,Flat Beater (Black)
(6752 reviews)
Meet your new kitchen workhorse! This ‘Kitchen in the box’ stand mixer offers a compact 3.2Qt capacity, perfect for everyday baking and cooking. With 6 speed settings and essential attachments like an egg whisk, dough hook, and flat beater, it’s designed to be portable, lightweight, and powerful for all your culinary adventures. Get consistent results without taking up too much counter space.
- Compact 3.2Qt Bowl: Ideal for daily use and smaller kitchens.
- Versatile 6-Speed Control: Perfect for a variety of recipes.
- Essential Attachments Included: Comes with egg whisk, dough hook, and flat beater.
As an Amazon Associate, I earn from qualifying purchases. This helps support the blog at no extra cost to you.
Loved this Gluten-Free Lemon Lavender Cake?
Get 5 MORE Divine Gluten-Free & Dairy-Free Cake Recipes – Absolutely FREE!

Tired of searching for delicious gluten-free and dairy-free desserts? Download your free guide and discover 5 more show-stopping cake recipes that are surprisingly simple and always a crowd-pleaser!
We respect your privacy. Unsubscribe anytime. No spam, ever.