Okay, let’s talk about texture, specifically the elusive, perfect chewiness we crave in a chocolate chip cookie, but in giant, sliceable form! Finding a truly great gluten-free cookie cake? It felt like searching for a unicorn sometimes. So many attempts ended up dry, crumbly, or just… not right. You know that feeling, right? That moment when you bite into a gluten-free treat hoping for that familiar comfort, only to be met with disappointment. Well, after countless test batches, tweaking ratios, and channeling the lessons learned from recipes like my gluten-free peanut butter cookie recipe (where almond flour worked wonders!), I finally cracked the code for the dream gluten-free cookie cake. It’s a star player here, giving this **gluten-free cookie cake** that absolutely perfect chewiness you’ve been missing. This isn’t just *a* **gluten-free cookie cake**; it’s *the* **gluten-free cookie cake** that will make you cheer! Get ready to bake the best **gluten-free cookie cake** you’ve ever had, maybe alongside a festive gluten-free sheet cake for a real party!
Tips for Recipe Success
- Why Chilling is Crucial: For sturdy, clean slices that hold their shape, it’s essential to refrigerate the cooled gluten-free cookie cake for 30-60 minutes before attempting to slice it. Skipping this step can result in a more crumbly cake.
- Understand Your Flours: The blend of gluten-free all-purpose flour and almond flour is key to this recipe’s signature chewy texture. Almond flour adds moisture and tenderness, helping achieve that perfect chewy bite often hard to find in gluten-free baked goods.
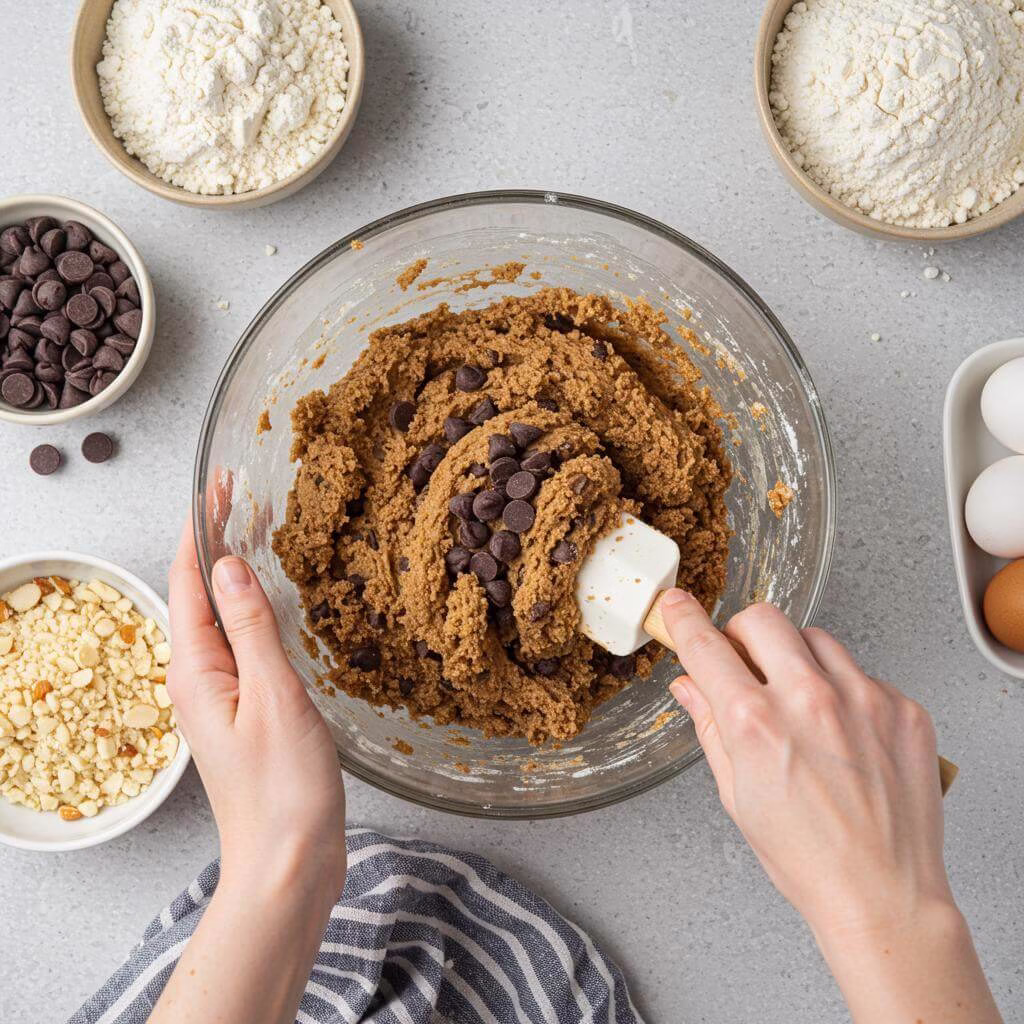
- Mix Gluten-Free Dough Differently: Unlike traditional baking where over-mixing creates tough gluten, gluten-free dough benefits from slightly *more* mixing. Mix until thoroughly combined to help the dough develop necessary structure without worry.
- Avoid Over-Baking at All Costs: A slightly under-baked appearance is ideal for a chewy cookie cake! The residual heat will continue cooking it as it cools. Over-baking leads to a crispy, dry texture that won’t slice cleanly.
- Prep Your Pan Properly for Easy Release: If you plan to remove or invert the cookie cake, generously grease the pan *and* line the bottom with parchment paper. Greasing alone is often insufficient for easily releasing gluten-free dough.
Essential Equipment for This Recipe
To prepare this delicious recipe, you’ll need the following kitchen tools:
- Mixing Bowls – A set of various sizes is essential for preparing different components of the recipe.
Find Mixing Bowls on Amazon - Measuring Cups and Spoons – Accurate measurements are crucial for baking and cooking success.
Find Measuring Cups and Spoons on Amazon - Baking Sheets – Perfect for baking cookies, roasting vegetables, or preparing sheet pan dinners.
Find Baking Sheets on Amazon - Whisks – Essential for whipping cream, eggs, or creating smooth sauces and batters.
Find Whisks on Amazon - Spatulas – Ideal for folding ingredients, scraping bowls, and spreading frosting.
Find Spatulas on Amazon - Food Processors – Useful for chopping vegetables, making dips, or creating smooth purees.
Find Food Processors on Amazon - Saucepans – Necessary for cooking sauces, soups, or heating liquids.
Find Saucepans on Amazon - Chef’s Knives – A versatile tool for chopping, slicing, and dicing ingredients.
Find Chef’s Knives on Amazon - Cutting Boards – Provides a safe and stable surface for preparing ingredients.
Find Cutting Boards on Amazon
Frequently Asked Questions
Why do I need both gluten-free all-purpose flour AND almond flour for this cookie cake? Can’t I just use one or the other?
That’s a fantastic question and gets right to the heart of what makes this gluten-free cookie cake so wonderfully chewy! Using a blend of gluten-free all-purpose flour (like Bob’s Red Mill 1-to-1, which this recipe was perfected with!) and almond flour is the secret sauce here.
Here’s why:
- GF All-Purpose Flour: Provides the essential structure needed to hold the cake together. Different blends perform differently, which is why sticking to the recommended one helps ensure success.
- Almond Flour: This is the game-changer for chewiness! Almond flour adds moisture and a richness that GF all-purpose flour alone can’t replicate. Without it, the cookie cake can end up dry and crumbly.
While the recipe technically worked with just GF all-purpose flour in testing, the texture wasn’t that perfect, chewy cookie cake texture we were aiming for. So, using both together is key to unlocking the best results for this specific recipe!
My dough feels pretty sticky and is hard to press into the pan. Is that normal for this gluten-free cookie cake dough?
Yes, absolutely! Don’t worry, a slightly wetter, stickier dough is totally normal for many gluten-free cookie recipes, including this gluten-free cookie cake. Gluten-free flours absorb liquids differently than wheat flour, and this consistency helps ensure a moist, chewy final product.
Pro Tip: If you find the dough is really sticking to your hands when you’re pressing it into the pan, lightly grease your hands with a tiny bit of butter or cooking spray. This simple trick makes spreading the dough much easier!
The baking time seems short (12-14 minutes), and my cookie cake looks a little underdone in the center when I take it out. Did I do something wrong?
Nope, you’re doing it perfectly! Trust the under-baked look. It might seem counter-intuitive, but pulling your gluten-free cookie cake out when the edges are just set and lightly golden, and the center still looks a bit soft, is crucial for that signature chewy texture.
Here’s the magic: The residual heat from the hot pan will continue to bake the cookie cake even after it’s out of the oven. If you bake it until it looks fully done and golden brown *in* the oven, it will likely become crispy or hard as it cools, losing that desired chewiness and making it harder to slice cleanly. So, that slightly underdone look is exactly what you want!
The recipe mentions that chilling the cookie cake after baking is essential. How important is this step, really?
This step is SUPER important! Please don’t skip it. Chilling the baked gluten-free cookie cake for 30-60 minutes (while still in the pan is fine!) is absolutely essential for two main reasons:
- Texture: It helps the fats in the cookie solidify slightly, resulting in a firmer, chewier texture.
- Slicing: A chilled cookie cake holds its shape much better, allowing you to get clean, sturdy slices without it crumbling or falling apart when you cut into it.
Think of it as letting the flavors and textures mature. It makes all the difference in getting those perfect, bakery-style slices!
What if I don’t have the specific 11.5″ round cookie cake pan? Can I use a different size or shape pan?
Great question! You definitely have options if you don’t have that exact pan. The goal is a relatively thin, large cookie:
- Rectangular Pan: You can easily bake this recipe in a 9×13-inch metal pan. It will result in a rectangular cookie cake that’s a bit thinner, so keep an eye on it as it might bake a minute or two faster.
- DIY Foil Pan: The original post links to instructions for making a DIY round pan using a large mixing bowl and aluminum foil. This works well, though because the heat distribution is different than a metal pan, a DIY pan might require an extra 4-6 minutes of baking time.
What won’t work is a standard round pizza pan, as it’s too large for this amount of dough and would result in a very flat, thin, and likely crispy cookie. Stick to a pan size that allows the dough to be spread about 1/2 inch thick for that ideal gluten-free cookie cake texture.
How should I store my gluten-free cookie cake? Will it dry out quickly?
Yes, gluten-free baked goods can sometimes dry out a little faster than their gluten counterparts, so proper storage is key to keeping your gluten-free cookie cake fresh! Here are the best ways:
- Unfrosted: Store the unfrosted cookie cake wrapped well in plastic wrap or in an airtight container at room temperature for up to 2 days.
- Frosted: Once you’ve added the buttercream frosting (which contains milk), it’s best to store the cookie cake (gently wrapped after the frosting sets) in the refrigerator, especially for longer storage or in warm temperatures.
Enjoying this gluten-free cookie cake within 2 days is ideal for the best texture. If you need to make it further in advance, consider baking the cookie layer, wrapping it tightly (unfrosted), and freezing it. Let it thaw completely before frosting and serving.
I followed the recipe, but when I tried to slice my gluten-free cookie cake, it crumbled or fell apart. What could have gone wrong?
Oh no, that can be frustrating! The most common culprits for a gluten-free cookie cake that crumbles when sliced are:
- Not enough chilling: Skipping or shortening the crucial chilling step is the number one reason slices fall apart. That time in the fridge allows the cake to firm up enough to hold its shape when cut.
- Over-baking: If the cookie cake was baked until it was fully golden brown and looked completely “done” in the oven, it likely became too dry and therefore crumbly when cooled. Remember, you want it to look slightly underdone when you pull it out!
Make sure you allowed it to cool completely on the counter *and* then chilled it for the recommended 30-60 minutes in the fridge before attempting to slice. Getting those baking and chilling times right will give you beautifully chewy, sturdy slices next time!
Can I make this gluten-free cookie cake dairy-free or even vegan?
Absolutely! With a few simple swaps, you can easily adapt this recipe to be a delicious vegan gluten-free cookie cake:
- Butter: Use a good quality vegan butter alternative in place of the dairy butter.
- Egg: Swap the large egg for a “flax egg” (whisk together 1 tablespoon of flax meal with 3 tablespoons of water and let it sit for 5-10 minutes until it becomes gel-like).
- Chocolate Chips: Ensure you use vegan-friendly chocolate chips.
- Buttercream: If you want to add the frosting, be sure to use vegan butter and a plant-based milk (like almond milk, soy milk, or oat milk) for the buttercream recipe.
Follow the rest of the instructions as written, and you’ll have a fantastic dairy-free and vegan version of this chewy treat!
Gluten-Free Chocolate Chip Cookie Cake
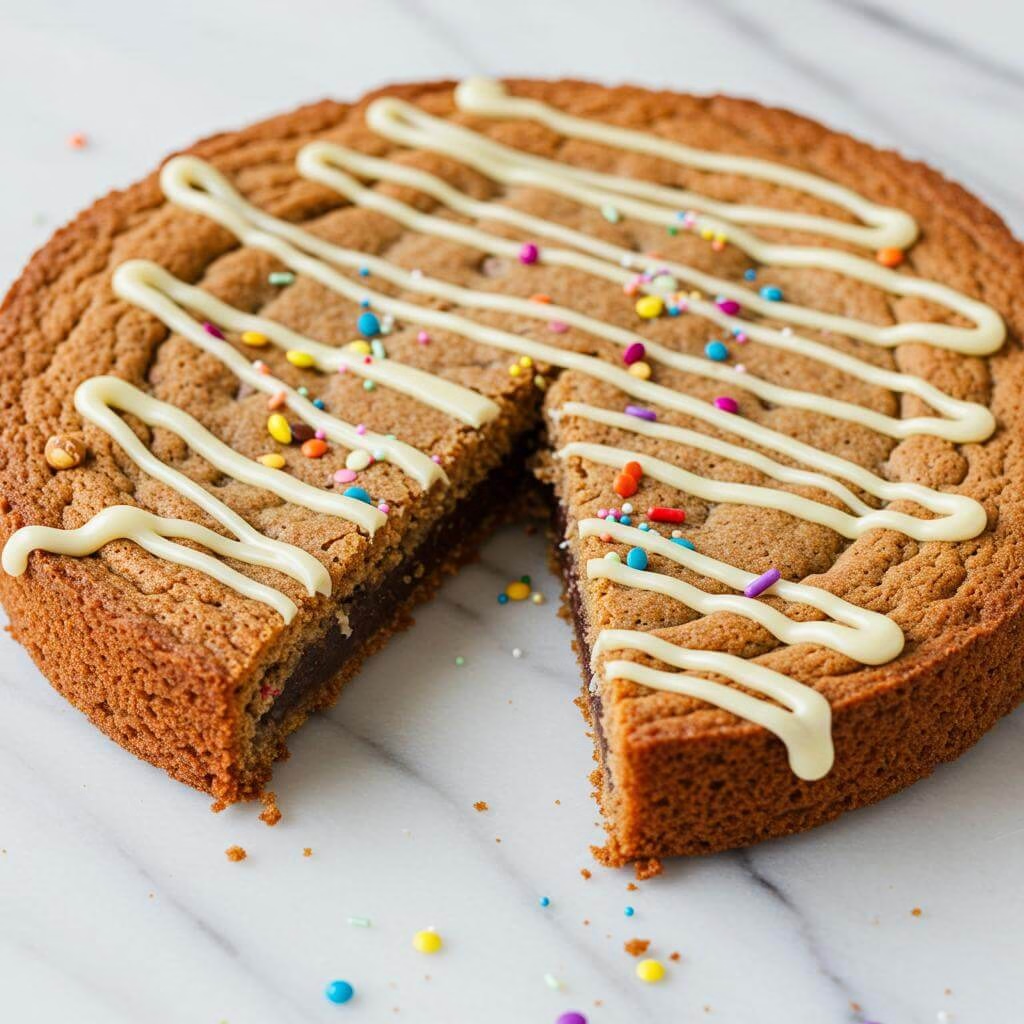
Gluten-Free Chocolate Chip Cookie Cake
Experience the ultimate chewy, sliceable gluten-free chocolate chip cookie cake! This recipe, perfected after countless batches, uses almond flour for an amazing texture that will make you cheer. It’s the best gluten-free cookie cake you’ve ever had.
Ingredients
12
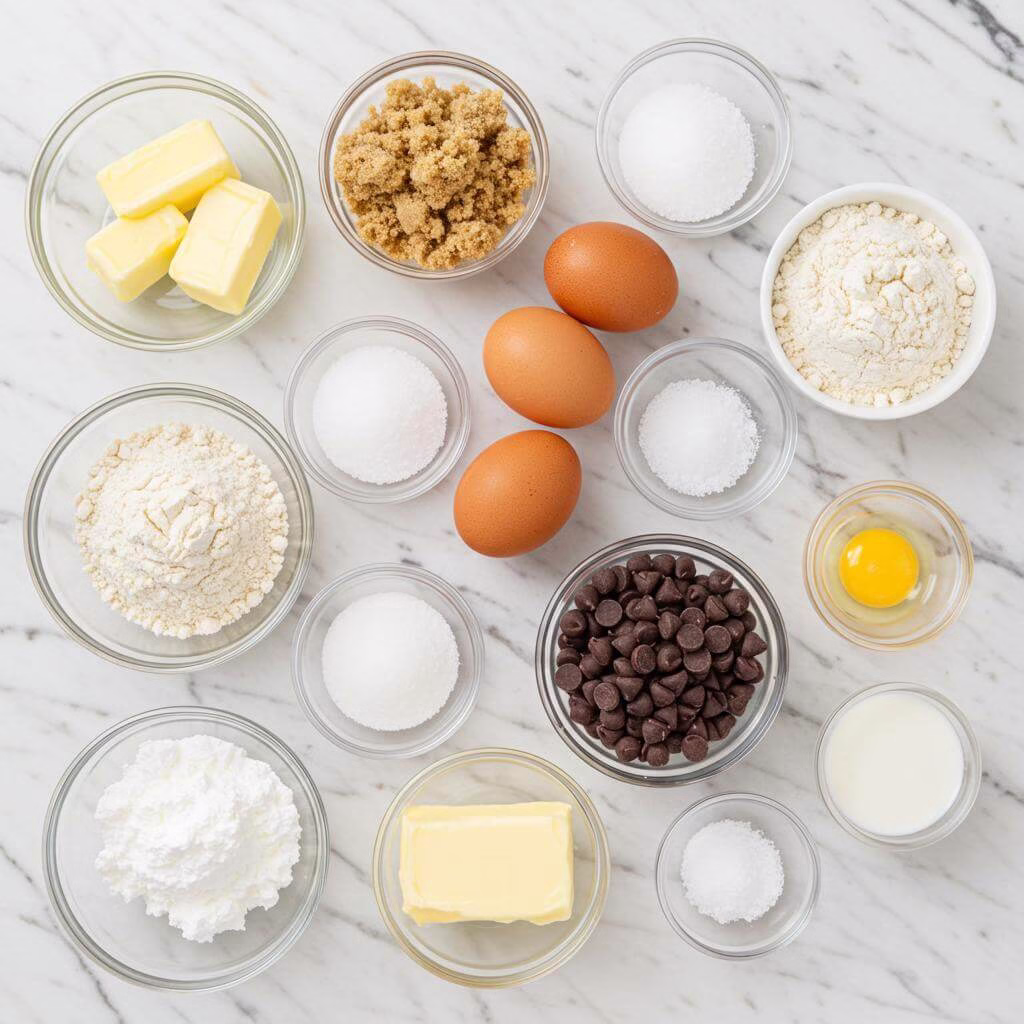
For the Chewy Gluten-Free Cookie Cake:
- ½ cup unsalted butter (You will be melting this)
- ½ cup light brown sugar
- ¼ cup granulated sugar
- 1 large egg
- 1 ½ teaspoon vanilla extract
- ½ teaspoon baking soda
- ¼ teaspoon baking powder
- ¼ teaspoon salt
- ¾ cup gluten-free all-purpose flour: I tested this recipe extensively using Bob’s Red Mill 1-to-1 gluten-free all-purpose flour, and that’s what I strongly recommend for consistent results and the best texture. A good GF blend provides the essential structure in gluten-free baking!
- ¾ cup almond flour: This is the secret ingredient for that signature chewy texture we all love in a classic cookie cake! Almond flour adds wonderful moisture and richness, making this gluten-free cookie cake truly special.
- 1 cup semi-sweet chocolate chips (You’ll be chopping ½ cup and adding the remaining ½ cup whole). We’ll chop half of these for little bursts of chocolate throughout and leave the other half whole for melty chunks – pure chocolate bliss!
For the Vanilla Buttercream Frosting:
- ¼ cup unsalted butter (softened to room temperature): Getting your butter nice and soft is crucial for a perfectly smooth, whip-able frosting.
- 1 ¼ cups powdered sugar (also known as confectioners’ sugar)
- ¾ teaspoons vanilla extract
- Pinch of Salt: Just a tiny bit of salt helps balance the sweetness!
- 1-2 tablespoons milk: You can use whole milk for a richer frosting, but any milk you have on hand will work. Start with less and add until you reach your desired consistency.
Equipment
- Oven
- Zip-top bag
- Rolling pin or heavy mug
- Microwave-safe bowl
- Medium mixing bowl
- Wooden spoon or sturdy spatula
- 11.5″ metal cookie cake pan (or 9×13″ pan)
- Parchment paper (optional)
- Wire cooling rack
- Electric mixer
- Piping bag with large star tip (or zip-top bag)
- Sharp chef’s knife
Instructions
*Optional: Removing from Pan:* If you lined your pan with parchment and want to remove the cake, first run a butterknife gently around the edges to loosen it. Place a flat serving platter or cutting board firmly over the pan, then carefully but quickly flip the pan over to release the cookie cake onto the platter. If it’s stubborn, a gentle tap or two on the bottom might help. Once released, place your final decorative plate over the cookie cake and flip it again so it’s right-side up on the plate you want to serve on.
Recipe Notes
- Pan Size: Don’t have the exact 11.5-inch metal cookie cake pan? No problem! You can confidently bake this recipe in a 9×13-inch metal pan for a rectangular cake (it will be a bit thinner) or even make a DIY foil pan following the instructions linked in the main post. You’ve got options!
- Make it Vegan: Looking for a vegan gluten-free cookie cake? It’s simple! Swap the egg for a flax egg (1 tbsp flax meal + 3 tbsp water, let sit for 5 mins), use a good quality vegan butter alternative, and be sure your chocolate chips are vegan-friendly. For vegan frosting, use vegan butter and plant-based milk. You can make this delicious GF treat work for your dietary needs!
- Frosting Fun: While the vanilla buttercream is classic, feel free to switch it up! You can use store-bought frosting or make chocolate frosting for a different flavor. Use different piping tips or even pipe designs or a birthday message directly onto your gluten-free cookie cake (you might need to double the frosting recipe for more coverage!). Consider adding colorful sprinkles to the border for a festive touch!
- Layer it Up: Feeling adventurous? You can bake this gluten-free cookie cake in a springform pan and layer it with ice cream for a show-stopping GF cookie ice cream cake! Or, take inspiration from the brownie pizza idea and bake a gluten-free brownie layer first, then bake this cookie cake on top after inverting the brownie layer – a true dessert masterpiece!
Nutrition (per serving)

My #1 Recommendation
Artisan Series 5 Quart Tilt Head Stand Mixer with Pouring Shield KSM150PS, Matte Black
(19676 reviews)
Elevate your gluten-free baking with this powerful and versatile 5-quart stand mixer. Its robust motor and multiple attachments make it perfect for everything from kneading dense doughs to whipping delicate meringues.
- 5-Quart stainless steel bowl with comfortable handle offers enough capacity to mix dough for 9 dozen cookies or 4 loaves of bread in a single batch.
- Tilt-head design allows clear access to the bowl and attached beater or accessory so you can easily add ingredients for a recipe.
- 10-speed slide control ranges from a very fast whip to a very slow stir, perfect for any task or recipe.
As an Amazon Associate, I earn from qualifying purchases. This helps support the blog at no extra cost to you.
Loved Our Ultimate Gluten-Free Cookie Cake?
You adored the cookie cake… now imagine 5 MORE mind-blowingly delicious (and easy!) gluten-free & dairy-free dessert recipes landing straight in your inbox. For FREE!

Download Your FREE “Sweet Cravings” Recipe Collection & Get:
-
5 Exclusive Reader-Favorite Recipes not found on the blog (think fudgy brownies, perfect cookies & more!). -
Each recipe is quick, easy to follow, and uses simple, everyday ingredients. -
100% Gluten-Free & Dairy-Free, so you can indulge without worry. -
Bonus tips to make your gluten-free baking a guaranteed success every time!
Get My FREE Dessert Recipes!
Enter your email on the next step for instant access. It’s 100% FREE!