
This is the BEST gluten free pizza dough recipe! It’s so easy to make, perfectly chewy and requires no kneading. Plus, this crust can be frozen for easy dinners throughout the week!

My go-to gluten free pizza dough! This crust recipe requires no kneading, is totally freezer friendly and can be made into a thick or thin crust depending on what you like!
It only requires about 15 minutes of prep time, plus an hour to let the dough rise and then you’re good to go!
Pizza was one of those foods I missed most when I was diagnosed with Celiac, and while I love a cauliflower crust every now and then, sometimes you just need something that more closely replicates the real deal.
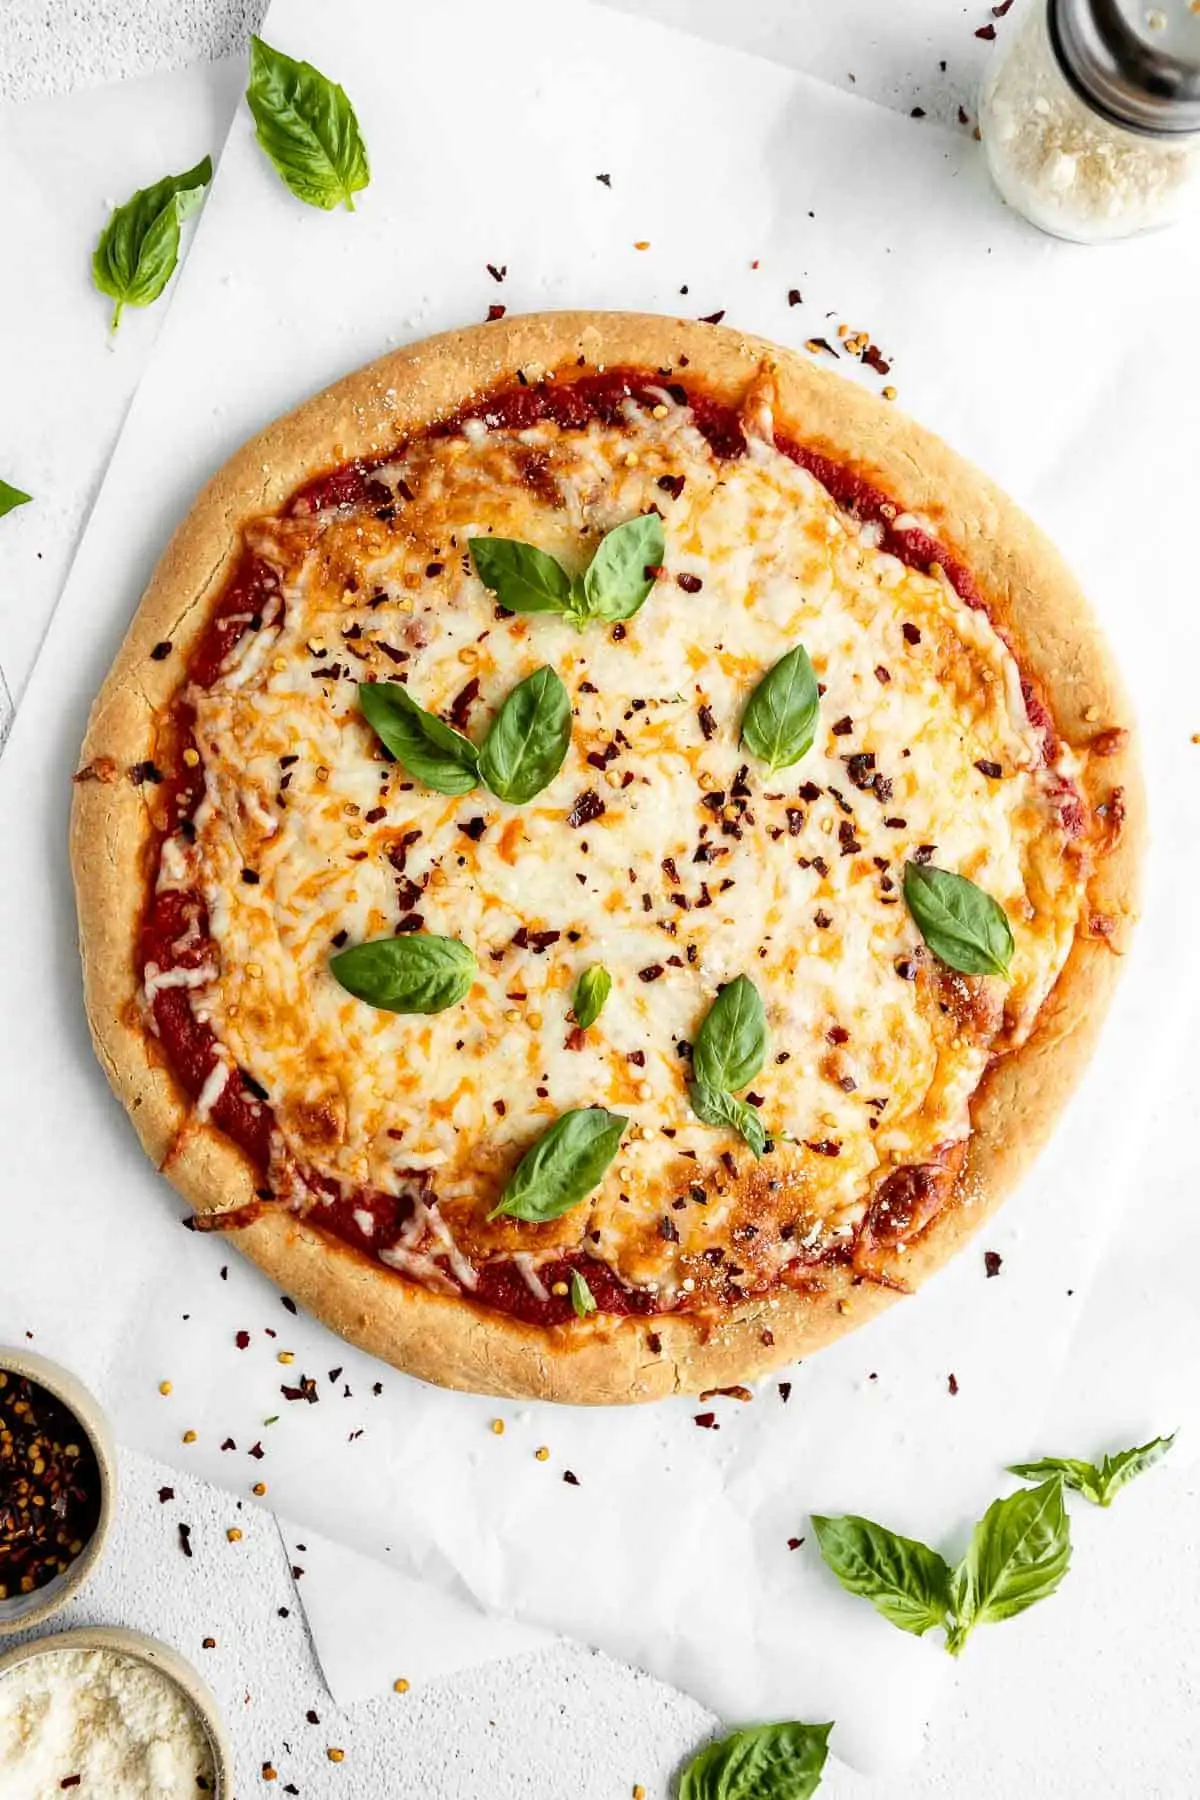
This crust is thick and chewy and will definitely become a regular in your meal rotation!
While this recipe is not vegan friendly, you can try my vegan and gluten free pizza crust instead which is just as delicious and made without egg! Try my gluten free risotto next!
Key ingredients
FLOUR. I used and recommend the Bob’s Red Mill 1:1 Baking Flour. It will give a fluffy texture but still hold everything together really well thanks to the xanthan gum.
If you use a different gluten free flour blend, make sure it has xanthan gum, but also understand it may yield a different result.
EGG. The egg is key in the crust for the best chewy texture. I would suggest my vegan gluten free crust instead!
YEAST. Yeast is key for getting that fluffy texture! You need instant active yeast for this recipe.
WATER. We’ll activate the yeast with some sugar and warm water, which will also add moisture to the dough.
OIL. Olive oil not only adds a lot of fresh flavor to the dough, but ensures it’s nice and moist. I don’t recommend any subs here.
How to make gluten free pizza dough
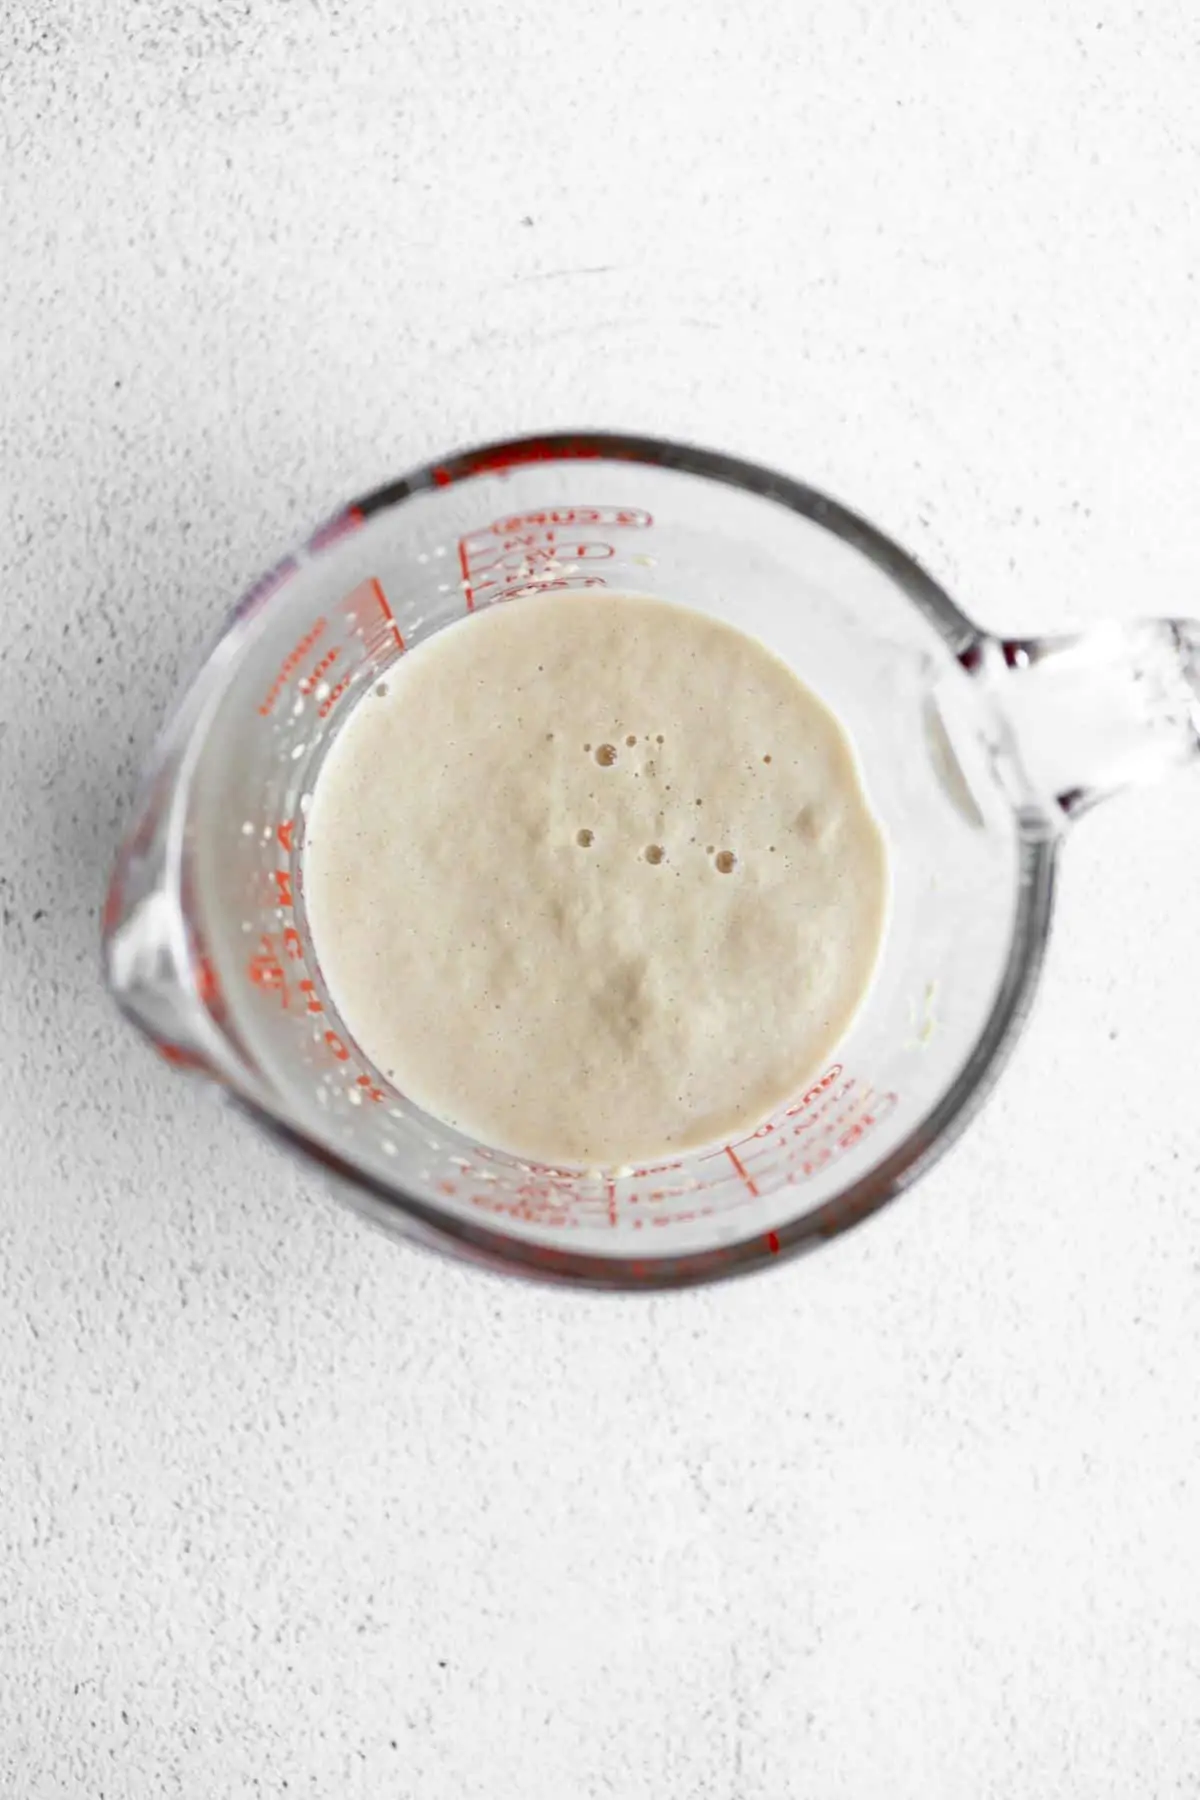
Microwave the water for about 30 seconds or until it reaches 110-115 degrees Fahrenheit. You don’t want it too hot or it will kill the yeast, but it needs to be warm enough to activate the yeast.
Mix in the sugar and one packet of yeast, stir together and let sit for 5 minutes. It should get quite foamy on top, which means the yeast is active and working!
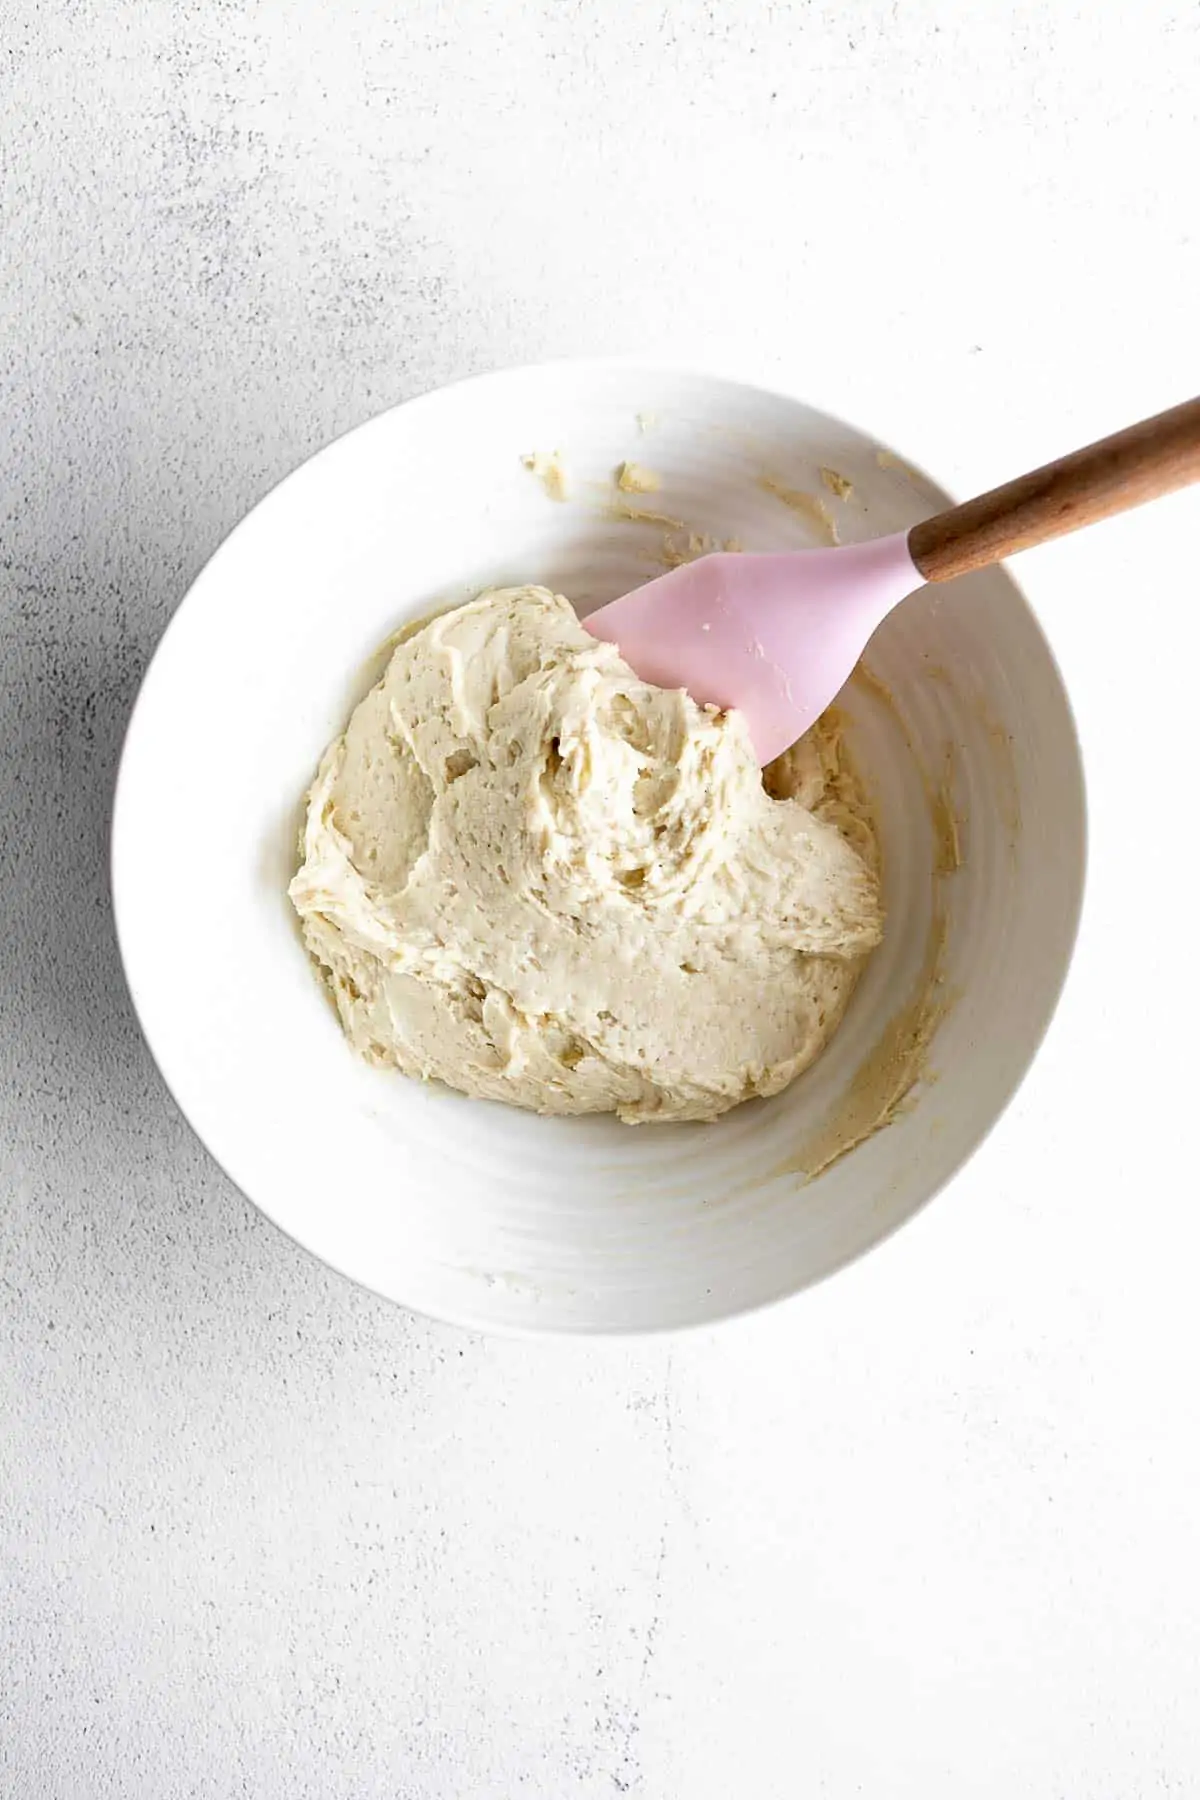
Meanwhile, whisk together the flour, baking powder and salt. Add in the whisked egg, vinegar, olive oil and water/yeast mixture.
Mix together with a wooden spoon or rubber spatula until a dough forms. It will likely be a bit sticky at this point.
Cover with plastic wrap then cover with a towel and let sit in a warm place for 1 hour to rise. I like to put it in the oven.
After 1 hour, preheat the oven to 425 and let the dough sit in the fridge for 15 minutes. This will make it easier to roll out.
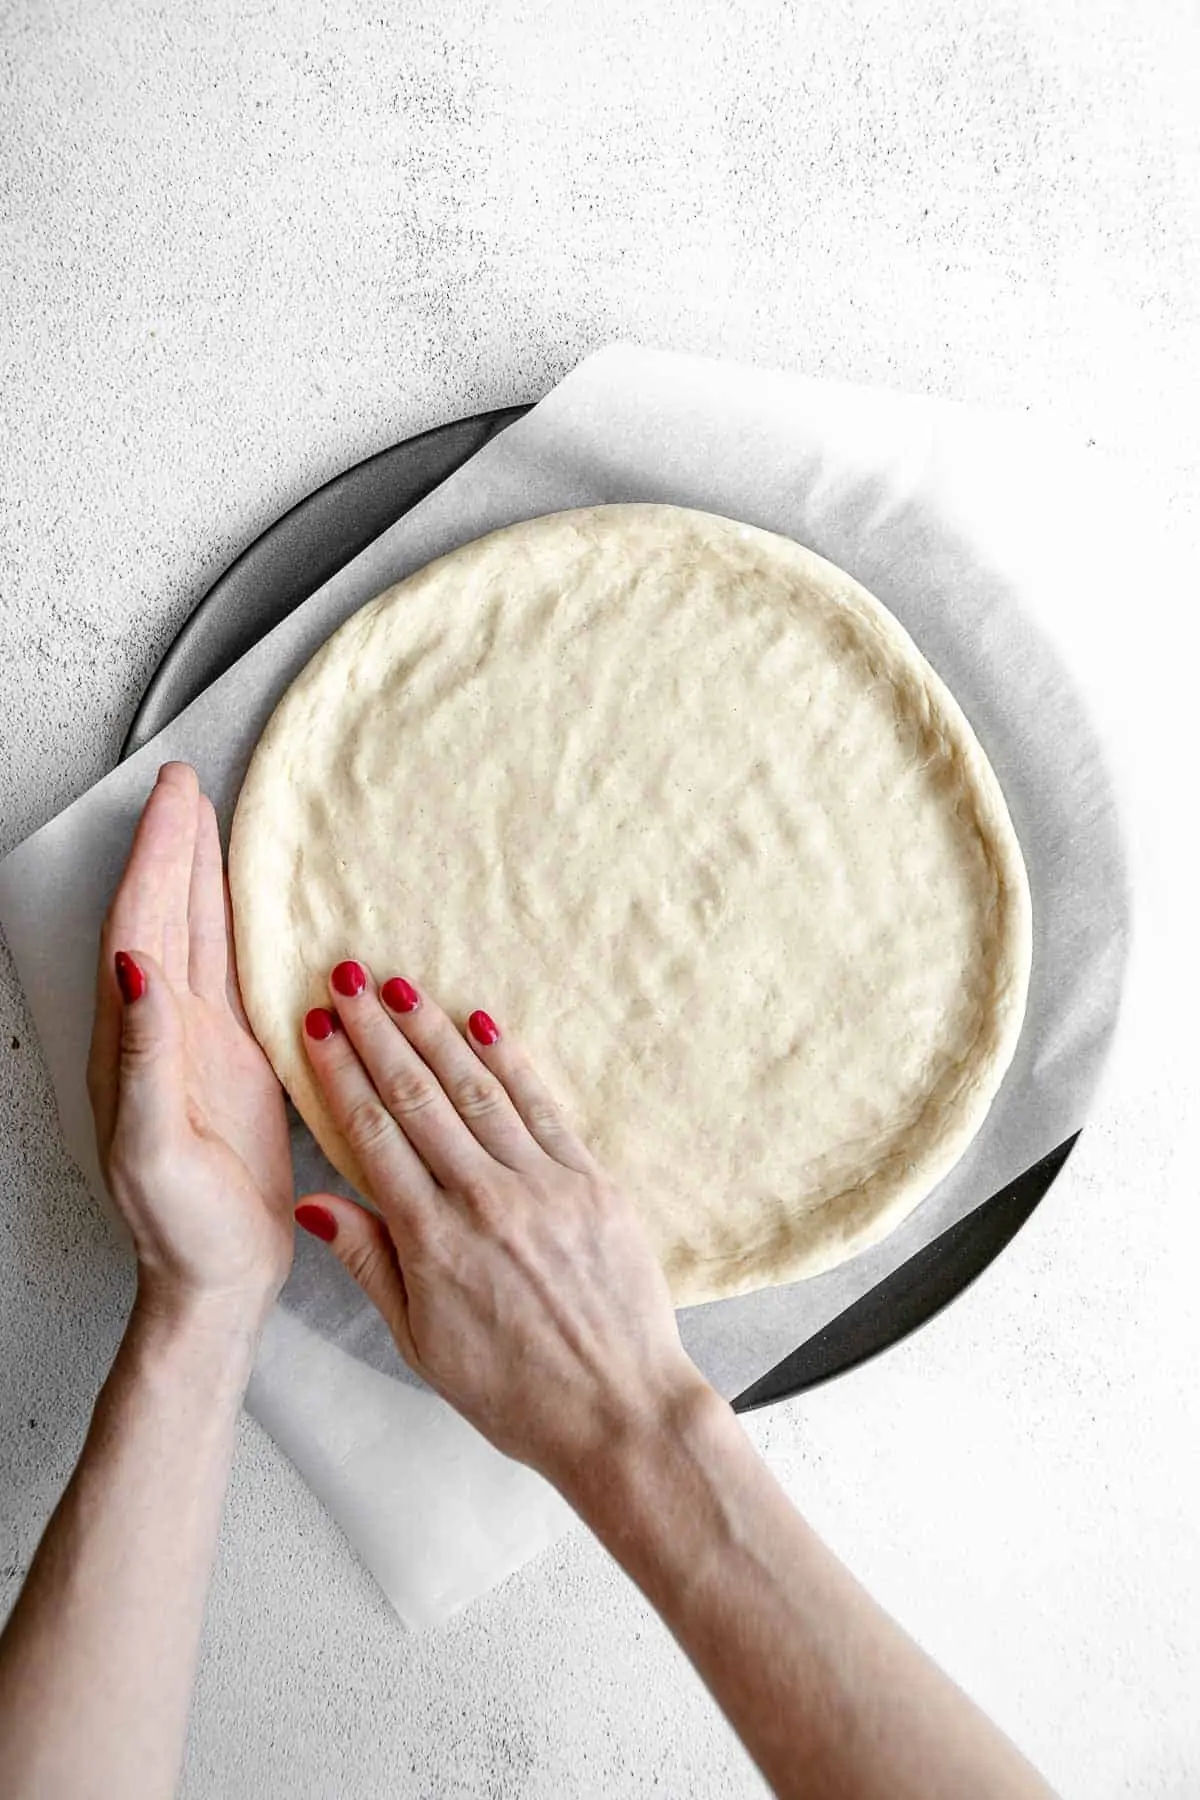
Add the dough to a floured piece of parchment paper and knead in 1-2 more tablespoons of flour until it forms into a smooth ball. Avoid adding too much flour, just enough until a ball dough forms and the dough isn’t as sticky.
Use a floured rolling pin and roll into a roughly 12 inch circle. I like to keep the crust fairly thick, you will be able to get a larger pizza or two smaller pizza if you prefer it thinner, just depends on your preference.
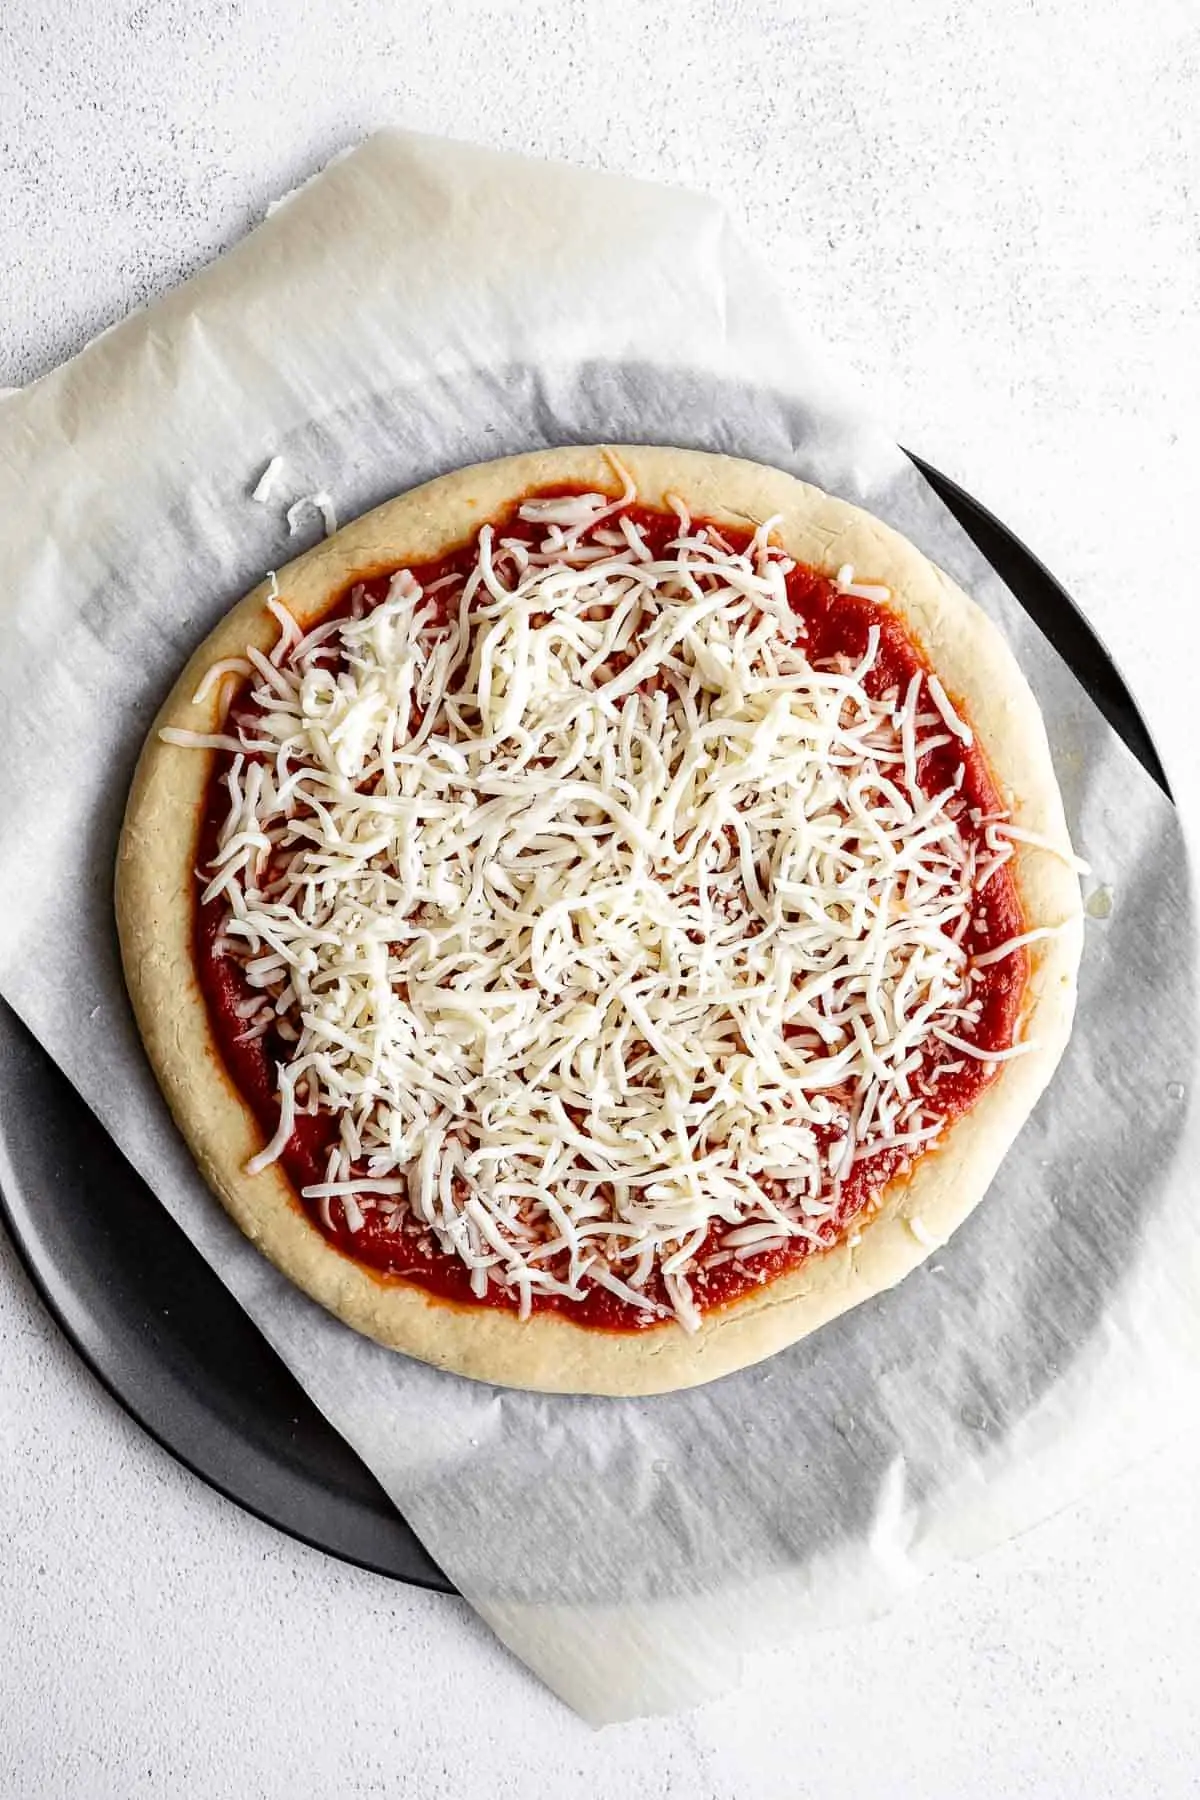
Generously brush the top of the crust with olive oil and bake for 12 minutes.
Remove from the oven, add sauce and any desired toppings and bake an additional 8-12 minutes. Feel free to bake for longer if you like it crispier or shorter if you prefer it doughier.
Remove from the oven and let cool for a few minutes, then slice and enjoy!
Working with yeast
I used to be very intimidated to work with yeast, but it truly is much easier than you may think! There are just a few key things to keep in mind.
First, make sure you’re using instant yeast for this recipe. It is key to ensure we don’t need to let the dough rise twice.
Second, the temperature of the water can’t be too hot or it will kill the yeast. Around 110 degrees Fahrenheit is what we’re aiming for.
Finally, be sure to let the dough rise for the full hour. It should roughly double in size which means the yeast is active and the crust will be nice and chewy!
On the topic of yeast, no, you cannot make this pizza dough without yeast. The yeast is super important in this dough and gives it a classic chewy and fluffy texture. Be sure to use active instant yeast which requires just a short proof time of 1 hour.

Why is it sticky?
This gluten free pizza dough is going to start out a bit sticky. We want to have plenty of moisture in the dough while it is rising to ensure the yeast can remain active, so we’ll add extra flour to the dough just before it gets rolled out.
To help with some of the stickiness, we will refrigerate the dough for about 15 minutes after it rises. This will make it a bit easier to work with, especially once a bit of extra flour is added.
Prep it in advance!
You can make this dough up to 24 hours in advance. Let it rise at room temperature for 1 hour, then cover tightly and transfer to the fridge for up to 24 hours. Roll out as usual, par-bake, top and bake again!
How to freeze pizza dough
To freeze this gluten free pizza dough, follow all of the steps as usual, and after you par-bake the crust, let it cool then freeze for up to 1 month. I suggest wrapping it tightly in plastic wrap to prevent any freezer burn.
When you’re ready to eat, just add your toppings and bake at 425 for about 10-15 minutes.

-
GET YOUR COOKBOOK
-
%20(2).png)
-
.png)
-
Ingredients
- 1 packet instant yeast
- ¾ cup + 2 tablespoons water
- 1 tablespoon white sugar
- 2 ½ cups gluten free all purpose baking flour* with xanthan gum
- 1 teaspoon salt
- 1 teaspoon baking powder
- 5 tablespoons olive oil
- 1 egg
- 1 teaspoon vinegar white or apple cider
US Customary – MetricInstructions
-
Microwave the water for about 30 seconds or until it reaches 110-115 degrees Fahrenheit. You don't want it too hot or it will kill the yeast, but it needs to be warm enough to activate the yeast.
-
Mix in the sugar and one packet of yeast, stir together and let sit for 5 minutes.
-
Meanwhile, whisk together the flour, baking powder and salt. Add in the whisked egg, vinegar, olive oil and water/yeast mixture.
-
Mix together with a wooden spoon or rubber spatula until a dough forms. It will likely be a bit sticky at this point.
-
Cover with plastic wrap then cover with a towel and let sit in a warm place for 1 hour to rise. I like to put it in the oven.
-
After 1 hour, preheat the oven to 425 and let the dough sit in the fridge for 15 minutes. This will make it easier to roll out.
-
Add the dough to a floured piece of parchment paper and knead in 1-2 more tablespoons of flour until it forms into a smooth ball. Avoid adding too much flour, just enough until a ball dough forms and the dough isn't as sticky.
-
Use a floured rolling pin and roll into a roughly 12 inch circle. I like to keep the crust fairly thick, you will be able to get a larger pizza or two smaller pizza if you prefer it thinner, just depends on your preference.
-
Generously brush the top of the crust with olive oil and bake for 12 minutes.
-
Remove from the oven, add sauce and any desired toppings and bake an additional 8-12 minutes. Feel free to bake for longer if you like it crispier or shorter if you prefer it doughier.
-
Remove from the oven and let cool for a few minutes, then slice and enjoy!
Notes
Bake times will vary slightly depending on how thick you make the crust. Thicker crust will require a long par-bake time to ensure the center isn’t doughy. Start with the recommended 12 minutes and add more as needed. If you like thin crust, you won’t need to bake for as long, unless you like it really crispy! You can sub the sugar with 1 tablespoon of honey if you prefer. I used Bob’s Red Mill 1:1 Baking Flour, which I highly recommend here.