Okay, so you’ve been there, right? The endless quest for a truly great gluten free bread recipe? The loaves that promise fluffy interiors but turn out dense bricks? Or the ones that crumble into dust the moment you try to slice them? I know the feeling. For years, finding a reliable gluten free bread recipe felt like chasing a baking unicorn. I tried countless combinations, tweaking flours, hydration levels, and techniques, often ending up with something… less than ideal. But the dream of a chewy, open-crumbed, crusty gluten free bread recipe kept me going. Through trial and error, through flops and near-misses, I finally cracked the code. This isn’t just *a* gluten free bread recipe; it’s the culmination of that persistent search. It kneads, it rises, and it actually delivers that classic bread experience. It’s the perfect partner for your morning toast, a delicious base for a simple sandwich, or even served alongside a comforting bowl of lentil salad. Forget those frustrating bricks of the past. This gluten free bread recipe is proof that authentic, bakery-quality bread is absolutely possible without gluten. It’s like the satisfying feeling of mastering gluten-free banana bread or a beautiful gluten-free coffee cake, but in a rustic loaf. Get ready to make your best gluten free bread recipe yet!
Tips for Recipe Success
- Harness the Power of Psyllium Husk: This ingredient is non-negotiable in this recipe! It acts as the crucial gluten substitute, forming a gel when mixed with water. This gel provides the structure and elasticity needed for the dough to be kneaded, rise, and develop that characteristic chewy, open crumb in your baked loaf.
- Measure by Weight for Accuracy: Gluten-free flours vary greatly in weight depending on how they are scooped. Using a kitchen scale to measure ingredients in grams is significantly more accurate than volume measurements (cups), ensuring consistent results every time you bake this gluten free bread.
- Steam is Key for Oven Spring: Don’t skip the step of creating steam in your oven during the initial baking phase! The steam keeps the crust pliable, allowing the loaf to expand maximally (oven spring) before the crust sets. This contributes to a taller, better-textured loaf.
- Patience in Cooling Pays Off: It’s tempting to slice into warm bread, but letting your gluten-free loaf cool completely on a wire rack is crucial. This allows the internal structure (the crumb) to set properly, preventing a gummy texture and ensuring you get that desired soft, chewy interior.
- Ensure Your Yeast is Active: Before combining all the ingredients, take the few minutes required to activate your yeast with warm water and sugar. Waiting for it to become bubbly and frothy confirms your yeast is alive and ready to leaven your dough effectively, leading to a good rise.
Essential Equipment for This Recipe
To prepare this delicious recipe, you’ll need the following kitchen tools:
- Mixing Bowls – A set of mixing bowls in various sizes is essential for prepping different ingredients.
Find Mixing Bowls on Amazon - Measuring Cups and Spoons – Accurate measurements are key to baking success!
Find Measuring Cups and Spoons on Amazon - Baking Sheets – For evenly baked goods.
Find Baking Sheets on Amazon - Whisks – Perfect for beating eggs and combining wet and dry ingredients.
Find Whisks on Amazon - Spatulas – Essential for scraping bowls and folding ingredients.
Find Spatulas on Amazon - Food Processors – Speeds up the preparation process and ensures smooth batter.
Find Food Processors on Amazon - Saucepans – A saucepan is crucial for heating liquids and making sauces.
Find Saucepans on Amazon - Chef’s Knives – A high-quality chef’s knife makes prepping ingredients a breeze.
Find Chef’s Knives on Amazon - Cutting Boards – Protect your countertops with a sturdy cutting board.
Find Cutting Boards on Amazon
Frequently Asked Questions
What exactly is psyllium husk, and is it really essential for this gluten free bread recipe? Can I swap it with something else?
Great question! Psyllium husk is a crucial ingredient in this particular gluten free bread recipe, and honestly, there’s no direct substitute that will give you the same results. When mixed with water, it forms a gel that acts as the primary binder, mimicking the structure and elasticity that gluten provides in traditional bread. This is what allows the dough to be kneaded and shaped, helps it trap gases for rising, and gives the final loaf its wonderful chewy texture and open crumb. You cannot skip it or swap it for things like xanthan gum or other binders, as this recipe is specifically formulated around psyllium. If you only have psyllium husk powder instead of whole husks, remember to use only 75% of the weight listed in the recipe.
My dough feels much stickier and less elastic than regular wheat dough. Did I do something wrong?
Nope, you’re doing great! It’s totally normal for gluten-free dough, especially one using psyllium as the main binder, to feel different from wheat dough. It will be stickier and won’t have that strong, stretchy elasticity you might be used to. As you knead (by hand or mixer), it should become smoother and pull away from the sides of the bowl, but it won’t feel like windowpane dough. The psyllium gives it enough structure to shape, but it won’t stretch endlessly. If it feels excessively sticky and hard to handle, lightly oiling your hands and work surface (rather than adding more flour) is the best trick!
I followed the instructions, but my gluten free bread didn’t seem to double in size during the rise times. What could be the reason?
Oh, that can be frustrating! The most common culprit for bread not rising is inactive yeast. Did your yeast/sugar/water mixture get nice and bubbly and frothy in step 1? If not, the yeast wasn’t active, and the dough won’t rise. Another factor is temperature – yeast works best in a warm environment. Make sure your water is warm (not hot!) and the place you put the dough to rise is cozy. While it might not double *exactly*, you should definitely see noticeable growth. Even if the rise is shy of doubled, bake it anyway! It might be a bit denser, but it can still be delicious. Always check your yeast’s expiry date!
How do I get that amazing, crispy, caramelised crust like yours on my gluten free bread?
Achieving that perfect crust is one of the most rewarding parts of this gluten free bread recipe! The keys are heat and steam. Make sure your oven is fully preheated to a scorching 480°F (250°C) and that your cast iron skillet, Dutch oven, or combo cooker has been preheating for a full 30-45 minutes. The initial high heat helps the loaf spring up. Steam, added either by the water tray/ice cubes in a skillet or trapped in a closed Dutch oven, keeps the crust soft initially so the bread can expand. After the first 20 minutes, removing the steam and lowering the temp to 450°F (230°C) allows the crust to finally crisp up and deepen in color. Don’t be afraid to bake it until it’s a deep brown – that’s where the flavor is!
This recipe uses specific flours (buckwheat, brown rice, potato starch). Can I just use a standard store-bought gluten-free all-purpose flour blend instead?
This specific gluten free bread recipe is carefully balanced using the combination of flours listed, along with the psyllium husk binder, to achieve a particular texture and flavor profile that truly mimics traditional artisan bread. Unfortunately, substituting with a standard all-purpose gluten-free blend likely won’t yield the same results. These blends vary hugely in composition and often contain gums like xanthan, which behave differently than psyllium alone as the primary binder. While we offer specific substitutions within the recipe for individual flours (like millet for brown rice), using a pre-made blend hasn’t been tested and isn’t recommended if you want to replicate this specific loaf with its unique chew and crumb structure. Sticking to the flours outlined is the best way to guarantee success with this recipe!
How long will this gluten free bread keep, and can I freeze portions?
Your delicious homemade gluten free bread will keep well for 3-4 days stored in a closed container or wrapped in a tea towel in a cool, dry place. And YES, it freezes beautifully! Freezing is a fantastic way to extend its life. For best results, slice the cooled loaf completely, then freeze the slices in a freezer-safe bag or container, perhaps with small pieces of parchment paper between them so they don’t stick. This way, you can pull out just a slice or two as needed! You can toast slices straight from frozen.
The loaf smells incredible right out of the oven! Do I really need to wait until it’s completely cool before cutting into it?
We feel your pain! It’s arguably the hardest part of baking bread! But yes, for the absolute best texture, waiting until the loaf is completely cool is highly recommended, even for this amazing gluten free bread recipe. As the bread cools, the internal structure (the crumb) sets properly. Cutting into hot bread can make the inside seem gummy or dense. The post mentions that cutting when it’s just lukewarm is *okay* if you absolutely can’t wait, but cutting it while truly hot will compromise the texture you worked so hard to achieve. Patience here really pays off for a perfect slice!
Gluten Free Bread Recipe: The Only Recipe You’ll Need!
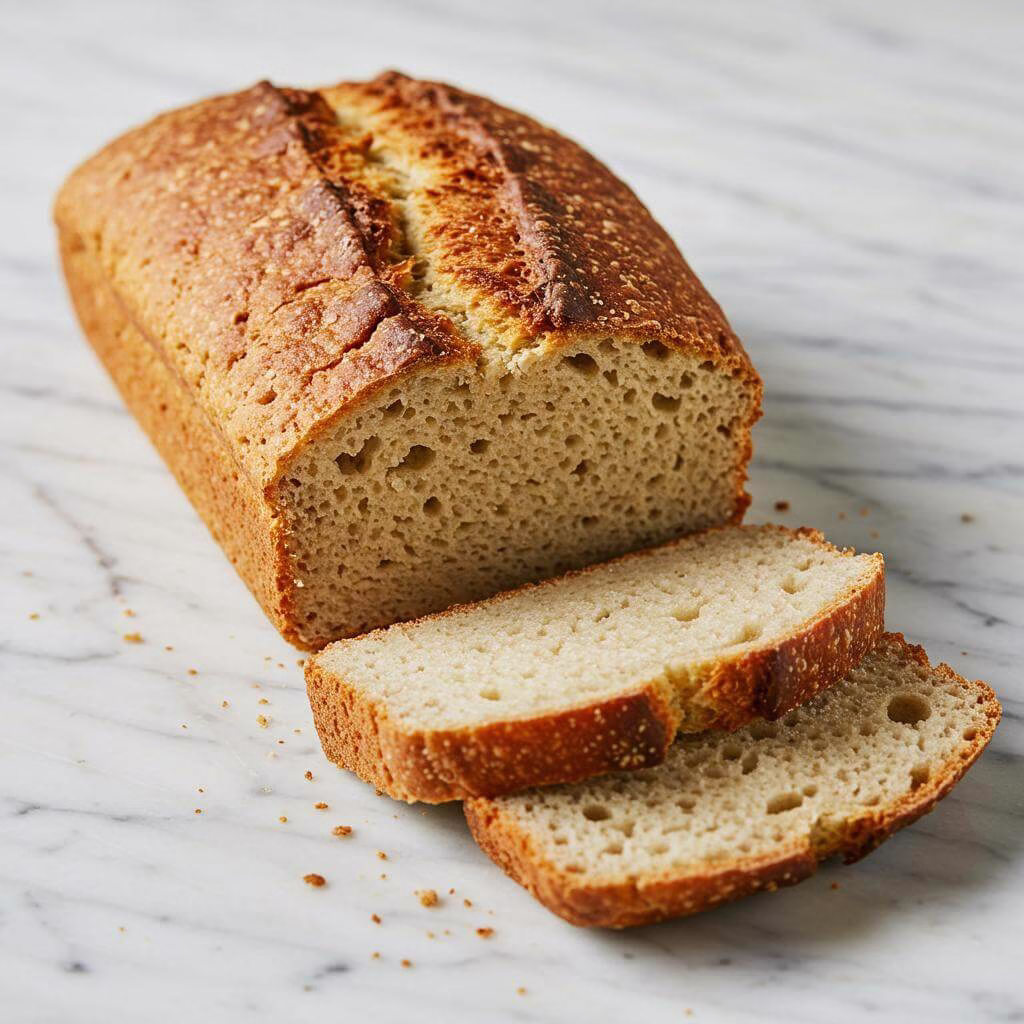
Gluten Free Bread Recipe: The Only Recipe You’ll Need!
Forget those frustrating bricks of the past. This gluten free bread recipe is proof that authentic, bakery-quality bread is absolutely possible without gluten. It kneads, it rises, and it actually delivers that classic bread experience.
Ingredients
12
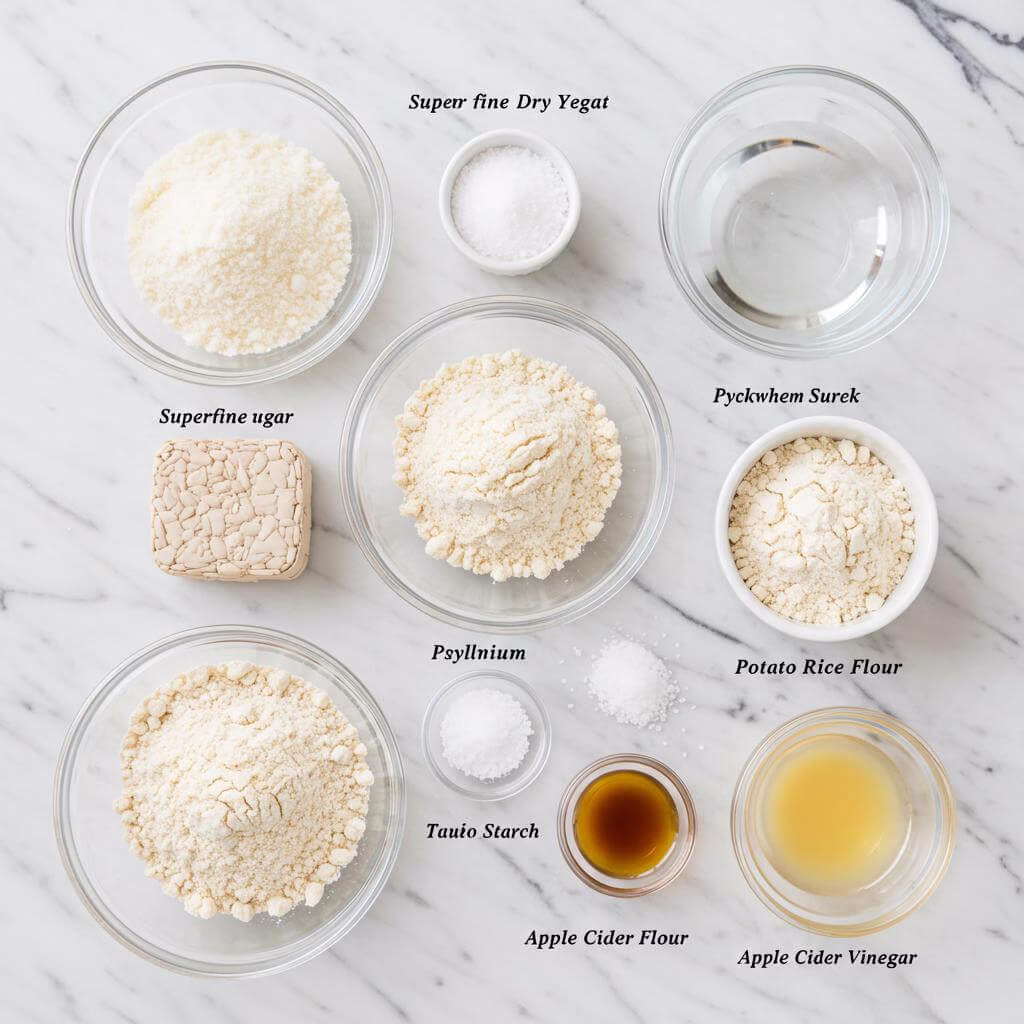
- 8 g active dried yeast (2 1/2 tsp)
- 20 g superfine/caster sugar (2 tbsp)
- 390 g warm water, divided (1 1/2 cups + 2 tbsp)
- 20 g psyllium husk (rough husk form) (1/4 cup)
- 130 g buckwheat flour (3/4 cup + 3 tbsp)
- 100 g potato starch (1/2 cup + 3 tbsp) (NOTE: this is different from potato flour)
- 90 g brown rice flour (1/2 cup + 2 tbsp) (needs to be very finely ground, “superfine”)
- 10 g table or sea salt (2 tsp)
- 12 g apple cider vinegar (2 tsp)
- A little neutral oil, for greasing
- A little brown rice flour, for dusting
Equipment
- Small bowls (2)
- Whisk
- Large mixing bowl
- Kitchen scale (recommended)
- Stand mixer with dough hook (optional)
- Damp tea towels
- 7-inch round proofing basket (or bowl)
- Cast iron skillet, Dutch oven, or combo cooker
- Baking tray (if using skillet for steam)
- Baking parchment paper
- Pizza peel or flat baking sheet
- Sharp knife or bread lame
- Oven mitts
- Wire cooling rack
Instructions
Let’s get the yeast ready! In a small bowl, combine the active dried yeast (8g or 2 1/2 tsp) and superfine/caster sugar (20g or 2 tbsp) with 150g (1/2 cup + 2 tbsp) of warm water. The water should feel comfortably warm to the touch, not hot (think bathwater!). Give it a gentle stir. Set this bowl aside in a warm spot for . You’re looking for the mixture to become noticeable bubbly and frothy on top – this tells you your yeast is alive and active, ready to make your gluten free bread rise! If it doesn’t get bubbly, your yeast might be old, and it’s best to start with a fresh packet.
While the yeast is blooming, prepare the psyllium gel. This is a MAGIC ingredient for gluten free bread recipe success! In a separate small bowl, whisk together the psyllium husk (rough husk form) (20g or 1/4 cup) and the remaining 240g (1 cup) of water. Stir it really well. You will see it start to thicken almost immediately into a gel-like consistency. It will become thick and jelly-like within about 30 seconds. This gel acts like gluten, giving your dough structure and elasticity. (Note: If you only have psyllium husk powder, use 75% of the weight listed here, combining 15g powder with 240g water). You can find psyllium husk for baking online easily.
In a large mixing bowl, measure out your lovely gluten-free flours and salt. It’s highly recommended to use a kitchen scale for the most accurate results in gluten free bread recipe baking – it makes a big difference! Combine the buckwheat flour (130g or 3/4 cup + 3 tbsp), potato starch (100g or 1/2 cup + 3 tbsp – remember this is starch, not potato flour!), superfine brown rice flour (90g or 1/2 cup + 2 tbsp), and salt (10g or 2 tsp). Whisk or stir these dry ingredients together until they are completely and evenly combined. This distributes the leavening and flavor throughout the mix.
Now, bring everything together! Make a well in the center of your dry ingredients. Pour in the bubbly yeast mixture, the thick psyllium gel you just made, and the apple cider vinegar (12g or 2 tsp). The apple cider vinegar gives the yeast an extra little boost!
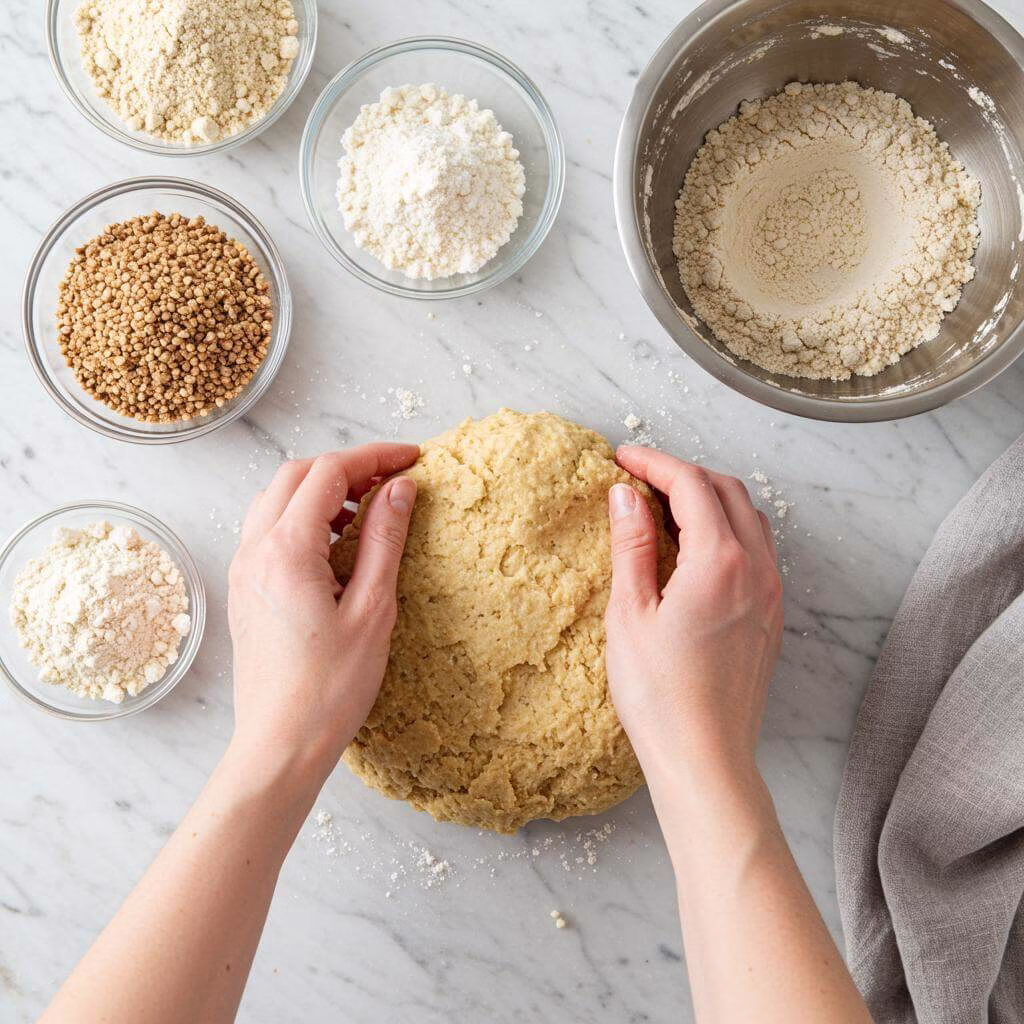
Time to mix and knead the dough! You can do this by hand or with a stand mixer fitted with a dough hook. Mix the wet and dry ingredients until they are just combined. Then, continue kneading for about . If kneading by hand, you can squeeze the dough through your fingers. Don’t expect the super-stretchy texture of wheat dough – gluten free bread dough is different! It will be stickier and less elastic. What you’re looking for is a dough that becomes smoother and starts to pull away from the sides of the bowl. After several minutes, it should be cohesive enough to form into a rough ball. You’re doing great!
Get ready for the first rise! Lightly oil a clean work surface and your hands with a little neutral oil. This helps prevent the sticky dough from sticking everywhere. Gently turn the dough out onto the oiled surface. Spend a minute gently kneading or shaping it into a smooth ball. The oil helps you handle it without adding extra flour, which can make the dough dry.
Perform the first rise (Bulk Fermentation). Lightly oil a clean bowl. Place the shaped dough ball into the oiled bowl, seam side down. Cover the bowl with a damp tea towel. Find a warm place in your kitchen (like near a sunny window or in a slightly warm oven that’s been turned off) and let the dough rise for about . During this time, the dough should approximately double in volume. This first rise is crucial for developing that wonderful deep bread flavor in your finished gluten free bread recipe!
After the bulk fermentation, it’s time for the final shaping. Turn the risen dough out onto a lightly floured surface. Using brown rice flour for dusting works well here. Gently deflate the dough slightly. Use the heel of your hand to shape it into a tight ball again – you can do this by folding sections of the dough back onto themselves and rotating as you go. It might not be perfectly smooth at first, just keep gently working it until you’re happy with the shape. Once formed, flip the dough seam side down onto a part of your surface that isn’t floured. Gently rotate it in place a few times to help seal the seams underneath.
Start the final proof (Second Rise). Carefully transfer the shaped dough into a proofing basket that you’ve generously dusted with brown rice flour (a 7-inch round proofing basket works perfectly). Place the dough in the basket seam side *up*. This way, when you flip it out, the smooth top will be ready for scoring. If needed, gently pinch the seams together at the top to close them. Cover the basket with a damp tea towel and let it proof in a warm place for , or until the dough has approximately doubled in volume again. This rise prepares the loaf for baking!
About before the final proof is finished, preheat your oven and baking vessel to a scorching hot 480°F (250°C). Place your cast iron skillet on the middle rack, or your Dutch oven or combo cooker on the lower middle rack. If you’re using a cast iron skillet, place an empty baking tray on the bottom rack of the oven as well – this tray will hold water later to create steam. It’s essential that your skillet, Dutch oven, or combo cooker gets fully preheated to help create that amazing crust and oven spring.
Your dough should now be beautifully proofed and doubled in size! Carefully turn the dough out of the proofing basket onto a piece of baking parchment paper. Using a pizza peel or a flat baking sheet underneath the parchment can help with the transfer step coming up. Use a sharp knife or a bread lame to score the top of the loaf with a pattern of your choice. A simple cross is a great place to start, about 1/4 to 1/2 inch deep. Scoring allows the bread to expand in a controlled way as it bakes.
Now for the slightly tricky but exciting part: transferring the dough into the hot vessel! Carefully take the preheated cast iron skillet, Dutch oven, or combo cooker out of the oven (use **oven mitts**!). Gently slide the dough on the baking parchment paper into the hot vessel. If using a skillet or combo cooker, the pizza peel or baking sheet method is easiest. For a Dutch oven, you can use the edges of the parchment paper as handles to lower the dough in. Be careful, it’s hot!
Add steam for the initial bake. Steam is key for allowing the crust to stay soft long enough for the loaf to expand rapidly in the hot oven (this is called oven spring!).
- If using a skillet: Place the skillet with the dough back into the oven on the middle rack. Carefully pour hot water into the empty baking tray you placed on the bottom rack earlier. For extra steam, you can add 3-4 ice cubes around the base of the bread, between the parchment paper and the skillet wall. Close the oven door immediately.
- If using a Dutch oven or combo cooker: Add 3-4 ice cubes around the base of the bread inside the vessel (between the parchment paper and the wall). Close the lid tightly and carefully place the Dutch oven/combo cooker back into the preheated oven.
Bake with steam at 480°F (250°C) for . This initial high heat and steam are vital for maximum oven spring and a beautiful crust. **Do not open the oven door or the Dutch oven lid** during this time – we need to keep that steam trapped!
After the initial 20 minutes of steam baking, it’s time to switch gears. Carefully remove the steam source:
- If using a skillet: Carefully pull out the bottom tray of water.
- If using a Dutch oven/combo cooker: Carefully remove the lid.
Reduce the oven temperature to 450°F (230°C). Continue baking for another . This steam-free stage allows the crust to crisp up and deepen in color. You’re looking for a beautiful, deep brown color on your finished gluten free bread. If the top starts browning too quickly before the full time is up, loosely cover it with a piece of aluminum foil (shiny side up) and continue baking until it sounds hollow when tapped on the bottom.
You did it! Your gorgeous artisan-style gluten free bread is baked. Carefully remove the vessel from the oven and transfer the loaf onto a wire cooling rack. This next step is the hardest: letting it cool completely. While tempting, cutting into hot bread can make the crumb gummy. For the best texture, patience is key! Let it cool fully on the rack. (Though, we understand if you can’t resist slicing into it when it’s just slightly warm!)
Enjoy your incredible homemade artisan gluten free bread recipe loaf! Once completely cooled, you can store it to keep it fresh. It keeps well wrapped in a tea towel or in a closed container in a cool, dry place for 3-4 days.
Recipe Notes
- Always substitute by weight (grams), not volume, for reliable results.
- Active dried yeast: Can use instant yeast (same weight), add directly to dry ingredients. Adjust water addition accordingly.
- Psyllium husk (rough): Essential! If using powder, use 75% of the weight (15g). Do not substitute with other ingredients. Find psyllium husk powder here.
- Potato starch: Substitute with equal weight of corn starch, tapioca starch, or arrowroot starch.
- Brown rice flour: Substitute with equal weight of millet flour.
- Buckwheat flour: Substitute with equal weight of white teff flour, sorghum flour, or certified gluten-free oat flour.
- Creative Variations: Mix in 2-4 tbsp of seeds (sunflower, pumpkin, etc.), 1-2 tsp dried herbs (rosemary, thyme), or swirl in roasted garlic paste before final proof.
- Storage: Store cooled bread wrapped in a tea towel or in a closed container in a cool, dry place for 3-4 days.
Nutrition (per serving)

My #1 Recommendation
Aucma Stand Mixer,6.5-QT 660W 6-Speed Tilt-Head Food Mixer, Kitchen Electric Mixer with Dough Hook, Wire Whip & Beater 2 Layer Red Painting (6.5QT, Red)
(16335 reviews)
This Aucma Stand Mixer is a powerful 660W kitchen essential with a large 6.5-QT capacity, 6-speed settings, and a convenient tilt-head design. It comes with essential attachments like a dough hook, wire whip, and beater, perfect for all your gluten-free baking needs.
- Large 6.5-QT Capacity: Ideal for big batches of gluten-free dough and batter.
- Powerful 660W Motor: Effortlessly handles tough mixing tasks with 6 speed options.
- Versatile Attachments Included: Comes with dough hook, wire whip, and beater for various recipes.
As an Amazon Associate, I earn from qualifying purchases. This helps support the blog at no extra cost to you.
Stop Guessing with Gluten-Free Flours & Bake Amazing Bread!
Making this delicious gluten-free bread recipe is a fantastic step, but what if you could truly understand and master the art of gluten-free flour blends for all your baking? We know how challenging (and sometimes frustrating!) it can be to get that perfect texture and taste without gluten.
Download our FREE “Gluten-Free Flour Blend Guide” and discover how to:
- ✔ Understand which individual flours and starches create the best structure and crumb for your gluten-free bread.
- ✔ Create your own versatile, all-purpose gluten-free flour blends that actually work (and save money!).
- ✔ Say goodbye to dense, gummy, or crumbly loaves by learning how different flours interact.
- ✔ Bake this gluten-free bread recipe (and many others!) with newfound confidence and consistently delicious results.
We’ve been there, fellow gluten-free friends! That’s why we’ve poured our knowledge into this essential guide. It’s designed to empower you on your gluten-free baking journey, turning confusion into confidence.
Get Your FREE Flour Blend Guide Now!
We respect your inbox! We’ll only send you genuinely helpful gluten-free tips, recipes, and resources. No spam, ever.