Okay, let’s talk about the elephant in the gluten-free bakery: achieving truly spectacular bread. Specifically, sourdough. For years, the dream of a crusty, chewy, perfectly tangy loaf felt impossible. Gluten-free versions often turned out dense hockey pucks or disappointingly gummy bricks. I tried countless recipes, experimented with different flour blends, and wrestled with maintaining a lively gluten free sourdough starter that actually worked for bread baking. It was a journey filled with deflated hopes and more than a few loaves that went straight to the birds (literally!). But I refused to give up on the magic of gluten free sourdough bread. I craved that authentic flavor and texture. This recipe is the culmination of years of testing, tweaking, and learning the nuances of gluten-free fermentation. It solves the common problems, delivering a gluten free sourdough bread that will make you forget it’s even gluten-free. Forget the frustrating attempts – your search for the perfect gluten free sourdough bread ends here. Get ready for that satisfying slice of homemade gluten free sourdough bread! You might even want to try adapting other favorites, like my gluten free flatbread, using your new sourdough skills. This truly is the best gluten free sourdough bread I’ve ever made.
Tips for Recipe Success
- Why Weighing is Non-Negotiable: Volume measurements (cups) are notoriously inconsistent, especially with gluten-free flours. Using a digital kitchen scale to weigh your ingredients ensures you use the exact amounts specified in the recipe every time, leading to consistent and predictable results in *gluten-free baking*.
- Understand the Sourdough Timeline: Unlike recipes using commercial yeast, *gluten-free sourdough bread* relies on wild yeast, which is inherently slower. Allow for longer bulk fermentation (3-4+ hours) and proofing times; the dough won’t double like conventional bread, but should be visibly puffed or risen to the top of the banneton.
- Harness the Power of Steam: Baking in a preheated Dutch oven with the lid on traps steam released from the dough. This keeps the crust pliable longer, allowing for maximum oven spring and preventing the crust from hardening too soon. If you don’t have a Dutch oven, the shallow pan with hot water technique creates a similar steamy environment crucial for a good crust and rise in *gluten-free bread*.
- Cool Completely for the Perfect Crumb: It’s tempting to slice into a warm loaf, but patience is essential! Just like you wouldn’t slice a delicate *gluten-free lemon cake* while hot, your sourdough needs several hours to cool completely. This allows the internal structure to set fully, preventing a gummy texture and ensuring that beautiful chewy crumb.
Essential Equipment for This Recipe
To prepare this delicious recipe, you’ll need the following kitchen tools:
- Mixing Bowls – A set of sturdy mixing bowls in various sizes is essential for combining ingredients.
Find Mixing Bowls on Amazon - Measuring Cups and Spoons – Accurate measuring is key to baking success.
Find Measuring Cups and Spoons on Amazon - Baking Sheets – Perfect for even baking and crisp results.
Find Baking Sheets on Amazon - Whisks – For incorporating air and blending ingredients smoothly.
Find Whisks on Amazon - Spatulas – Ideal for folding, scraping, and mixing without scratching your bowls.
Find Spatulas on Amazon - Food Processors – A handy tool for chopping, slicing, and shredding ingredients quickly.
Find Food Processors on Amazon - Saucepans – Essential for cooking sauces, melting butter, and more.
Find Saucepans on Amazon - Chef’s Knives – A good quality chef’s knife is essential for any cook.
Find Chef’s Knives on Amazon - Cutting Boards – Protect your countertops while prepping ingredients.
Find Cutting Boards on Amazon
Frequently Asked Questions
Is this gluten free sourdough bread safe for someone with Celiac disease?
Absolutely, yes! This recipe for gluten free sourdough bread is specifically developed using only naturally gluten-free flours and a gluten-free sourdough starter. Unlike traditional wheat sourdough which still contains gluten (even if partially broken down), this bread is entirely free from gluten-containing ingredients and is safe for those with Celiac disease or non-celiac gluten sensitivity, provided all ingredients you use are certified gluten-free and you avoid cross-contamination in your kitchen.
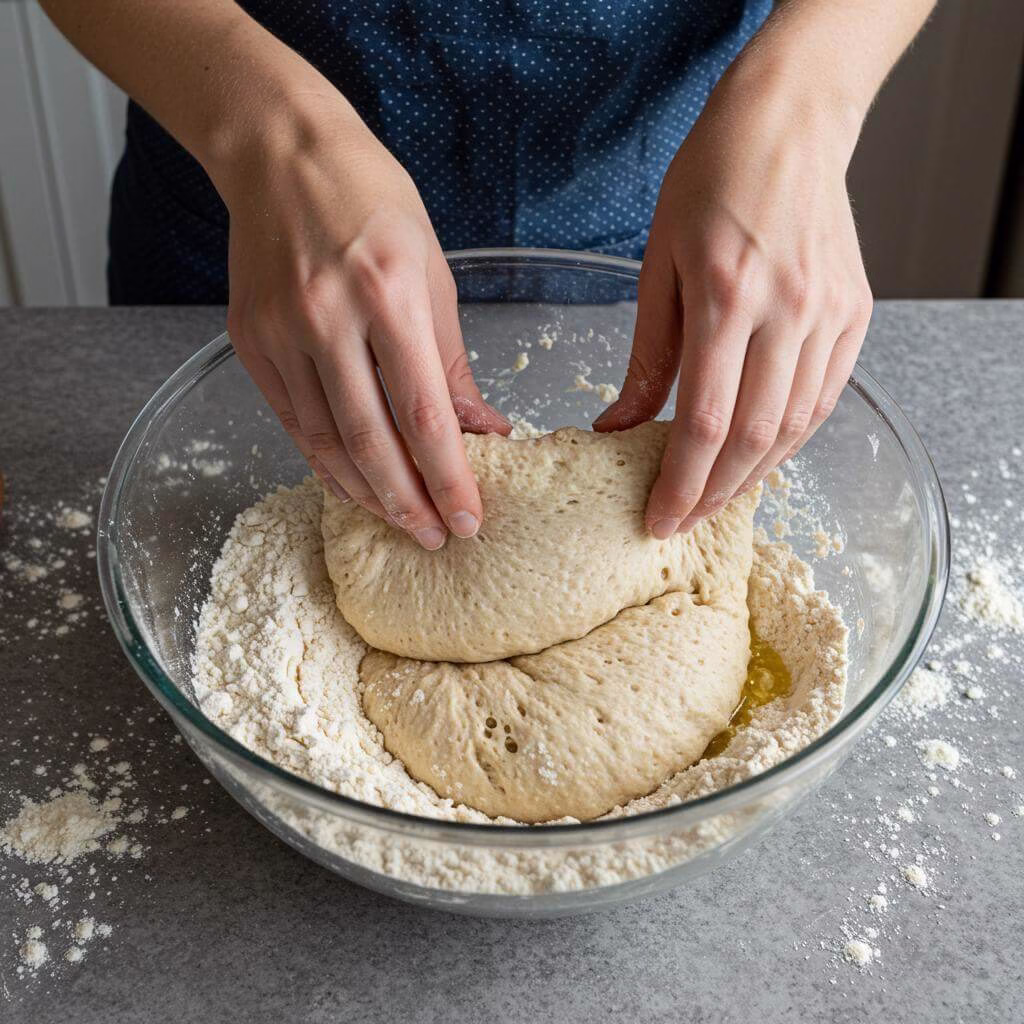
My gluten free sourdough dough feels very wet and sticky, not like regular dough. Is that right?
Yes, that is totally normal for this specific gluten free sourdough bread recipe! Gluten-free dough behaves very differently than wheat-based dough because it lacks the gluten protein network. It won’t form that smooth, elastic ball you might be used to. The dough for this recipe is intentionally wet and may resemble a very thick batter or a sticky dough. Don’t panic! Using a stand mixer helps develop the structure needed, and the overnight cold ferment helps make it more manageable for shaping the next day. Trust the process and the hydration level!
Why isn’t my gluten free sourdough bread dough doubling in size during the first rise (bulk fermentation) or final proof?
Great question! Gluten-free sourdough often doesn’t show the dramatic rise that traditional wheat sourdough does. The lack of gluten means the structure can’t hold trapped gas in the same way. During bulk fermentation (the first rise), look for the dough to be visibly puffed and slightly increased in volume, but probably *not* doubled. For the final proof in the banneton, it’s ready when it looks expanded and has reached near the top of the basket/bowl. The timing (3-4 hours for bulk, 2-6 hours for final proof) is more about developing flavor and structure than a massive increase in volume. Focus on the look and feel described in the steps, not just doubling.
Help! My gluten free sourdough bread came out gummy inside. What did I do wrong?
Oh no, that’s a common frustration, but easily fixable! The most frequent reason for a gummy interior in gluten free sourdough bread is slicing it before it has cooled completely. As the bread cools, the internal structure finishes setting and steam needs to escape. If you cut into it while it’s still warm, that steam gets trapped, leading to a gummy texture. Always let your loaf cool *completely* on a wire rack for several hours before slicing. Another possibility is that it was slightly underbaked. Make sure you followed the full 60-minute bake time, especially the final uncover/steam-free period, to ensure the interior is fully cooked through.
Can I use a different gluten-free flour blend for this recipe?
This recipe was specifically developed and extensively tested using “Kim’s gluten free bread flour blend” for optimal results. While you *can* try other blends, keep in mind that they will likely yield different results in texture, structure, and potentially flavor because each blend has a unique composition of flours, starches, and gums. For your first few attempts at this specific gluten free sourdough bread, we highly recommend using the flour blend specified in the recipe for the best chance of success. Once you’re comfortable, you can experiment with other blends, but be prepared for potential variations.
Are psyllium husks, baking powder, or baking soda required, or can I leave them out?
These ingredients are included to improve the texture and rise of your gluten free sourdough bread, but they aren’t strictly *required* for edible bread, with a few important notes:
- Psyllium Husks: These act as a binder. Leaving them out is possible, but the dough will be stickier and harder to shape, and the final crumb may be less cohesive and slightly more crumbly.
- Heat-Activated Baking Powder: This is optional but highly recommended for maximum oven spring. You can substitute regular baking powder or omit it entirely, but you’ll likely get less dramatic lift in the oven.
- Baking Soda: This is also optional and *only* used if you are NOT using baking powder. It’s added during kneading for a potentially more open crumb. If you use baking powder, do NOT add baking soda. If you omit both baking powder and baking soda, your loaf will still rise from the starter, just with a denser crumb.
For the best texture and rise, we recommend using the psyllium husks and choosing either the heat-activated baking powder or the baking soda (but not both!).
What if my active gluten free sourdough starter peaks before I’m ready to make the dough, or I have to leave unexpectedly after feeding it?
No worries at all! This is one of the beautiful things about a strong gluten-free sourdough starter. If your starter is active and bubbly and you suddenly can’t use it right away, simply stash it in the refrigerator. It will preserve its activity and can often be used directly from the fridge for up to two weeks after being fed! If it’s been longer than that, or starts to look thin and inactive, you’ll need to pull it out, feed it again (following the notes in the recipe or starter guide on reviving), and wait for it to become active and ripe again before making your gluten free sourdough bread dough.
Do I really need special tools like a digital scale, stand mixer, or Dutch oven for this gluten free sourdough bread recipe?
While not strictly *required*, certain tools significantly improve the results and ease of making this gluten free sourdough bread.
- Digital Scale: Highly recommended! Gluten-free baking is precise, and weighing ingredients in grams ensures you have the correct ratios every single time, leading to consistent results and easier troubleshooting.
- Stand Mixer: Makes mixing and developing the dough structure much easier and more effective. You *can* use a Danish dough whisk or mix vigorously by hand, but a stand mixer yields the best dough consistency for this recipe.
- Dutch Oven: Creates the perfect steamy environment for incredible oven spring and a crisp crust. If you don’t have one, you can use the alternative steam method described in the post with a baking steel/stone or overturned baking sheet and a pan of hot water.
Other tools like a banneton (or a floured bowl/towel) and a bread lame (or a sharp knife) are helpful for shaping and scoring but have easy substitutes. Invest in a scale first if you’re serious about consistent gluten-free baking!
gluten free sourdough bread
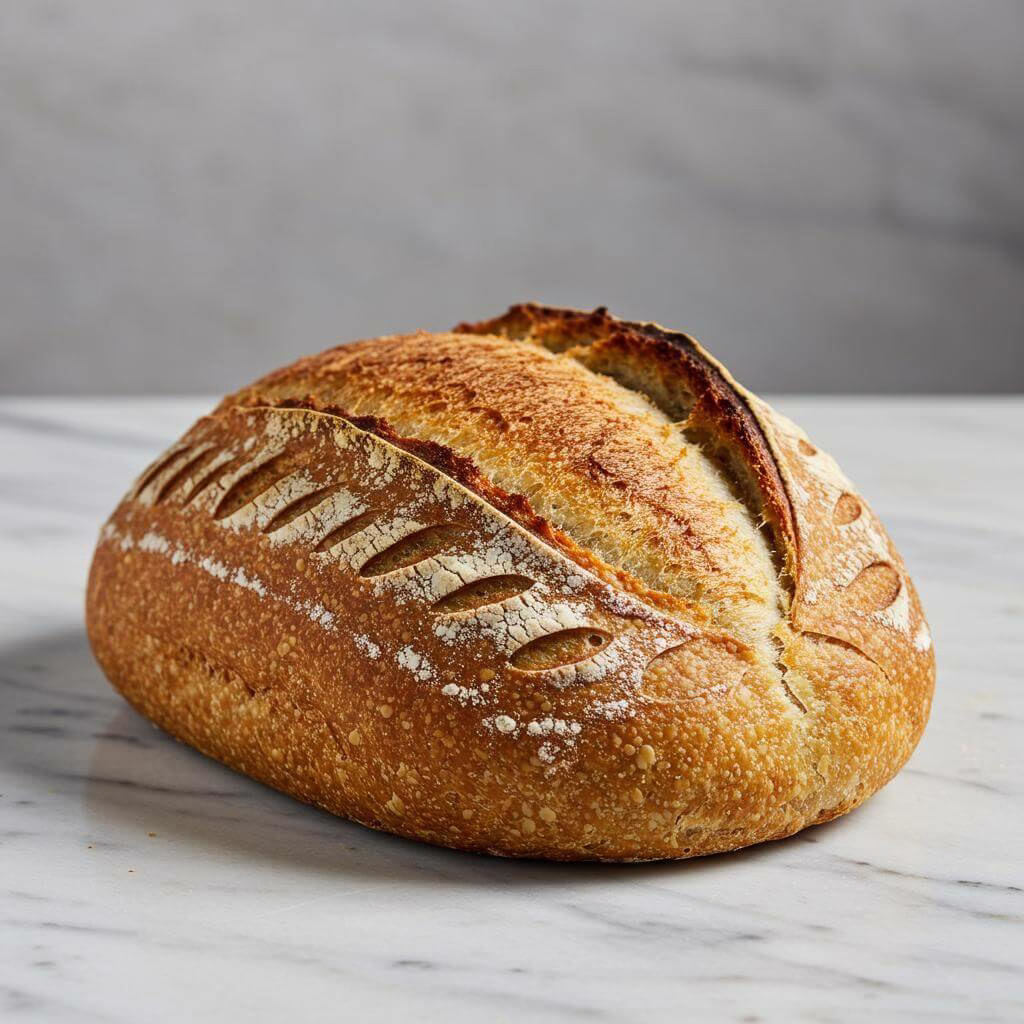
gluten free sourdough bread
This recipe is the culmination of years of testing, tweaking, and learning the nuances of gluten-free fermentation. It solves the common problems, delivering a gluten free sourdough bread that will make you forget it’s even gluten-free. Forget the frustrating attempts – your search for the perfect gluten free sourdough bread ends here.
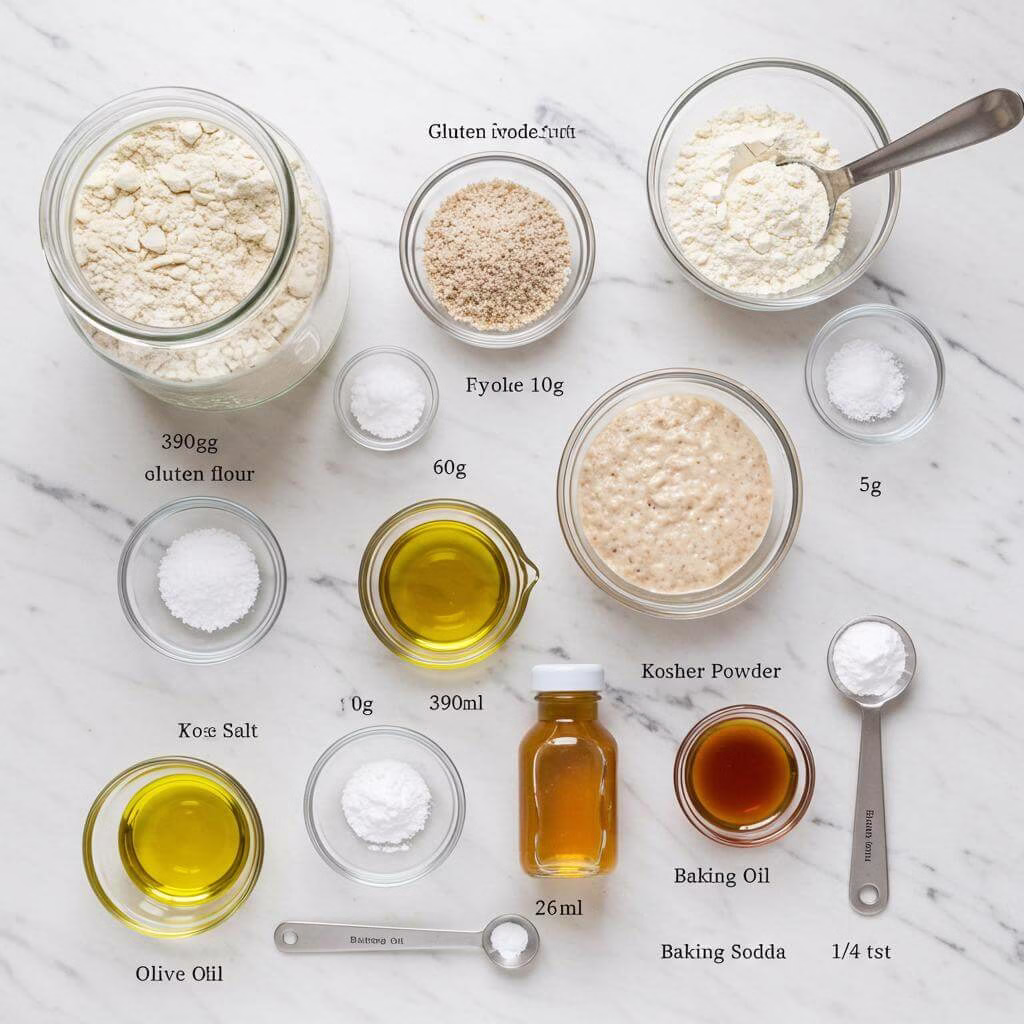
Ingredients
12
- 390 grams Kim’s gluten free bread flour blend (specific blend crucial)
- 60 grams gluten free sourdough starter (mature and ripe)
- 5 grams whole psyllium husks or 1½ teaspoon psyllium husk powder
- 6 grams (1 tsp) kosher salt
- 10 grams (2 tsp) heat-activated baking powder (optional)
- 390 ml water
- 26 grams olive oil
- 21 grams honey
- ¼-½ teaspoon baking soda (optional, only if not using baking powder)
Equipment
- Digital kitchen scale
- Stand mixer (with dough hook)
- Dutch oven (with lid)
- Banneton basket (or bowl lined with a floured tea towel)
- Bread lame (or very sharp serrated knife)
- Parchment paper sheets
- Wire cooling rack
- Large mixing bowl
- Plastic wrap or damp tea towel
- Danish dough whisk (optional, for hand mixing)
Instructions
Prepare Your Gluten Free Sourdough Starter: Ensure your active gluten free sourdough starter is fed and ready (60g mature, ripe starter, fed within last 12 hours, active and bubbly). Feed with 30-50g GF whole grain flour and 30-50g water. Stir, cover, and leave at room temperature until bubbly, usually .
Mix the Gluten Free Sourdough Dough: Measure ingredients by weight using a digital kitchen scale. In a stand mixer with dough hook, add water, olive oil, honey, gluten-free bread flour blend, psyllium husks (if using), salt, heat-activated baking powder (if using), and active starter. Mix on medium-high for . Dough will be like thick batter. (Hand mix option: use Danish dough whisk vigorously).
Begin the Bulk Fermentation (First Rise): Scrape down bowl. Cover tightly. Let rise in a warm spot until visibly puffed (not necessarily doubled), about .
Chill Overnight (Cold Ferment): Cover bowl and refrigerate dough for at least , or overnight, for flavor development and easier handling.
Shape Your Gluten Free Sourdough Loaf: Remove chilled dough. Lightly flour work surface. Turn dough out. If using baking soda (and not baking powder), sprinkle ¼-½ tsp now. Gently knead for to incorporate soda (if using) and form a round (boule) or oblong (batard) loaf.
Prepare for the Final Proof: Generously flour your banneton basket or a bowl lined with a well-floured tea towel. Place shaped dough seam-side up (if flipping later). Cover loosely.
Final Proof (Second Rise): Let dough rise at room temperature until visibly expanded and near top of basket/bowl, about .
Preheat the Oven and Baking Vessel: About before baking, place Dutch oven with lid (or baking steel/stone and shallow pan) in oven. Preheat oven to 500°F (260°C).
Score and Transfer to the Hot Oven: Gently flip proofed dough onto parchment paper. Score top with a bread lame or sharp knife. Carefully transfer dough into preheated Dutch oven and cover. (If using steel/stone, slide dough on parchment onto it, pour 1 cup hot water into shallow pan below, close oven).
Bake Your Gluten Free Sourdough Bread: Reduce oven to 450°F (230°C).
If using a Dutch Oven: Bake lid on for , then lid off for another .
If using a Baking Steel/Stone with steam pan: Bake for .
Total bake time is 1 hour. Loaf should be deep golden-brown.
Cool Completely: Remove bread from oven/Dutch oven. Transfer to a wire cooling rack. Cool completely for several hours before slicing to prevent a gummy texture.
Recipe Notes
- Psyllium Husks: Optional, but dough may be stickier and crumb different if omitted. Using them is recommended for best structure.
- Heat-Activated Baking Powder: Regular double-acting baking powder can be used as a substitute; this may result in slightly less oven spring.
- Dutch Oven Alternative: If you don’t have a Dutch oven, use a preheated baking steel or stone with a shallow pan of hot water on a lower rack to create steam.
- Seeded Variation: Add 1/4 to 1/2 cup of mixed seeds (e.g., sunflower, pumpkin, chia, flax), pre-soaked and drained, to the dough during mixing.
- Herb Infusion: Mix in 1-2 tablespoons of finely chopped fresh herbs like rosemary or thyme during final kneading for an aromatic twist.
Nutrition (per serving)

My #1 Recommendation
Aucma Stand Mixer,6.5-QT 660W 6-Speed Tilt-Head Food Mixer, Kitchen Electric Mixer with Dough Hook, Wire Whip & Beater (6.5QT, Black)
(16334 reviews)
This Aucma Stand Mixer features a powerful 660W motor and a large 6.5-quart stainless steel bowl, making it perfect for all your gluten-free baking adventures. With 6 speed settings and a convenient tilt-head design, it offers versatility and ease of use. It comes complete with essential attachments: a dough hook, wire whip, and flat beater, ready to tackle any recipe.
- Powerful 660W motor with 6-speed control for various mixing tasks.
- Large 6.5-quart stainless steel bowl accommodates big batches.
- Includes dough hook, wire whip, and beater for ultimate versatility.
As an Amazon Associate, I earn from qualifying purchases. This helps support the blog at no extra cost to you.
Bake Perfect Gluten-Free Sourdough Every Time!
Struggling to get that ideal texture and rise for your gluten free sourdough bread? You’re not alone, fellow gluten-free friends! The secret often lies in the right flour blend.
Unlock the secrets with our FREE “Gluten-Free Flour Blend Guide”:
- 🍞 Discover the best individual flours for gluten-free baking and their unique properties.
- ✨ Learn to create your own versatile, all-purpose gluten-free flour mixes that truly work.
- 💰 Save money by ditching expensive pre-made blends that don’t always deliver.
- 🥖 Achieve superior texture and taste in your sourdough and all your gluten-free creations.
Say goodbye to dense, crumbly loaves and hello to delicious, homemade gluten-free sourdough bread you’ll be proud of. This guide is your first step!
Get Your FREE Flour Blend Guide!
Your email is safe with us. We promise to only send valuable gluten-free tips and recipes!