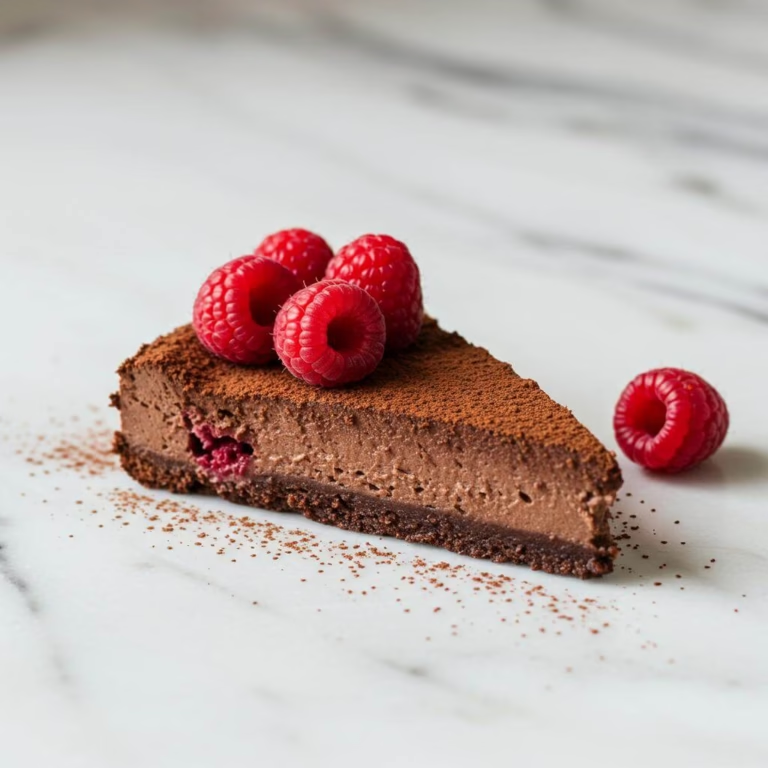
Ah, there are just some days that call for a little sunshine, aren’t there? Maybe it’s the first warm breeze, or perhaps you simply need a burst of brightness in your week. Whatever the reason, nothing quite hits the spot like the tangy sweetness of lime. Finding the perfect gluten-free version of classic desserts can be a journey, but discovering the ultimate key lime cake recipe felt like finding a pot of gold. Forget dry, crumbly cakes; this key lime cake recipe delivers a moist, tender crumb bursting with that unmistakable zesty flavour. I remember the joy after countless attempts, finally perfecting this divine key lime cake recipe. It’s honestly become a go-to whenever I crave something bright and cheerful, much like baking a lovely gluten-free strawberry cake or whipping up some zesty lemon bars. This key lime cake recipe is proof that gluten-free baking can be truly spectacular. Get ready to soak up the sunshine with every slice of this incredible key lime cake recipe. Trust me, you’re going to love baking and sharing this key lime cake recipe!
Tips for Recipe Success
- Measure Your Flour Accurately: For the best texture in your gluten-free lemon cake, use the spoon-and-level method. This prevents compacting the flour in the measuring cup, which can lead to a dry, dense cake. Lightly spoon the flour into your cup and level off the excess with a straight edge.
- Room Temperature Ingredients are Key: Ensure your butter and eggs are at room temperature before you begin. Room temperature butter creams smoothly with sugar, incorporating air for a tender crumb, and eggs emulsify better, creating a smooth, even batter.
- Don’t Over-Mix the Batter: Once you add the dry ingredients, mix only until they are just combined and no streaks of flour remain. Over-mixing gluten-free batters can break down the starches and gums, resulting in a gummy texture instead of a light, airy cake.
- Maximize That Citrus Zest: Zest your citrus *before* you cut and juice it – it’s much easier! Be careful to only grate the colored part of the peel and avoid the white pith underneath, which can add a bitter flavor. The zest holds the most aromatic oils for a bright, fresh taste.
Essential Equipment for This Recipe
To prepare this delicious recipe, you’ll need the following kitchen tools:
- Mixing Bowls – A set of various sizes is essential for preparing different components of the recipe.
Find Mixing Bowls on Amazon - Measuring Cups and Spoons – Accurate measurements are key for baking success.
Find Measuring Cups and Spoons on Amazon - Baking Sheets – Perfect for even baking and crisp results.
Find Baking Sheets on Amazon - Whisks – Essential for incorporating air into batters and creams.
Find Whisks on Amazon - Spatulas – Ideal for folding and mixing without scratching your bowls.
Find Spatulas on Amazon - Food Processors – Great for quickly chopping or pureeing ingredients.
Find Food Processors on Amazon - Saucepans – For heating sauces and liquids evenly.
Find Saucepans on Amazon - Chef’s Knives – A versatile knife for chopping, slicing, and dicing.
Find Chef’s Knives on Amazon - Cutting Boards – Protect your countertops while you prep your ingredients.
Find Cutting Boards on Amazon
Frequently Asked Questions
What type of gluten-free flour blend works best for this key lime cake recipe?
Great question! For this key lime cake recipe, we specifically recommend using a gluten-free all-purpose flour blend that contains xanthan gum or guar gum. These gums are crucial in gluten-free baking as they help provide structure and prevent crumbling, mimicking the role of gluten. Different blends absorb moisture differently, but a good quality blend with added gum should work beautifully. Remember the pro tip: spoon and level your flour rather than scooping directly from the bag to avoid a dense cake!
The recipe emphasizes not overmixing the batter. Why is that so important for gluten-free baking?
Ah, this is one of the most important tricks for successful gluten-free cakes! Unlike wheat flour, gluten-free flours don’t develop tough gluten strands when mixed. However, overmixing can still lead to a dense or gummy texture by overworking the starches and gums in the blend. The key is to mix just until the dry ingredients are incorporated and you see no streaks of flour. Seriously, stop the mixer the moment it’s just combined! This simple step ensures your key lime cake stays wonderfully tender and moist.
My batter looked a little curdled or thicker than I expected. Is that normal for this key lime cake recipe?
Yes, don’t worry at all! It’s actually quite common for cake batters to look slightly curdled after adding the wet ingredients like lime juice and milk, especially with gluten-free blends. This is often just the fats and liquids emulsifying. Also, gluten-free batters can sometimes appear a bit thicker than their wheat-based counterparts. As long as you followed the measurements, the texture you described is perfectly fine and shouldn’t negatively affect your delicious key lime cake recipe!
Can I use regular limes instead of key limes for this recipe?
Absolutely! While key limes offer a unique, slightly more tart and aromatic flavor profile, you can definitely substitute regular Persian limes if that’s what you have available. Use the same measurements for both the juice and zest. The flavor of your cake will be subtly different – perhaps a little less intensely floral – but it will still be a delightful and zesty lime cake. So go ahead and use what’s accessible!
How can I tell if my gluten-free key lime cake is fully baked?
Knowing when a gluten-free cake is done is key! Look for a few signs: the edges should be pulling slightly away from the sides of the pan, the top should be golden brown, and when you gently press the top, it should spring back slightly. The most reliable test is inserting a wooden skewer or toothpick into the center of the cake. It should come out clean or with just a few moist crumbs attached – wet batter means it needs more time. Baking times can vary by oven, so start checking around the lower end of the suggested time range.
What’s the best way to store leftover key lime cake, and can I freeze it?
To keep your beautiful key lime cake recipe as fresh as possible, store any leftovers in an airtight container at room temperature for up to 2-3 days, or in the refrigerator for up to 5 days (especially if it’s frosted with something perishable like cream cheese frosting). And yes, it freezes wonderfully! For best results, wrap cooled, unfrosted cake layers tightly in plastic wrap, then in foil, or place slices in a freezer-safe container or bag. It will keep in the freezer for up to 2-3 months. Thaw overnight in the refrigerator or at room temperature before serving.
I followed the recipe, but my cake turned out a bit dense or didn’t rise as much as I expected. What could have gone wrong?
Oh, that can be frustrating, but it happens in gluten-free baking! A few common culprits for density or poor rise in a key lime cake recipe include: packing the flour (remember to spoon and level!), overmixing the batter (which we talked about – it can lead to a tougher crumb), using expired baking powder or soda, or oven temperature issues. Ensure your leavening agents are fresh, avoid opening the oven door too early during baking, and double-check your flour measurement technique. Don’t get discouraged – keep practicing, and you’ll nail it!
Gluten-Free Key Lime Cake

Gluten-Free Key Lime Cake
This ultimate gluten-free key lime cake recipe delivers a moist, tender crumb bursting with unmistakable zesty flavour. Perfected after countless attempts, it’s a go-to for a bright and cheerful treat.
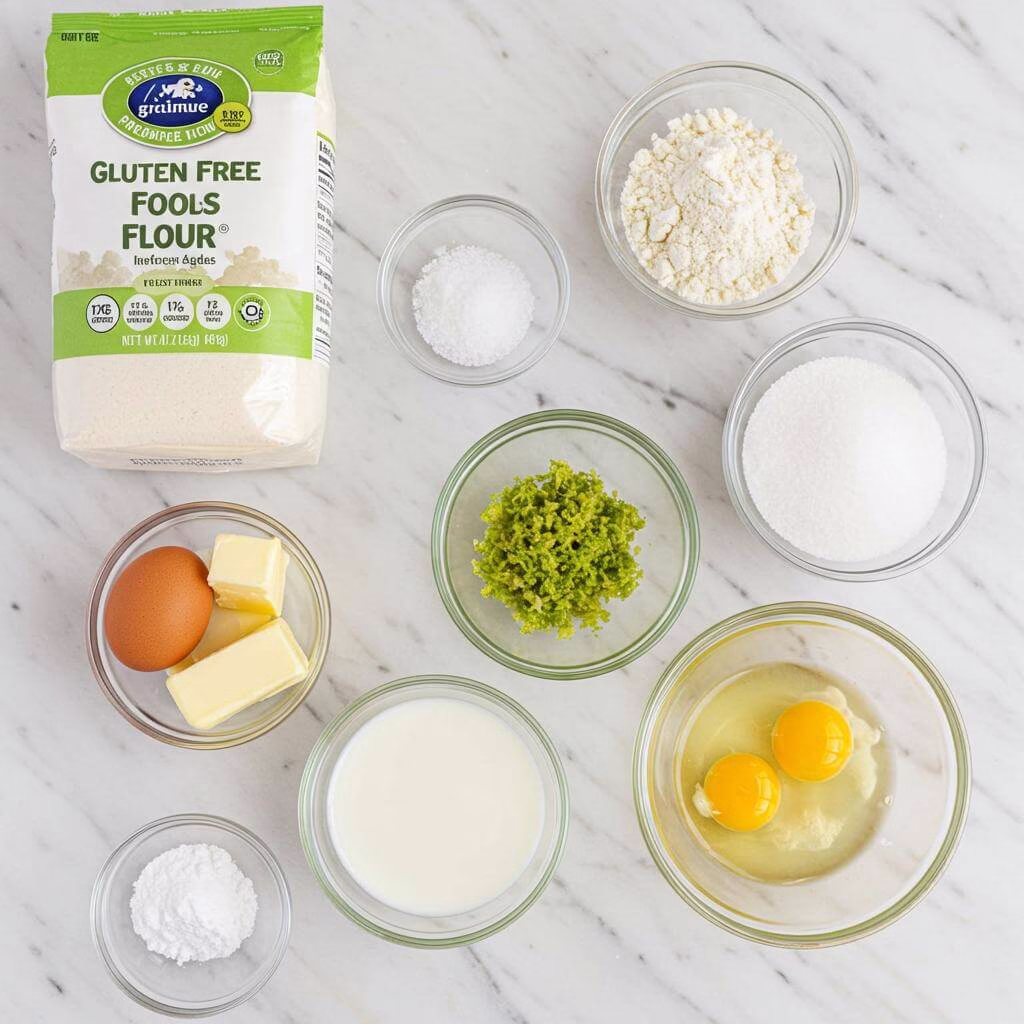
Ingredients
12
- 1 1/2 cups Gluten-Free All-Purpose Flour Blend (with xanthan or guar gum)
- 1 tsp Baking Powder
- 1/2 tsp Baking Soda
- 1/4 tsp Salt
- 1 cup Granulated Sugar
- 1/2 cup Unsalted Butter, softened
- 2 large Eggs
- 1/2 cup Milk (Dairy or Non-Dairy)
- 1/4 cup Fresh Key Lime Juice
- 2 tbsp Key Lime Zest
- 1 tsp Vanilla Extract
Equipment
- Two 8-inch round cake pans
- Parchment paper
- Wire whisk
- Stand mixer (or large mixing bowl)
- Paddle attachment (if using stand mixer)
- Rubber spatula
- Cake tester (or wooden skewer/toothpick)
- Wire cooling rack
- Citrus zester
Instructions
Prepare Your Cake Pans: Start by preheating your oven to 350°F (175°C) and preparing your two 8-inch round cake pans. Generously grease the inside of each pan using butter or a non-stick spray. Then, dust the greased pans with your gluten-free flour blend, tapping out any excess. You can also line the bottoms with a circle of parchment paper for extra insurance. This step ensures your beautiful key lime cake releases perfectly after baking!
Combine Dry Ingredients: In a medium bowl, whisk together your gluten-free all-purpose flour blend, baking powder, baking soda, and salt. Make sure you whisk thoroughly to distribute the leavening agents evenly throughout the flour. This initial mix is important for the structure of your delicious key lime cake. Use a good wire whisk for this step.
Cream Butter and Sugar: In a large mixing bowl or the bowl of your stand mixer fitted with the paddle attachment, cream together the softened butter and granulated sugar on medium speed. , or until the mixture is light, fluffy, and has turned a pale yellow color. Scrape down the sides and bottom of the bowl occasionally to ensure everything is evenly combined. This creates the airy base for your truly amazing gluten-free key lime cake.
Add Eggs: Add the eggs one at a time, beating well after each addition until fully incorporated. Make sure to scrape down the bowl after adding the last egg. The mixture should look smooth and homogenous.
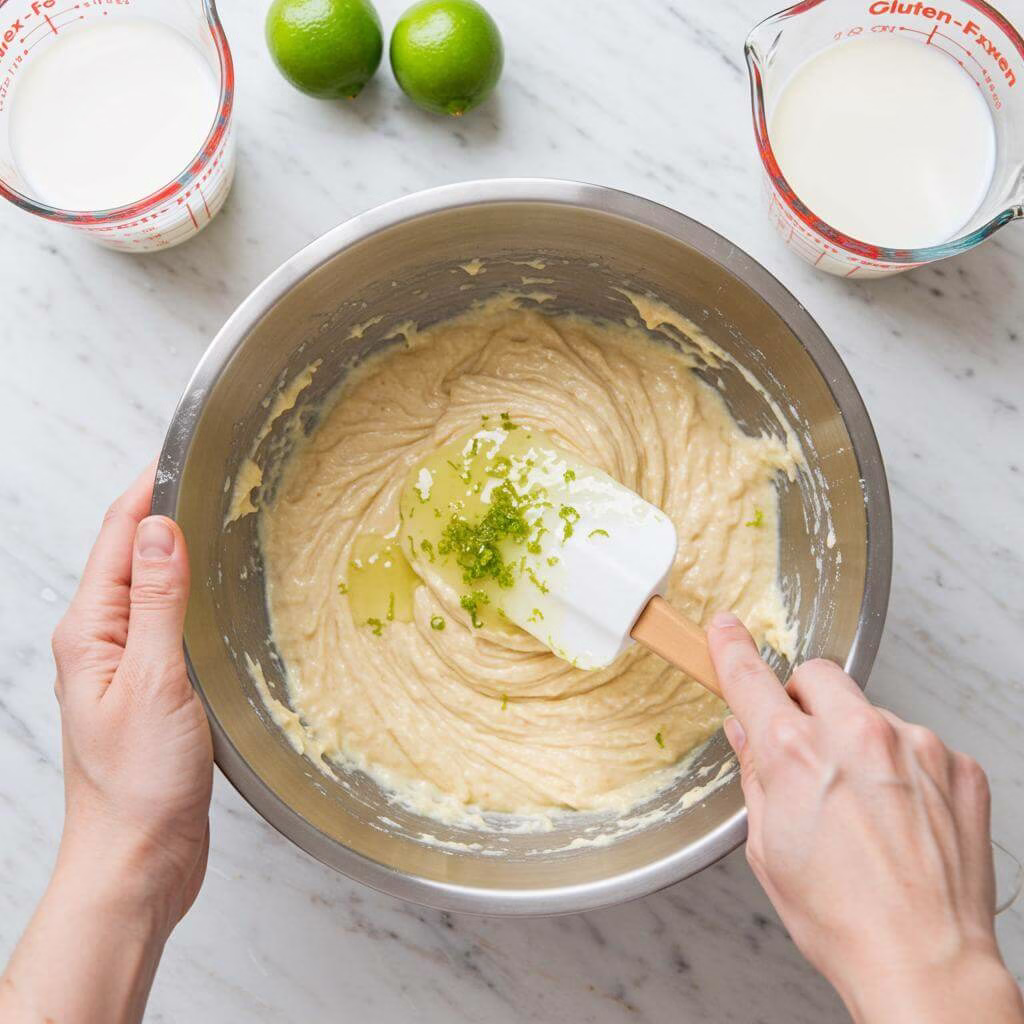
Incorporate Wet Ingredients: With the mixer on low speed, slowly pour in the key lime juice, lime zest, vanilla extract, and milk. Mix until just combined. The mixture might look slightly curdled at this point – don’t worry, this is normal! The fresh scent of the key lime is starting to fill the air, promising a wonderful key lime cake result.
Alternate Dry and Wet (The Gluten-Free Trick!): Now, it’s time to add your dry ingredients and the remaining liquid (like milk). Start by adding about one-third of the dry ingredient mixture to the wet ingredients, mixing on low speed until just combined. Then, add half of the remaining liquid (if applicable), mixing until just incorporated. Repeat, ending with the last addition of dry ingredients. A crucial gluten-free tip: As soon as you add the last of the dry ingredients, stop mixing almost immediately – only mix until *barely* combined and no dry streaks are visible. Gluten-free batters develop structure differently and can become tough if overmixed. The batter might look thicker than regular cake batter, which is perfectly fine for this key lime cake!
Pour Batter into Pans: Evenly divide the cake batter between your two prepared pans. Use a rubber spatula to scrape all that delicious batter from the bowl. Gently smooth the tops of the batter in the pans with the spatula. Getting closer to enjoying this wonderful key lime cake!
Bake to Golden Perfection: Place the pans in your preheated oven. , or until the tops are golden brown, the edges pull away slightly from the sides, and a wooden skewer or toothpick inserted into the center comes out clean (a few moist crumbs are okay, but no wet batter!). Your kitchen should smell absolutely incredible right now – the sign of a successful key lime cake in progress! Baking times can vary, so start checking around the lower end of the time range.
Cool Before Frosting: Once baked, remove the cakes from the oven and let them cool in their pans on a wire cooling rack for about . This allows them to set up properly. Then, carefully invert the cakes onto the wire rack to cool completely before frosting them. Patience is key here – trying to frost a warm cake is a recipe for melty disaster! You’re almost ready to enjoy your amazing key lime cake.
Recipe Notes
- For best results with your gluten-free flour blend, gently spoon it into your measuring cup and level it off. Avoid scooping directly from the bag, which can compact the flour and lead to a dense cake.
- Dairy-Free? No Problem! Swap the dairy milk for your favorite unsweetened non-dairy alternative like almond, soy, or oat milk. Use a plant-based butter or oil (like refined coconut or vegetable oil – use about 1/3 cup for the butter) in place of dairy butter.
- Need a Different Flour Blend? If your gluten-free blend doesn’t contain xanthan gum, add 1 teaspoon per cup of flour used in the recipe. This provides the binding structure that gluten normally would.
- Out of Key Limes? While key limes offer a unique tartness, you can use regular lime juice and zest in a pinch. The flavor will be slightly different but still delicious!
- Add Coconut: Incorporate 1/4 cup of shredded unsweetened coconut into the batter for a tropical twist. Pair with a coconut glaze (powdered sugar mixed with coconut milk and a splash of lime juice).
- Lemon-Lime: Use a mix of 1/2 key lime zest/juice and 1/2 lemon zest/juice for a brighter, slightly different citrus profile.
- Spice It Up: A tiny pinch (1/8 tsp) of ground ginger or cardamom can add an unexpected layer of warmth that complements the lime beautifully.
- Elevate the Topping: Beyond a simple glaze, consider topping your cooled cake with fresh whipped cream (dairy or coconut) and extra lime zest, or even toasted coconut flakes.
Nutrition (per serving)

My #1 Recommendation
Kitchen in the box Stand Mixer,3.2Qt Small Electric Food Mixer,6 Speeds Portable Lightweight Kitchen Mixer for Daily Use with Egg Whisk,Dough Hook,Flat Beater (Black)
(6742 reviews)
Whip up your favorite gluten-free recipes with ease using the Kitchen in the box Stand Mixer. This compact 3.2Qt mixer offers 6 speeds and is lightweight, making it perfect for daily kitchen tasks. Includes essential attachments for versatile baking.
- Compact & Lightweight Design: 3.2Qt capacity, perfect for everyday gluten-free baking without taking up too much counter space.
- Versatile 6-Speed Control: Easily adjust mixing speed for various ingredients, from gentle stirring to powerful whipping.
- Includes Essential Attachments: Comes with an egg whisk, dough hook, and flat beater to tackle a wide range of recipes.
As an Amazon Associate, I earn from qualifying purchases. This helps support the blog at no extra cost to you.
Enjoyed This Key Lime Cake? Bake Even More Gluten-Free Delights!
We know that perfecting gluten-free baking can sometimes feel like a puzzle, especially when adapting your favorite recipes. That’s why we’ve created a special gift for you, our fellow gluten-free friend!
Download your FREE Gluten-Free Baking Substitutions Cheat Sheet today!
- 🍰 Never wonder which GF flour to use for cakes, cookies, or breads again.
- 🥚 Easily find perfect substitutes for eggs, dairy, and other common baking ingredients.
- ✨ Transform your favorite traditional recipes into gluten-free showstoppers with confidence.
- 💡 Save time, reduce waste, and say goodbye to gluten-free baking fails!
This handy guide is your key to unlocking a world of delicious gluten-free baking possibilities beyond this key lime cake. Let’s make your gluten-free journey joyful and successful!
Yes, Send Me The FREE Cheat Sheet!
We promise to only send you valuable gluten-free tips, recipes, and support. No spam, ever. Your baking adventures are safe with us!