
“`html
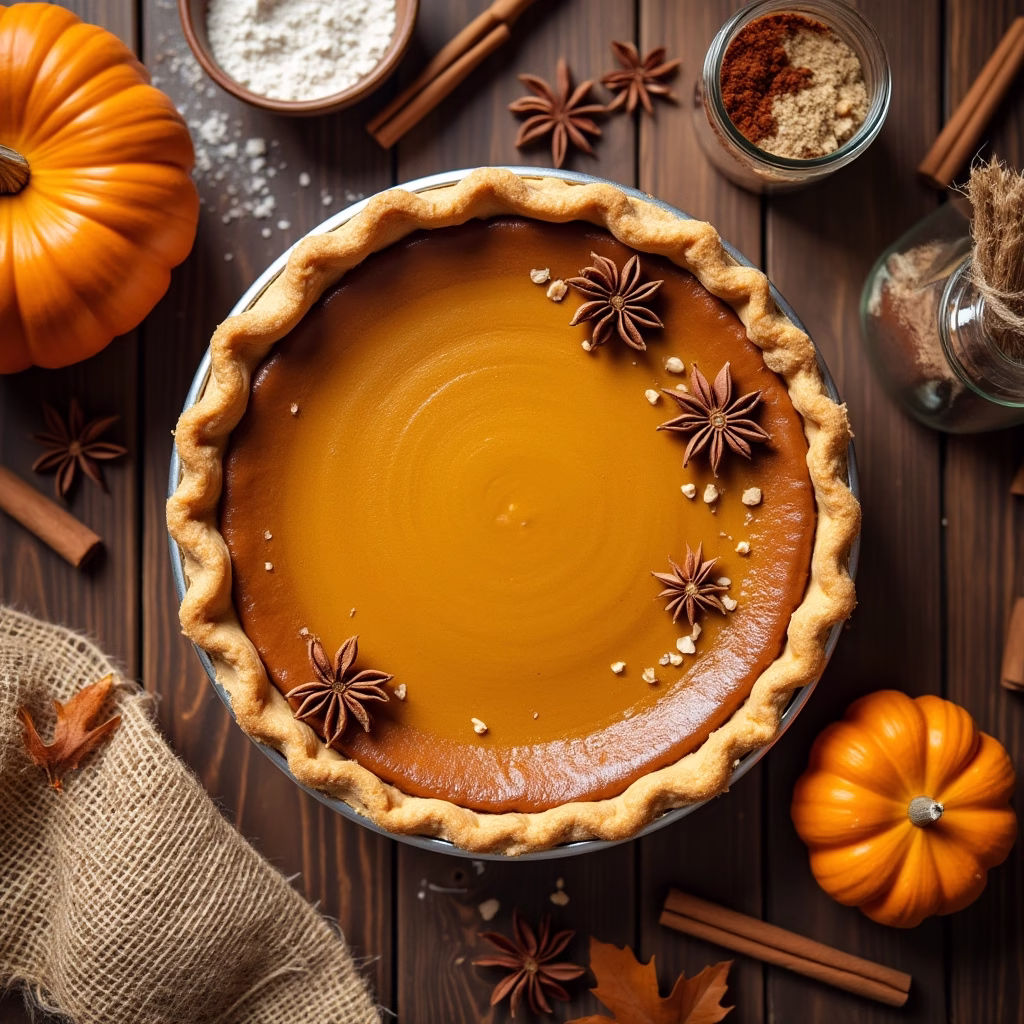
Gluten-Free Pumpkin Pie: A Holiday Classic Reimagined
Nothing says “holidays” quite like a slice of pumpkin pie! This gluten-free version captures all the warmth and spice of the traditional dessert, but with a homemade, flaky gluten-free pie crust that’s surprisingly easy to make. Perfect for Thanksgiving, Christmas, or any fall gathering, this pie will be the star of your dessert table, guaranteed!
Baking gluten-free doesn’t have to be intimidating. With a few simple tips and the right ingredients, you can create a pumpkin pie that’s just as delicious as the original. If you’re looking for other holiday-inspired desserts, be sure to check out our Gluten-Free Carrot Cake or our Warm Gluten-Free Apple Crisp for more ideas!
Creating a truly great gluten-free pie crust is the key to success. We’ve perfected a method that yields a tender, flaky crust that won’t crumble. This recipe uses a blend of gluten-free flour, cold butter, and a touch of sour cream for the perfect texture. For another twist on pie, consider our Old-Fashioned Gluten-Free Peach Cobbler!
“`
“`html
How to Make Gluten-Free Pumpkin Pie
Follow these step-by-step instructions to create a delicious, gluten-free pumpkin pie with a homemade crust.
Part 1: Making the Gluten-Free Pie Crust
-
Chill the Butter: Cut 8 tablespoons (1 stick) of butter into small, approximately 1/4-inch pieces. Place the cut butter in the freezer for 10-15 minutes. This helps create a flaky crust.
-
Combine Wet Ingredients: In a small bowl, mix together 3 tablespoons of ice water, 1 1/2 tablespoons of sour cream, and 1 1/2 teaspoons of white vinegar or rice vinegar. Whisk until smooth, then set aside.
-
Process Dry Ingredients: In the bowl of a food processor, combine 1 cup + 2 tablespoons (180 grams) of gluten-free 1:1 baking flour, 1 teaspoon of sugar, and 1/2 teaspoon of salt. Process until the ingredients are fully combined.
Gluten-Free Tip: Ensure your gluten-free flour blend contains xanthan gum for best results.
-
Incorporate Butter: Scatter the chilled butter pieces over the flour mixture. Pulse the food processor until the butter is the size of large peas, approximately 10 pulses.
-
Add Wet Ingredients: Pour the sour cream mixture into the food processor. Pulse until the mixture begins to clump around the blade, about 10 pulses. If the dough doesn’t clump, don’t worry! Transfer it to a bowl and gently press it together with your hands to form a ball.
-
Chill the Dough: Turn the dough out onto a piece of plastic wrap. Gather it into a flat disc and wrap tightly. Refrigerate for at least 1 hour, or up to 2 days. This chilling time is crucial for the dough to hydrate and become easier to work with.
-
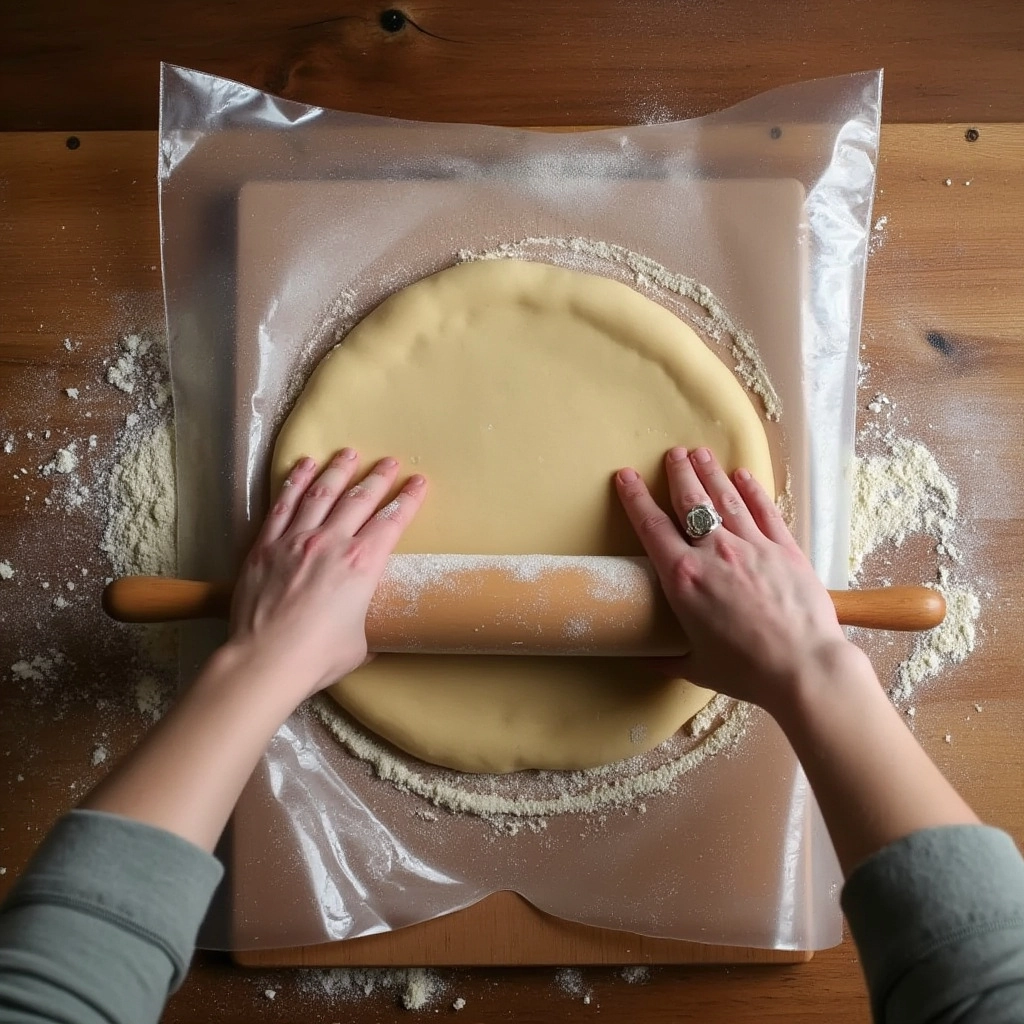
Roll Out the Dough: If the dough has been refrigerated for more than 1 hour, let it sit at room temperature for about 15 minutes before rolling. Place the dough between two large pieces of plastic wrap. Roll it out to about ¼ inch thickness.
Gluten-Free Tip: Gluten-free dough is more delicate. Rolling between plastic wrap prevents sticking and tearing.
-
Transfer to Pie Plate: Remove the top piece of plastic wrap. Carefully flip the rolled crust into a 9-inch pie plate. Gently ease the dough into the edges of the pan before removing the second piece of plastic wrap.
-
Shape the Crust: Trim any excess dough from the edges with scissors. Shape the edges of the crust as desired (crimp, flute, etc.).
-
Freeze the Crust: Wrap the shaped pie crust loosely in plastic wrap and place it in the freezer for 15 minutes, or up to 1 hour, until chilled and firm. This helps prevent shrinking during baking.
Part 2: Making the Gluten-Free Pumpkin Pie Filling
-
Preheat Oven: Preheat your oven to 425°F (220°C).
-
Combine Filling Ingredients: In a medium bowl, whisk together 2/3 cup of sugar, 1 teaspoon of cinnamon, 1/2 teaspoon of ginger, 1/4 teaspoon of cloves, and 1/2 teaspoon of salt.
-
Add Pumpkin, Eggs, and Milk: Whisk in one 15 oz can of pumpkin puree (not pumpkin pie filling!), 2 eggs, and 12 ounces (1 can) of evaporated milk or 1 cup of full-fat coconut milk until the mixture is smooth.
Dairy-Free Tip: Coconut milk will impart a slight coconut flavor. -
Pour Filling into Crust: Pour the pumpkin filling into the prepared and frozen pie shell. If you have any extra filling, you can pour it into ramekins and bake them alongside the pie.
-
Bake the Pie: Bake the pie for 15 minutes at 425°F (220°C). Then, reduce the heat to 350°F (175°C) and bake for another 40-50 minutes, or until the custard is set. The center should have a slight jiggle but not be liquid.
-
Cool and Refrigerate: Let the pie cool on a wire rack for 2 hours. Then, cover it and refrigerate for up to 2 days. This allows the filling to fully set and the flavors to meld.
-
Serve: Serve the gluten-free pumpkin pie chilled, topped with whipped cream or your favorite topping! Enjoy!
“`
“`html
Gluten-Free Pumpkin Pie: The Ultimate Guide
Get ready to bake the perfect gluten-free pumpkin pie! This recipe ensures a flaky crust and a creamy filling that everyone will love. Whether you’re gluten-free or just looking for a delicious holiday treat, this pie is a must-try.
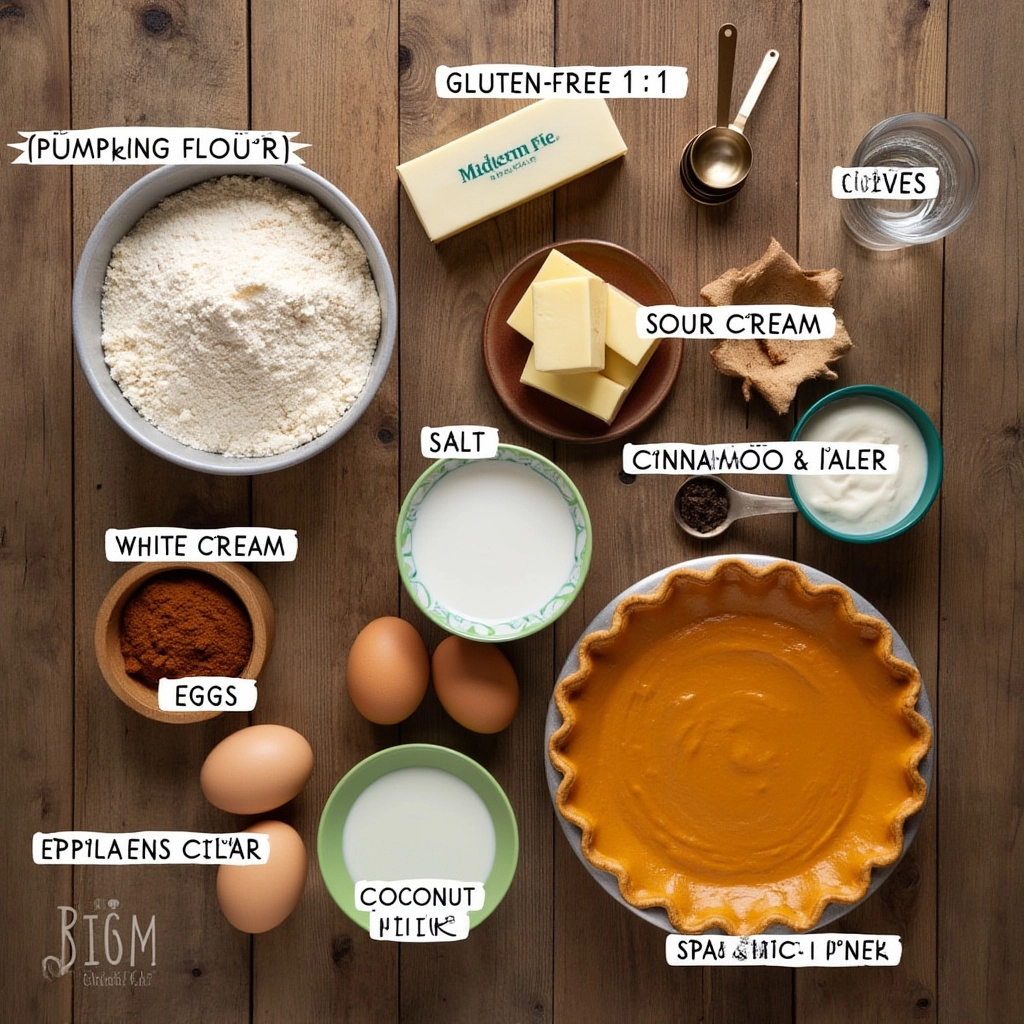
Ingredients
For the Crust:
- 8 tablespoons butter (1 stick)
- 3 tablespoons ice water
- 1 1/2 tablespoons sour cream
- 1 1/2 teaspoons white vinegar or rice vinegar
- 1 cup + 2 tablespoons gluten-free 1:1 baking flour 180 grams
- 1 teaspoon sugar
- 1/2 teaspoons salt
For the Pie:
- 2/3 cup sugar
- 1 teaspoon cinnamon
- 1/2 teaspoon ginger
- 1/4 teaspoon cloves
- 1/2 teaspoon salt
- 1 15 oz can of pumpkin
- 2 eggs
- 12 ounce (1 can) evaporated milk or 1 cup full-fat coconut milk
Nutritional Information & Gluten-Free Benefits
This gluten-free pumpkin pie is more than just a delicious dessert; it’s a mindful choice for those avoiding gluten. Here’s a breakdown of the nutritional benefits and how this recipe caters to a gluten-free lifestyle:
- Gluten-Free Flour Blend: Using a high-quality 1:1 gluten-free flour blend ensures that the crust is light and flaky without any gluten. Look for blends that include xanthan gum for the best texture.
- Pumpkin Power: Pumpkin is packed with Vitamin A and antioxidants, making this pie a healthier dessert option.
- Spice It Up: Cinnamon, ginger, and cloves not only add warmth but also have anti-inflammatory properties.
- Dairy Options: Choose evaporated milk for a classic taste or full-fat coconut milk for a dairy-free alternative.
Tips & Tricks for the Perfect Gluten-Free Pumpkin Pie
Achieving the perfect gluten-free pumpkin pie is all about technique and ingredient quality. Here are some essential tips to ensure your pie turns out flawlessly:
Crust Perfection:
- Cold Ingredients: Keep your butter and water as cold as possible. This prevents the gluten-free dough from becoming too sticky and ensures a flaky crust.
- Food Processor Magic: Using a food processor makes the crust-making process quick and efficient. If you don’t have one, you can cut in the butter by hand with a pastry cutter.
- Resting Time: Letting the dough rest in the fridge for at least an hour is crucial. This allows the gluten-free flour to fully hydrate and prevents a crumbly crust.
- Rolling with Ease: Gluten-free pie dough can be delicate. Rolling it between two sheets of plastic wrap makes it easier to transfer to the pie plate without tearing.
- Pre-Baking: For an extra crisp crust, consider pre-baking your pie crust for 10-15 minutes before adding the filling.
Filling Finesse:
- Smooth as Silk: Ensure your filling is smooth by whisking all ingredients thoroughly before pouring it into the crust.
- Baking Time: Start with a higher temperature to set the crust, then reduce the heat to ensure the filling cooks evenly without cracking.
- Cooling is Key: Allow the pie to cool completely before refrigerating. This helps the filling set properly.
Substitutions and Variations
Customize this gluten-free pumpkin pie to suit your dietary needs and preferences with these easy substitutions:
- Dairy-Free: Replace evaporated milk with full-fat coconut milk for a creamy, dairy-free filling. Ensure your butter substitute is also dairy-free.
- Lower Sugar: Reduce the sugar by up to 1/4 cup without significantly affecting the texture. You can also use a sugar alternative like stevia or monk fruit sweetener, adjusting the amount to match the sweetness of sugar.
- Spice it Up: Add a pinch of nutmeg or allspice to the filling for an extra layer of flavor.
Storage Instructions
To keep your gluten-free pumpkin pie fresh and delicious:
- Refrigerate: Store the pie in the refrigerator for up to 3 days. Cover it loosely with plastic wrap or foil to prevent it from drying out.
- Freezing: While this pie is best enjoyed fresh, you can freeze it for up to 1 month. Wrap it tightly in plastic wrap and then in foil. Thaw overnight in the refrigerator before serving.
“`
“`html
Essential Equipment for This Recipe
To prepare this delicious recipe, you’ll need the following kitchen tools:
- Mixing Bowls – A set of various sizes is essential for prepping different ingredients.
Find Mixing Bowls on Amazon - Measuring Cups and Spoons – Accuracy is key in baking!
Find Measuring Cups and Spoons on Amazon - Baking Sheets – For baking cookies or roasting vegetables.
Find Baking Sheets on Amazon - Whisks – Perfect for whipping cream or egg whites.
Find Whisks on Amazon - Spatulas – Great for folding ingredients and scraping bowls.
Find Spatulas on Amazon - Food Processors – Helpful for chopping, shredding, and pureeing.
Find Food Processors on Amazon - Saucepans – A must-have for making sauces or heating liquids.
Find Saucepans on Amazon - Chef’s Knives – A versatile knife for all your cutting needs.
Find Chef’s Knives on Amazon - Cutting Boards – Protect your countertops while you chop.
Find Cutting Boards on Amazon
“`