
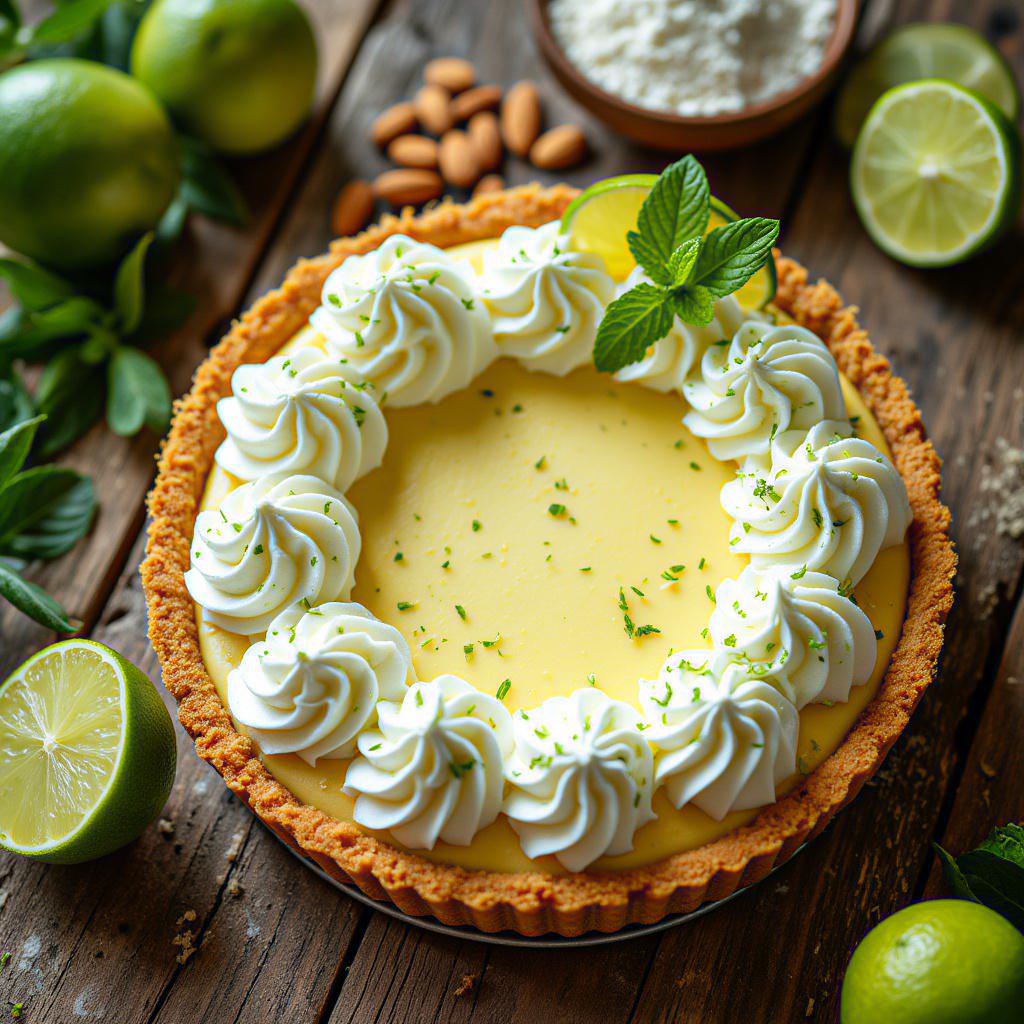
Gluten-Free Key Lime Pie: A Zesty Delight
Craving a dessert that’s both refreshing and gluten-free? This key lime pie recipe is the answer! With its perfect balance of tartness and sweetness, it’s a guaranteed crowd-pleaser. The creamy, citrusy filling, combined with a customizable gluten-free crust, makes it a delightful treat for any occasion.
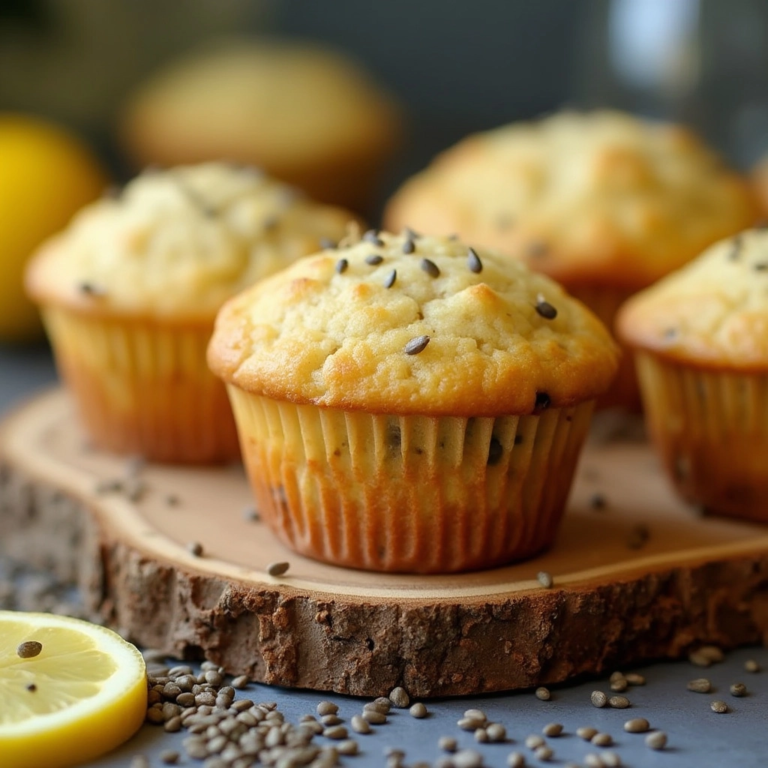
If you’re a fan of citrusy desserts, you might also enjoy our Gluten-Free Lemon Poppyseed Muffins! And for another pie option, be sure to check out our Gluten-Free Pumpkin Pie for a taste of fall flavors.
Crafting the Perfect Gluten-Free Crust
Many key lime pie recipes traditionally call for a graham cracker crust. Since gluten-free graham crackers can sometimes be tricky to find, this recipe uses an innovative Gluten-Free Cinnamon Chex crust. This crust delivers a similar flavor and satisfying crunch, creating a wonderful base for the creamy key lime filling.
If you prefer a more traditional crust, we also offer a recipe for a buttery almond crust that would pair beautifully with this key lime pie. For a simpler option, consider using a store-bought gluten-free graham cracker crust to save time.
Making the Perfect Gluten-Free Key Lime Pie
Ready to bake a refreshing and tangy dessert? Follow these simple steps to create a delicious gluten-free key lime pie that everyone will love! Whether you choose our easy Chex crust or opt for a gluten-free graham cracker crust, this recipe ensures a perfect balance of tart and sweet in every bite.
Step-by-Step Instructions
Getting Started
- Gather Your Ingredients: Make sure you have all the necessary ingredients ready. Preheat your oven to 350°F (175°C).
Making the Gluten-Free Chex Crust
- Crush the Cereal: Add 3 cups of Gluten-Free Cinnamon Chex cereal to a food processor. Pulse until you have 1 1/2 cups of finely crushed cereal. This creates the perfect base for your gluten-free crust.
- Combine with Dry Ingredients: Add 1/2 cup of Gluten-Free Bisquick and 4 tablespoons of cold, unsalted butter (cut into small pieces) to the food processor. Process until the mixture resembles coarse, sandy crumbs.
- Form the Dough: Transfer the crumb mixture to a medium-sized bowl. Add 3 tablespoons of ice water. Mix with your hands until the dough begins to clump together and form a ball.
- Prepare the Pie Dish: Spray a 9-inch pie dish with gluten-free cooking spray. Gluten-free coconut oil spray works great to prevent sticking.
- Press the Crust: Press the Chex mixture evenly into the bottom and up the sides of the greased pie dish. Ensure the crust is compact and uniform. Using the flat bottom of a measuring cup can help you achieve an even, firm crust.
- Bake the Crust: Place the pie dish on the middle rack of the preheated oven and bake for 8 minutes. This will set the crust and give it a light golden color.
- Cool Completely: Remove the crust from the oven and allow it to cool completely before adding the filling. This is crucial to prevent the filling from melting the crust.
Preparing the Key Lime Filling
- Whisk Egg Yolks: In a large mixing bowl, whisk 4 large egg yolks until they are fully combined and smooth. This ensures a creamy filling.
- Add Vanilla and Condensed Milk: Add 1 teaspoon of pure vanilla extract and two 14-ounce cans of sweetened condensed milk to the bowl with the egg yolks. Whisk until the mixture is fully combined, smooth, and creamy.
- Incorporate Key Lime Juice: Stir in 1 cup of key lime juice (or regular lime juice). Mix until the filling is smooth and well combined. The mixture will thicken slightly as the lime juice reacts with the condensed milk.
Assembling and Baking the Pie
- Pour in Filling: Pour the key lime filling into the cooled gluten-free crust. Smooth the top of the pie with a spatula to ensure even distribution.
- Bake the Pie: Place the pie on the middle rack of the preheated oven. Bake for 20 minutes, or until the filling is set but still has a slight jiggle.
- Cool and Chill: Remove the pie from the oven and let it cool at room temperature for 30 minutes. Then, cover it loosely with plastic wrap and refrigerate for at least 3 hours, or preferably overnight, to allow the filling to set completely.
Serving
- Serve and Enjoy: Once the pie is thoroughly chilled, slice and serve. Top with whipped cream, a sprinkle of lime zest, or gluten-free graham cracker crumbs for an extra touch. Enjoy your delicious gluten-free key lime pie!
Tips for the Perfect Pie
- Crust Alternatives: Don’t want to make a homemade gluten-free crust? Use a pre-made Mi-Del Gluten-Free Graham Style Pie Crust for convenience.
- Whipped Cream: For a stable whipped cream topping, add a teaspoon of cornstarch while whipping. You can also use canned whipped cream or Cool Whip for an easy alternative.
Ingredients for the Perfect Gluten-Free Key Lime Pie
Get ready to bake the most delicious and tangy gluten-free key lime pie! Here’s everything you’ll need:
Gluten-Free Chex Crust
- ▢ 1 1/2 cups crushed Gluten-Free Cinnamon Chex cereal*, Or your favorite flavor of gluten-free Chex.
- ▢ 1/2 cup Gluten-Free Bisquick
- ▢ 4 tablespoons unsalted butter
- ▢ 3 tablespoons ice water
Key Lime Filling
- ▢ 4 large egg yolks
- ▢ 1 teaspoon pure vanilla extract
- ▢ 2 14-ounce cans sweetened condensed milk
- ▢ 1 cup key lime juice, or lime juice, I used Nellie & Joe’s Key Lime Juice.
Nutritional Information
Here’s a breakdown of the nutritional content per serving:
- Serving: 1 slice
- Calories: 160kcal
- Carbohydrates: 17g
- Protein: 3g
- Fat: 9g
- Saturated Fat: 5g
- Polyunsaturated Fat: 1g
- Monounsaturated Fat: 3g
- Trans Fat: 1g
- Cholesterol: 108mg
- Sodium: 168mg
- Potassium: 103mg
- Fiber: 2g
- Sugar: 3g
- Vitamin A: 437IU
- Vitamin C: 11mg
- Calcium: 56mg
- Iron: 4mg
Note: Nutrition information is an approximation and can vary based on specific ingredients and brands used.
Gluten-Free Benefits and Dietary Considerations
This key lime pie is naturally gluten-free when using the specified ingredients, making it a safe and delicious option for those with celiac disease or gluten sensitivity. Here are some additional considerations:
- Gluten-Free Crust Options: The Chex cereal crust provides a delightful alternative to traditional graham cracker crusts, which often contain gluten. If you’re looking for a different crust, consider using a store-bought gluten-free graham cracker crust or making one from scratch with gluten-free graham crackers.
- Dairy-Free Variation: To make this pie dairy-free, substitute the sweetened condensed milk with a dairy-free alternative made from coconut or almond milk. Ensure your butter is also dairy-free.
- Lower Sugar Option: Use a sugar-free condensed milk alternative and a sugar substitute in the crust to reduce the overall sugar content.
Tips and Variations for the Best Gluten-Free Key Lime Pie
Here are some tips to ensure your gluten-free key lime pie turns out perfectly every time:
- Key Lime Juice: Freshly squeezed key lime juice provides the best flavor, but bottled key lime juice (like Nellie & Joe’s) works well too. If you can’t find key limes, regular lime juice is a suitable substitute.
- Chilling Time: Don’t rush the chilling process! The pie needs at least 3 hours in the refrigerator to fully set.
- Crust Perfection: For a crispier crust, blind bake it for a few extra minutes before adding the filling. Watch carefully to prevent burning.
- Serving Suggestions:
- Top with homemade or store-bought whipped cream. For a stabilized whipped cream, add a teaspoon of cornstarch while whipping.
- Garnish with lime zest, toasted coconut flakes, or fresh berries for added flavor and texture.
- Storage:
- Store leftover pie covered in the refrigerator for up to 3 days.
- For longer storage, freeze the pie wrapped tightly in plastic wrap and aluminum foil for up to 1 month. Thaw in the refrigerator overnight before serving.
Enjoy your delicious, gluten-free key lime pie!
Essential Equipment for This Recipe
To prepare this delicious recipe, you’ll need the following kitchen tools:
- Mixing Bowls – A set of good mixing bowls is essential for prepping and combining ingredients.
Find Mixing Bowls on Amazon - Measuring Cups and Spoons – Precise measurements are key for baking success.
Find Measuring Cups and Spoons on Amazon - Baking Sheets – Perfect for baking cookies, roasting vegetables, and more.
Find Baking Sheets on Amazon - Whisks – Ideal for blending wet and dry ingredients
Find Whisks on Amazon - Spatulas – Use a spatula to mix ingredients and scrape the sides of bowls.
Find Spatulas on Amazon - Food Processors – A food processor can speed up prep time.
Find Food Processors on Amazon - Saucepans – A saucepan is essential to create sauces and custards
Find Saucepans on Amazon - Chef’s Knives – To cut and chop ingredients with precision
Find Chef’s Knives on Amazon - Cutting Boards – To protect your kitchen surfaces while chopping
Find Cutting Boards on Amazon

One Comment