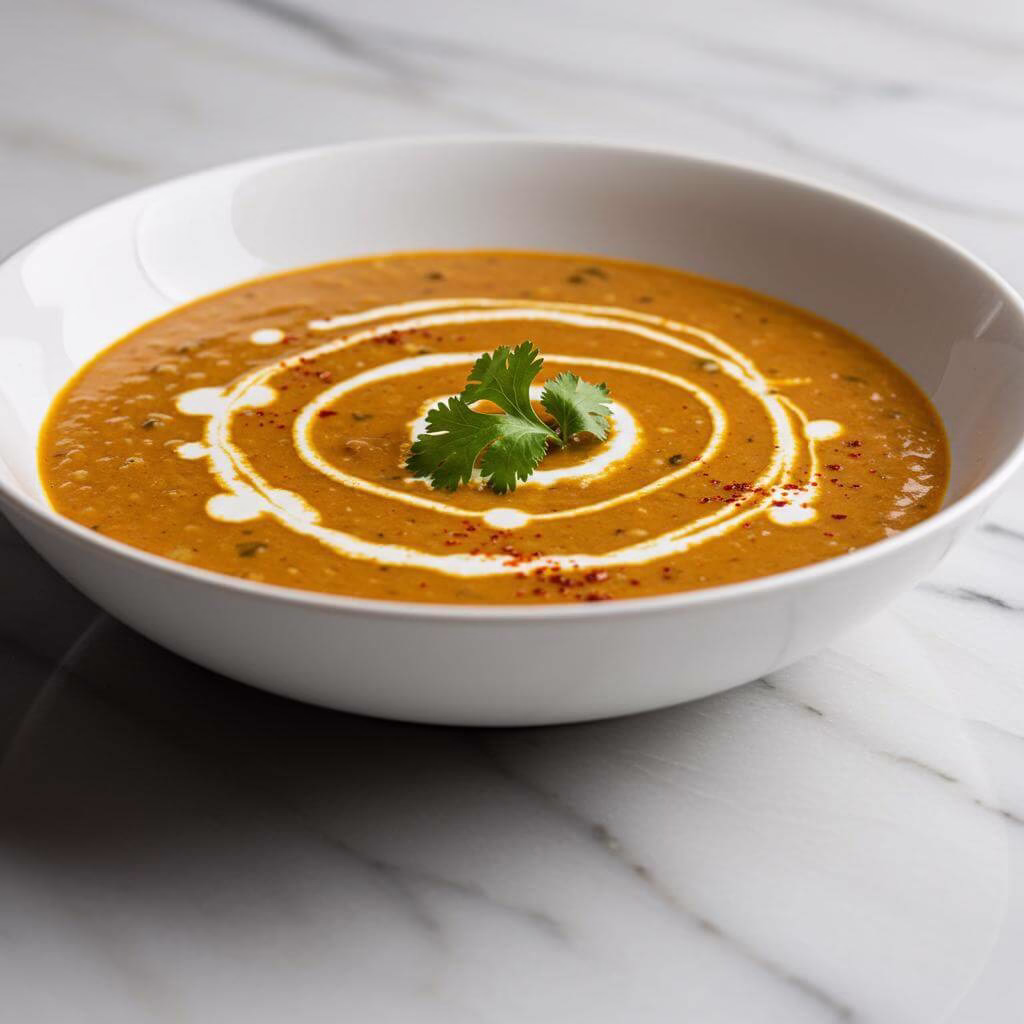
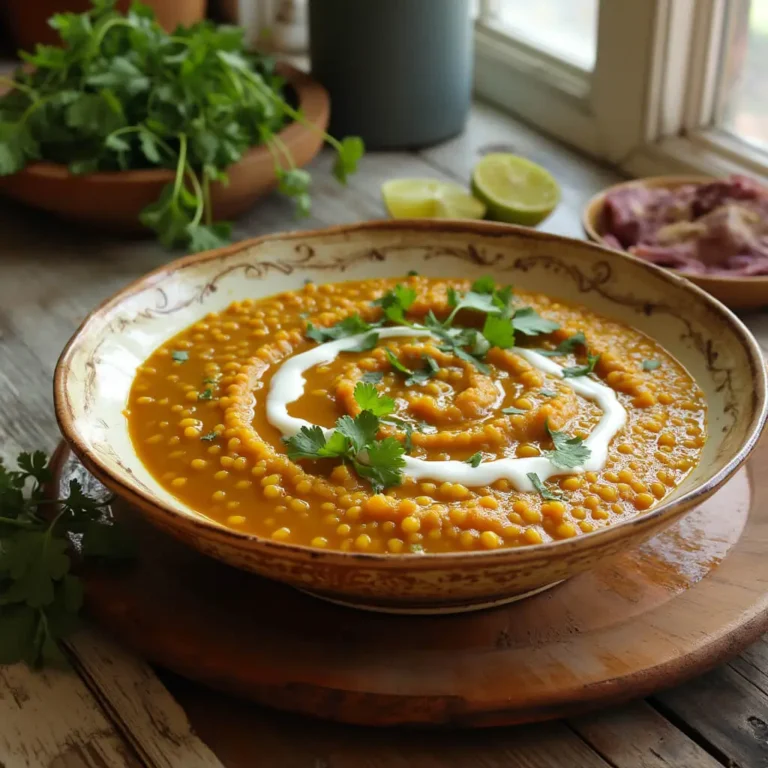
Discover the Ultimate Comfort: Our Easy Gluten-Free Dal Makhani Recipe!
Hello, wonderful food adventurers! Are you ready to dive into a dish that’s the absolute epitome of comfort, bursting with incredible flavor, and so wonderfully satisfying? Today, we’re over the moon to share a treasured favorite from our kitchen: our incredibly easy and authentic dal makhani recipe. This isn’t just any lentil dish; it’s a rich, creamy, and deeply flavorful experience that will warm you from the inside out. And the best part? Our version of this classic dal makhani recipe is completely gluten-free, proving once again that you never have to compromise on taste when embracing a gluten-free lifestyle!
Living a gluten-free life is all about discovering those gem recipes that are both delicious and nourishing, and this dal makhani recipe fits that bill perfectly. Packed with plant-based protein from wholesome black lentils and beans, and simmered lovingly with a symphony of aromatic spices, it’s a hearty and nutritious main course. We promise, everyone at your table will adore it, whether they’re strictly gluten-free or just love fantastic food! It’s the kind of dish that makes you feel truly good, offering a satisfying and flavorful escape without a single gluten worry. Imagine serving this culinary masterpiece alongside our fluffy Gluten-Free Flatbread – pure, unadulterated bliss!
One of the many joys of this easy dal makhani recipe is its natural compatibility with gluten-free cooking. The star ingredients – luscious lentils, hearty beans, and fragrant spices – are inherently gluten-free, which simplifies your kitchen prep immensely. We’re here to guide you every step of the way, ensuring your dal makhani is not only authentic in its rich taste but also perfectly safe and an absolute delight to eat. Forget complicated gluten-free conversions; this recipe is wonderfully straightforward and a true pleasure to prepare. It’s a fantastic way to explore robust flavors and add an exciting, yet simple, Indian classic to your gluten-free repertoire. For a truly complete and soul-soothing meal, why not pair it with some fragrant Pilau Rice?
So, get your apron ready! It’s time to transform these humble, wholesome ingredients into a spectacular, creamy, and utterly delicious gluten-free dal makhani. This dal makhani recipe is a definite keeper, a true star in any gluten-free kitchen, and we absolutely can’t wait for you to try it and fall in love.
Why This Dal Makhani Recipe Works Exceptionally Well (Naturally Gluten-Free!)
Discovering recipes that are not just “gluten-free substitutions” but are *naturally* free of gluten and utterly delicious is a true joy! This particular dal makhani recipe falls beautifully into that category. It’s a perfect example of how some of the world’s most comforting and flavourful dishes are inherently gluten-free, offering immense satisfaction without needing any special flours or binders typically required for things like gluten-free baked goods.
Built on the Strength of Legumes (Not Grains!)
At its heart, dal makhani is a celebration of lentils and beans, specifically urid beans (black lentils), red beans, and black beans in this recipe. This is the foundational reason why this dal makhani recipe is a gluten-free triumph. Unlike recipes based on wheat flour, oats (unless certified GF), or barley, legumes are 100% gluten-free. They provide the bulk, the protein, and the wonderful, creamy texture that defines this dish. The combination of whole urid beans, which break down partially to create a thick, luscious base, and the added red/black beans for structure and variety, ensures a hearty and satisfying texture that requires absolutely no gluten for body or cohesion.
Pressure Cooking: The Secret to Creamy Perfection
One of the key elements contributing to the success of this dal makhani recipe is the cooking method, especially when using an Instant Pot or pressure cooker. Pressure cooking is magic for legumes! It drastically reduces the cooking time while also forcing moisture deep into the beans and lentils, helping them to burst and soften completely. This rapid breakdown is crucial for achieving the signature creamy, ‘melty’ consistency of truly great dal makhani. Pre-soaking the urid beans, as the recipe instructs, gives them a head start, ensuring they cook evenly and reach that perfect tenderness that contributes so much to the dal’s luxurious texture.
Layers of Flavor That Sing
While texture is vital, flavour is king, and this dal makhani recipe delivers in spades. The process starts with sautéing onions in butter, building a rich base of flavor right from the beginning. The addition of tomatoes provides acidity and depth. Then comes the glorious array of traditional Indian spices – cumin, garlic, chili, ginger, turmeric, fenugreek, and finally, garam masala. Each spice plays a role, layering warmth, earthiness, gentle heat, and aromatic complexity. This robust flavor profile is so characterful and complete that you simply don’t miss anything by it being gluten-free. The spices, combined with the natural richness of the legumes, create a deeply satisfying eating experience.
The ‘Makhani’ Finish: Richness Without Reliance on Gluten
The word ‘makhani’ means ‘buttery’, and the finishing touches of butter and cream are what elevate this dish to its iconic status. Added towards the end, the cream brings a silky smoothness and richness, while the final swirl of butter adds decadent flavour and sheen. These ingredients perfectly complement the slow-cooked lentils, creating a luxurious mouthfeel and finish. Crucially for a gluten-free lifestyle, this richness and texture are achieved through fats and dairy (or non-dairy alternatives), completely independent of gluten. There’s no need for thickeners or stabilizers often found in GF substitutes; the dish thickens naturally from the broken-down lentils.
Simplicity and Accessibility for the Gluten-Free Kitchen
What makes this dal makhani recipe particularly wonderful for those following a gluten-free diet is its inherent simplicity. You aren’t grappling with complex flour blends or worrying about cross-contamination from grain-based ingredients within the dish itself. The ingredients are straightforward pantry staples (aside from maybe the specific lentils, which are readily available), and the method, especially with a pressure cooker, is efficient. It’s a naturally wholesome, protein-rich, and fibre-packed meal that effortlessly fits into a gluten-free lifestyle, proving that going gluten-free doesn’t mean sacrificing flavour, texture, or culinary adventure.
Enjoy this fantastic dal makhani recipe with naturally gluten-free basmati rice for a complete and incredibly satisfying meal that everyone can enjoy!

🎁 33 Gluten-Free Breakfasts
Start every day with a smile and flavor. Get our FREE recipe eBook!
Ingredients, Nutritional Information, and Additional Tips for Your Gluten-Free Dal Makhani
Creating a delicious and authentic dal makhani recipe at home is a rewarding experience, especially when you know exactly what goes into it. This gluten-free version uses simple, wholesome ingredients that come together to create a rich, flavorful dish. Understanding the role of each ingredient helps you appreciate how this classic transforms into a wonderful gluten-free option.
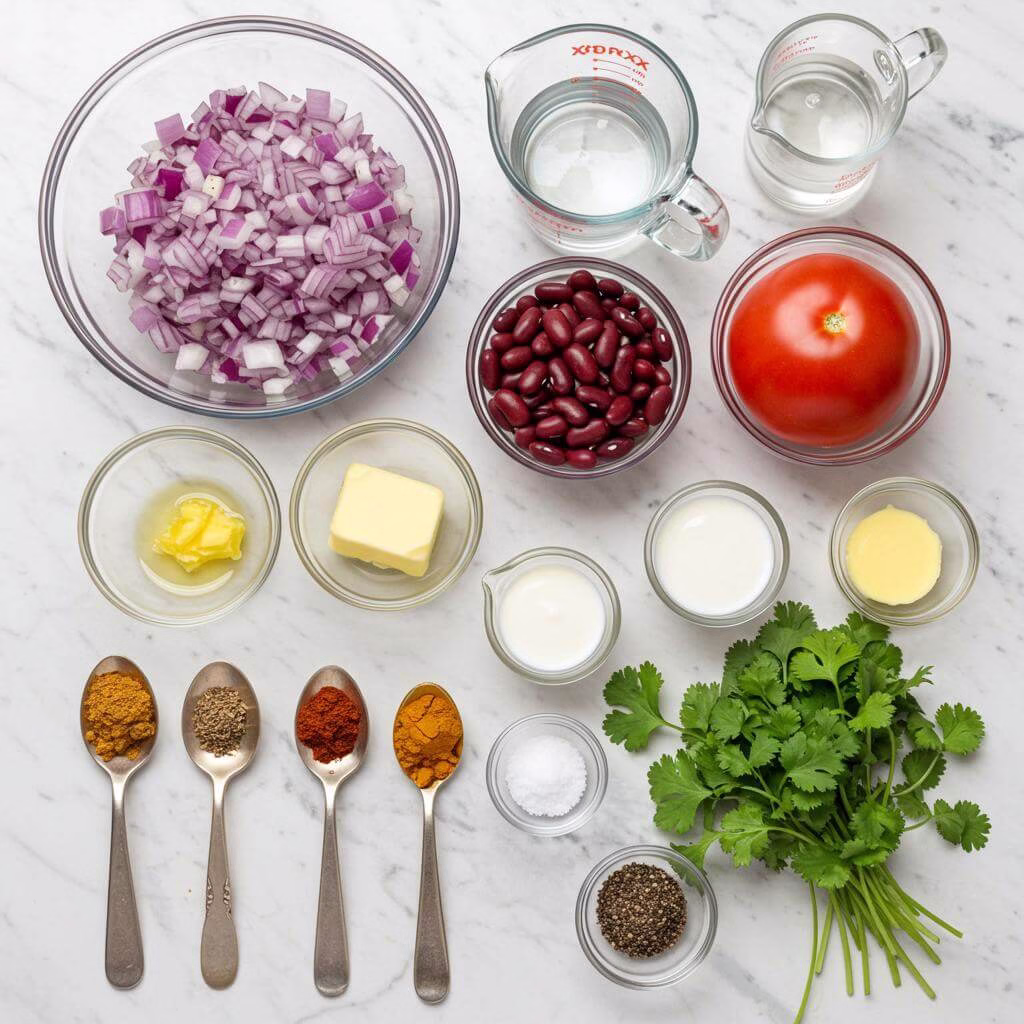
Ingredients You’ll Need
Here is the precise list of ingredients for this delightful gluten-free dal makhani:
- 1 onion chopped
- 1 cup urid beans (black lentils): These are the star of a traditional dal makhani recipe, providing the creamy texture and earthy flavor. They are naturally gluten-free and packed with protein and fiber. Find whole urid beans to get started.
- ⅓ cup canned red beans: Adding another layer of texture and slightly different flavor, these contribute to the heartiness of the dish. Ensure you choose certified gluten-free canned beans to avoid cross-contamination concerns, although most plain canned beans are naturally gluten-free.
- ⅓ cup canned black beans: Similar to red beans, black beans enhance the visual appeal and provide additional plant-based protein and fiber. Again, opt for gluten-free certified options if you’re particularly sensitive.
- 1 chopped tomato: Adds essential acidity and freshness, balancing the richness of the lentils and cream.
- 1 Tbsp butter: Used for sautéing the aromatics and adding richness.
- ¼ cup cream: Provides the signature creamy finish to the dal makhani recipe.
- 3 cups of water: The liquid base for cooking the lentils. Using filtered water can sometimes enhance the final flavor.
- ⅕ tsp cumin: A foundational spice in Indian cooking, offering warmth and depth.
- ⅕ tsp granulated garlic: Provides concentrated garlic flavor easily.
- ⅕ tsp chili: Adds a touch of heat. Adjust to your preference!
- ⅕ tsp ginger: Essential for its pungent, warming flavor, common in dal makhani recipes.
- ⅕ tsp turmeric: Known for its vibrant color and earthy, slightly bitter flavor, plus potential anti-inflammatory properties.
- ⅕ tsp fenugreek: Adds a unique, slightly bitter and aromatic note characteristic of authentic dal makhani. Fenugreek powder is easy to use here.
- ⅓ tsp garam masala: An aromatic blend of ground spices added towards the end to enhance the fragrance and flavor profile. Ensure your garam masala is gluten-free, although pure spice blends typically are.
- ½ tsp salt: Essential for seasoning and bringing out all the flavors.
- ⅕ tsp pepper: Adds a mild bite.
- cilantro for serving: Fresh cilantro brightens the dish and adds a burst of fresh flavor just before serving this delicious dal makhani recipe.
Nutritional Insights for Your Gluten-Free Dal Makhani
This dal makhani recipe is not only naturally gluten-free but also offers several nutritional benefits:
- Rich in Plant-Based Protein: Lentils and beans are excellent sources of vegetable protein, making this dish very satisfying.
- High in Fiber: The significant lentil and bean content contributes plenty of dietary fiber, which is great for digestive health and helps you feel full longer.
- Packed with Spices: The array of spices like turmeric, ginger, and cumin don’t just provide fantastic flavor for your dal makhani but also offer various antioxidants and potential health benefits.
- Naturally Gluten-Free: All the core ingredients – lentils, beans, spices, vegetables – are inherently gluten-free, making this a safe and comforting choice for those with celiac disease or gluten sensitivity.
- Source of Iron: Lentils are a good source of iron, important for energy levels.
Enjoying this homemade dal makhani recipe means enjoying a nutrient-dense meal that doesn’t compromise on flavor or dietary needs.
Substitutions, Variations, and Pro Tips
One of the joys of cooking is adapting recipes to suit your taste and dietary needs. Here are some ideas for your gluten-free dal makhani:
- Make it Dairy-Free/Vegan: Easily convert this dal makhani recipe by substituting the butter with a neutral-flavored oil like coconut or olive oil. Replace the cream with a full-fat canned coconut milk or a plant-based cooking cream alternative (check for gluten-free certification). This creates a rich, creamy vegan dal makhani.
- Swap Beans: If red or black beans aren’t readily available, you could potentially use kidney beans (Rajma) as they are also commonly paired with urid dal in Indian cuisine, staying true to the spirit of a hearty dal makhani recipe.
- Adjust Spice Levels: The chili amount can be increased or decreased based on your heat preference. Fresh green chilies, finely chopped and added with the onions, can also provide a different kind of heat.
- Add Aromatics: For deeper flavor, consider adding a pinch of asafoetida (hing) to the hot oil before adding the onions (ensure it’s a gluten-free variety, as some contain wheat flour). A little kasuri methi (dried fenugreek leaves) crushed between your palms and added towards the end with garam masala adds another layer of traditional flavor to your dal makhani. Find gluten-free asafoetida and kasuri methi online.
- Smoky Flavor (Dhaba Style): For an authentic smoky finish often found in restaurant-style dal makhani, try the ‘dhungar’ method. Heat a small piece of charcoal until red hot, place it in a small steel bowl or on a piece of foil in the center of the dal, add a teaspoon of ghee or oil over the charcoal, and quickly cover the pot with a lid for a few minutes to trap the smoke. Remove the charcoal before serving.
- Consistency: If the dal is too thick after cooking, add a little hot water and simmer for a few minutes to reach your desired consistency. If it’s too thin, continue to simmer uncovered for a bit longer to allow it to reduce.
- Serving Suggestions: This glorious dal makhani recipe pairs perfectly with basmati rice or gluten-free naan bread for a complete and satisfying meal.
Experiment with these tips to make this dal makhani recipe your own! Enjoy the process of creating this beloved Indian dish in your gluten-free kitchen.
Essential Equipment for This Recipe
To prepare this delicious recipe, you’ll need the following kitchen tools:
- Mixing Bowls – A set of various sizes is essential for prepping and combining ingredients.
Find Mixing Bowls on Amazon - Measuring Cups and Spoons – Accurate measurements are key to baking success!
Find Measuring Cups and Spoons on Amazon - Baking Sheets – Perfect for evenly baking your treats.
Find Baking Sheets on Amazon - Whisks – For whipping air into your batters and sauces.
Find Whisks on Amazon - Spatulas – Ideal for folding ingredients and scraping bowls clean.
Find Spatulas on Amazon - Food Processors – Makes chopping and pureeing a breeze!
Find Food Processors on Amazon - Saucepans – For cooking sauces and fillings.
Find Saucepans on Amazon - Chef’s Knives – A good knife is essential for chopping vegetables and herbs.
Find Chef’s Knives on Amazon - Cutting Boards – Protect your countertops while you prep!
Find Cutting Boards on Amazon
“` 
- Begin by preparing your whole urid beans (black lentils). It is essential to pre-soak the urid beans in plenty of water for 5 to 6 hours before you plan to cook your dal makhani recipe. This crucial step helps to significantly reduce the cooking time needed and also improves the texture of the beans, making them softer and more digestible. After soaking, drain the beans thoroughly and give them a quick rinse under cool water.
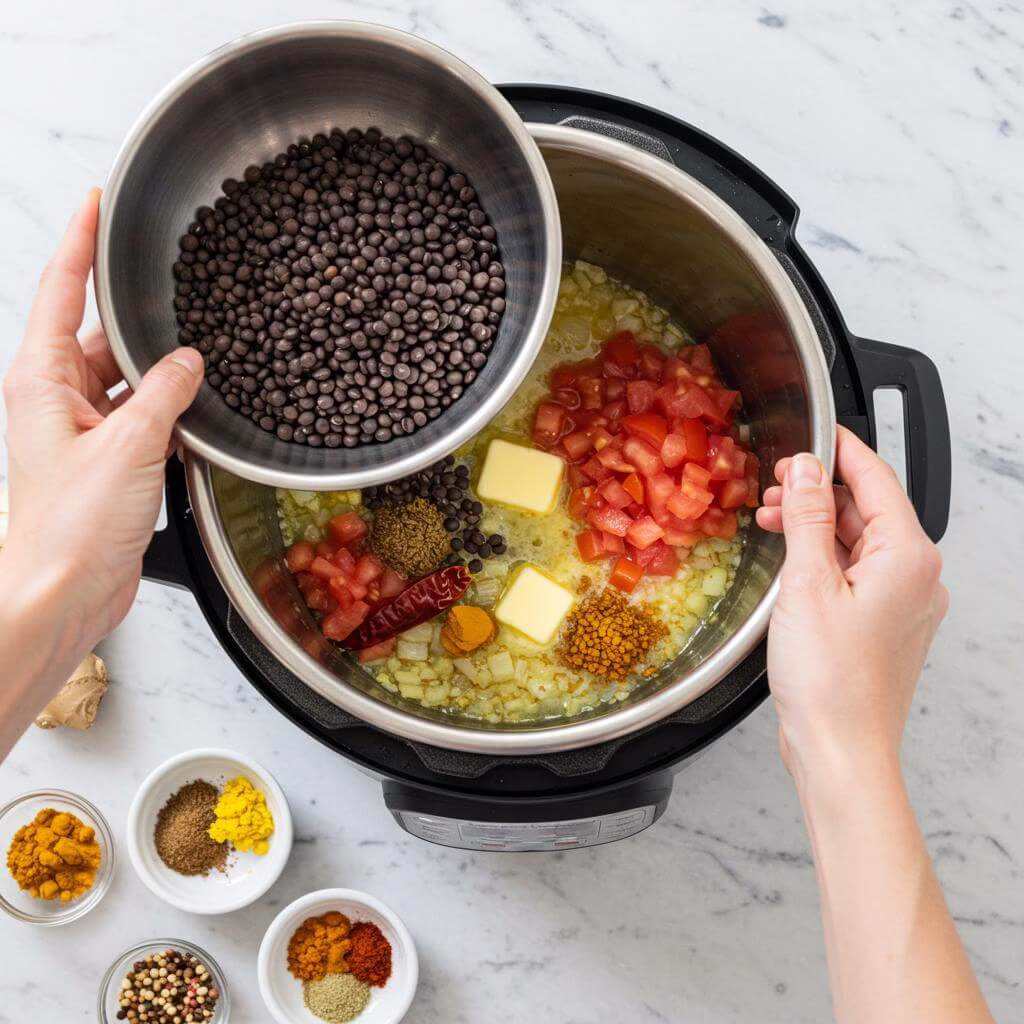
- Set up your cooking vessel, either an Instant Pot or a dedicated pressure cooker. Select the Saute mode setting. Add the required amount of butter to the pot and allow it to melt. Once the butter is hot and slightly shimmering, add the chopped onion. Cook the onion, stirring occasionally with a wooden spoon or heat-resistant spatula, for about 4 to 5 minutes, or until it softens and becomes translucent. Be careful not to burn the onions; moderate heat is key for this step in your dal makhani recipe preparation.
- Now it’s time to build the base flavor for your delicious dal makhani. Carefully add the drained and rinsed pre-soaked urid beans to the pot with the sautéed onions. Incorporate the chopped fresh tomato, the salt, and all the specified ground spices except for the garam masala. This includes the cumin, granulated garlic, chili, ginger, turmeric, and fenugreek. Pour in the 3 cups of water, ensuring all ingredients are submerged. **Important Note:** If you chose to use raw red and black beans (instead of canned), add them *at this specific stage* along with the urid beans. Stir everything together to combine the ingredients evenly before proceeding.
- Secure the lid on your pressure cooker or Instant Pot according to the manufacturer’s instructions. Switch from the Saute mode and select the Pressure Cook or Manual function. Set the timer for 30 minutes. Allow the pot to build pressure and cook for the full duration. Once the cooking cycle is complete, follow the recommended procedure for a gentle pressure release (this is often a natural release or a controlled quick release, depending on your pot). Once the pressure pin has dropped and it is safe to open, carefully remove the lid. Check the urid beans; they should be very soft and easily mashable if pressed between your fingers. This ensures your dal makhani has the right creamy texture.
- With the pressure safely released and the lid open, pour in the cream. Add the remaining spice, the garam masala, which provides a wonderful aromatic depth to the dal makhani recipe. **Crucial Timing:** If you are using *canned* red beans and canned black beans (as listed in the ingredients), *this* is the point at which you should drain and rinse them, then add them to the pot with the cooked urid beans and cream.
- Return your Instant Pot or pressure cooker to the Saute mode. Stir all the ingredients gently to incorporate the cream, garam masala, and canned beans (if using). Allow the mixture to simmer uncovered for about 5 minutes. Stir occasionally during this final simmer to prevent sticking and to help the dal makhani thicken slightly to your desired consistency. The heat will also help meld the flavors beautifully. Once complete, turn off the pot and serve your rich and comforting dal makhani recipe immediately. Garnish generously with fresh cilantro for a burst of freshness.
Tips for Perfect Results for Your Dal Makhani Recipe
Making a rich, creamy Dal Makhani is a true culinary pleasure, and achieving that perfect texture and depth of flavor is absolutely within reach! While this specific dal makhani recipe is naturally gluten-free, mastering the technique ensures you get the most authentic and delicious results possible. Here are some expert tips to elevate your homemade Dal Makhani:
- Soak Your Urid Beans Thoroughly: The recipe calls for soaking the black urid beans for 5-6 hours, and this step is non-negotiable! Soaking drastically reduces cooking time and helps the beans cook more evenly, leading to that wonderfully soft, creamy texture that is the hallmark of a great dal makhani recipe. Don’t skip it.
- Perfect the Pressure Cooking: Thirty minutes under pressure is a good starting point for soaked urid beans. However, check them after the pressure release. They should be very soft and easily mashable between your fingers. If not, cook for an additional 5-10 minutes under pressure. Properly cooked beans are key to the final consistency of your dal makhani recipe.
- Achieve Creaminess Through Simmering: After adding the cream and garam masala, simmering for the final 5 minutes isn’t just about heating; it’s about allowing the flavors to meld and the dal to thicken slightly. Stirring occasionally helps prevent sticking and encourages the beans to break down slightly, contributing to the creamy texture of your dal makhani. For extra creaminess, you can gently mash a few of the beans against the side of the pot during this simmering phase.
- Mind the Canned Beans: The recipe correctly instructs you to add canned red and black beans towards the end. This is important! Adding them too early during high-pressure cooking will cause them to disintegrate completely. Adding them during the final simmer keeps them intact while allowing them to heat through and absorb the flavors.
- Consider a “Tadka” (Tempering): While the recipe uses butter upfront, many traditional dal makhani recipes finish with a final tempering step (tadka). Heat a tablespoon of butter or ghee in a small pan, add a pinch of cumin seeds, a dried red chili, and maybe some finely chopped garlic or ginger. Let them sizzle briefly until fragrant (be careful not to burn!), then pour this hot mixture over the finished dal makhani just before serving. This adds an incredible layer of flavor.
- Adjust Consistency as Needed: The desired consistency of dal makhani can vary. If your dal is too thick after simmering, stir in a little hot water or milk/cream until it reaches your preferred level of thickness. If it’s too thin, simmer uncovered for a few extra minutes to allow some liquid to evaporate.
- Use Fresh Spices: The quality of your spices significantly impacts the final taste of your dal makhani recipe. Using fresh, fragrant ground spices makes a noticeable difference compared to older, less potent ones.
Common Mistakes to Avoid
Even with a straightforward dal makhani recipe, a few common slip-ups can impact the final dish. Keep an eye out for these:
- Skipping (or Rushing) the Bean Soak: This is probably the biggest mistake. Unsoaked or insufficiently soaked urid beans will take much longer to cook, may cook unevenly, and won’t yield that desired melt-in-your-mouth texture crucial for a classic dal makhani recipe. Always plan ahead and give them their full soak time.
- Adding Canned Beans Too Soon: As mentioned in the tips, introducing soft, pre-cooked canned beans into a high-pressure cooking environment can turn them into mush. Follow the instruction to add them only during the final simmering stage after the main pressure cooking is complete.
- Not Simmering After Adding Cream/Garam Masala: Simply stirring in the cream and garam masala and immediately serving won’t give you the full flavor development. The final 5-minute simmer is essential for the garam masala’s aromatics to bloom and for the cream’s richness to fully integrate, creating that signature velvety texture and deep flavor profile of a wonderful dal makhani recipe.
Frequently Asked Questions
Why do I need to pre-soak the urid beans for this dal makhani recipe?
Pre-soaking the whole urid beans is a really important first step in this dal makhani recipe! The blog post explains that soaking them for 5 to 6 hours significantly reduces the cooking time needed in the pressure cooker. It also helps to soften the beans and improve their texture, making them more digestible and contributing to that lovely creamy consistency traditional dal makhani is known for.
Can I make this Dal Makhani recipe vegan or dairy-free?
Absolutely! The blog post includes a great tip for making this dal makhani recipe suitable for vegan or dairy-free diets. Simply substitute the butter with a neutral-flavored oil like coconut or olive oil for sautéing. For the cream, use a full-fat canned coconut milk or a plant-based cooking cream alternative. Just make sure to check that your plant-based cream is certified gluten-free to keep the dish safe for those with sensitivities.
The recipe uses two kinds of beans – are they added at different times? Why?
Yes, if you’re using the canned red and black beans as listed in the ingredients, they are added towards the end of the cooking process. The instructions specify adding the pre-soaked urid beans (and raw red/black beans if using) with the initial spices and water before pressure cooking. The canned beans, which are already cooked and soft, are added *after* the pressure cooking is complete, along with the cream and garam masala, and then simmered briefly. This prevents the canned beans from overcooking and becoming mushy under pressure, ensuring they hold their shape while the urid beans break down to create the creamy base of the dal makhani recipe.
What kind of beans or lentils can I substitute in this dal makhani recipe?
While urid beans (black lentils) are the star and essential for the authentic texture of dal makhani, the blog post suggests a substitution for the red and black beans. If you don’t have them on hand, kidney beans (Rajma) are mentioned as a potential alternative often used in Indian cuisine, which would certainly keep within the spirit of a hearty lentil and bean dal makhani recipe. For the urid beans themselves, sticking to them is best for the classic result.
How can I make sure all the ingredients, like spices and beans, are truly gluten-free for this dal makhani recipe?
That’s a very important question for gluten-free cooking! The blog post mentions that the core ingredients like lentils, beans, and pure spices are naturally gluten-free. However, they recommend opting for certified gluten-free canned beans and garam masala if you are particularly sensitive, as cross-contamination can sometimes be a risk during processing. The substitutions section also advises checking that asafoetida (hing), if you choose to add it for extra flavor, is a gluten-free variety, as some contain wheat flour. Always reading labels is key!
What should I do if my dal makhani turns out too thick or too thin after cooking?
Don’t worry, adjusting the consistency is easy! The blog post offers simple fixes. If your dal makhani recipe is too thick after the pressure cooking and simmering steps, just add a little hot water to the pot and give it a gentle simmer for a few more minutes until it reaches your desired consistency. If it’s too thin, continue to simmer it uncovered on the Saute mode for a bit longer, stirring occasionally, to allow some of the liquid to evaporate and the dal to thicken.
How should I serve this delicious dal makhani?
This glorious dal makhani recipe is incredibly versatile! The blog post suggests pairing it perfectly with fragrant basmati rice for a comforting and complete meal. They also mention that gluten-free naan bread would be a fantastic accompaniment for scooping up all that creamy deliciousness. And don’t forget the fresh cilantro garnish right before serving – it adds a wonderful burst of freshness!
One Comment