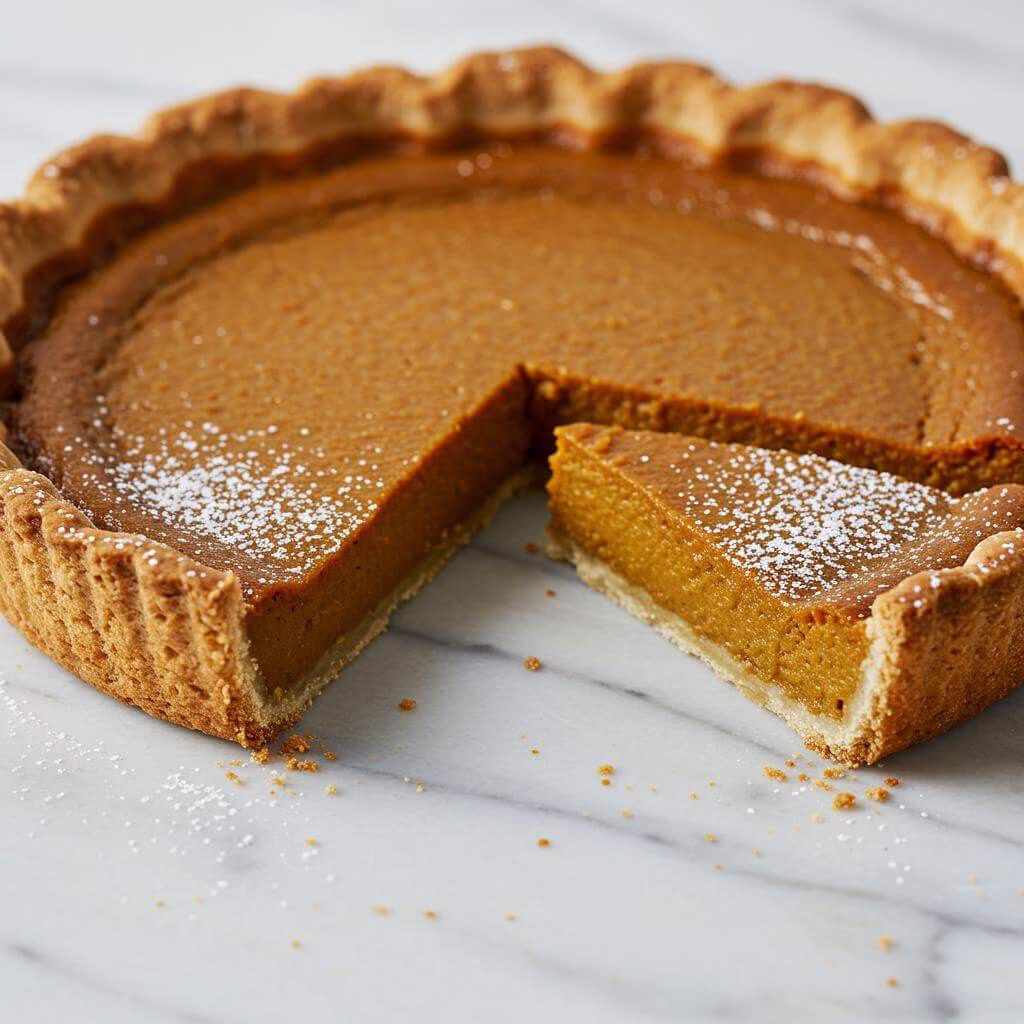
The Ultimate Gluten Free Pumpkin Pie: Your Holiday Showstopper!
When the leaves start to turn and a cozy chill fills the air, our minds (and stomachs!) often drift to one heartwarming thought: holiday baking! And what’s the quintessential dessert that perfectly captures comfort, celebration, and pure autumnal joy? Pumpkin pie, of course! For those of us navigating the gluten-free world, the dream of a truly delicious, flaky-crusted pumpkin pie can sometimes feel just out of reach. But what if we told you that the most incredible gluten free pumpkin pie – one that will have everyone at your table, gluten-free or not, clamoring for seconds – is absolutely achievable in your own kitchen?
Get ready to embrace the holiday season with open arms and a preheated oven, because this recipe for gluten free pumpkin pie is a true game-changer. We’re talking about a rich, perfectly spiced, sumptuously creamy pumpkin filling, all nestled inside a buttery, flaky crust that beautifully defies gluten-free expectations. This isn’t just a pie that’s ‘good for gluten-free’; it’s simply an outstanding pie, period. So wonderfully delightful, in fact, that your guests might be utterly surprised to learn it’s a gluten-free pumpkin dessert! This is the kind of treat that brings everyone together, ensuring that no one misses out on this cherished holiday tradition, making your gatherings truly inclusive.
We understand that gluten-free baking, particularly when it comes to achieving that perfect pie crust, can sometimes seem a bit daunting. That’s precisely why we’ve poured our passion and experience into perfecting this recipe, equipping you with all the essential tips and tricks for a stunningly successful result every time. Imagine the pride and joy of pulling a golden-brown, beautifully aromatic gluten free pumpkin pie from your oven! It’s so much more than just a dessert; it’s a heartfelt way to share love, create wonderful new memories, and celebrate the season. Whether you’re orchestrating a grand Thanksgiving feast (and perhaps need some delicious gluten-free dinner rolls to complete the spread!) or simply craving a comforting slice of homemade happiness, this pie is your go-to. And if you’re looking to present a variety of showstopping desserts, consider pairing this classic with our stunning gluten-free carrot cake for a truly unforgettable dessert table.
So, let’s roll up our sleeves and get baking! This easy-to-follow guide will walk you step-by-step through creating the ultimate gluten free pumpkin pie, transforming your holiday baking from what might have felt like a challenge into a genuinely delightful and rewarding adventure. Prepare to impress yourself and your loved ones with what will surely become the best gluten free pumpkin pie recipe in your collection. It’s time to make this holiday season the most delicious and joy-filled one yet!
The Secrets Behind This Exceptionally Delicious Gluten-Free Pumpkin Pie
Prepare to be amazed! Crafting a truly spectacular pie crust without the magic of gluten might seem like a daunting task, but this particular gluten free pumpkin pie recipe cracks the code beautifully. It’s not just about substituting ingredients; it’s about understanding how gluten-free components behave and using clever techniques to coax them into performing like their traditional counterparts. The result? A show-stopping, flaky-crusted, perfectly spiced gluten free pumpkin pie that will have everyone asking for a second slice, regardless of dietary needs!
Building a Better Gluten-Free Crust: Ingredient Intelligence
Let’s dive into the genius of this gluten-free pie crust. Unlike simply swapping wheat flour for a single gluten-free flour, this recipe leverages a thoughtful combination of ingredients and methods:
- The Power of a Quality 1:1 Blend with Xanthan Gum: This is fundamental. Gluten provides structure and elasticity in traditional dough, allowing it to be rolled and hold its shape. Since gluten is absent, a high-quality 1:1 gluten-free baking flour blend containing xanthan gum is essential. The blend itself often combines different flours and starches (like rice flour, potato starch, tapioca starch, etc.) to mimic the texture and absorption properties of wheat. Crucially, the xanthan gum acts as a binder and stabilizer. It hydrates and creates a viscous network that holds the disparate gluten-free flour particles together, providing just enough structure and flexibility to make the dough pliable and prevent it from crumbling when rolled and transferred. It’s the unsung hero giving the crust its integrity.
- Butter, Oh Glorious Cold Butter: Just like in conventional pie crust, keeping the butter very cold and cutting it into the flour is paramount for flakiness. When the cold butter pieces hit the hot oven, they melt and release steam, which pushes apart the layers of dough, creating those desirable flaky pockets. Freezing the butter before cutting it ensures it stays solid throughout the mixing process, maximizing this effect in the gluten-free matrix.
- The Dynamic Duo: Sour Cream and Vinegar: This is where this recipe gets particularly smart for gluten-free baking. The *acid* from both the sour cream and vinegar helps tenderize the dough by breaking down proteins in the gluten-free flours, resulting in a more tender crumb. Sour cream adds crucial fat and moisture, which are often lacking in gluten-free doughs, preventing dryness and contributing to richness. The fat also works with the butter to create tenderness. Furthermore, sour cream aids in achieving a beautiful golden-brown crust during baking.
- Ice Water: Hydration Control: Using a minimal amount of ice-cold water helps bring the dough together without over-hydrating (which can make it gummy) and keeps the butter pieces firm.
Techniques That Ensure Gluten-Free Pie Crust Perfection
Beyond the ingredients, the methodology is key to the success of this gluten free pumpkin pie crust:
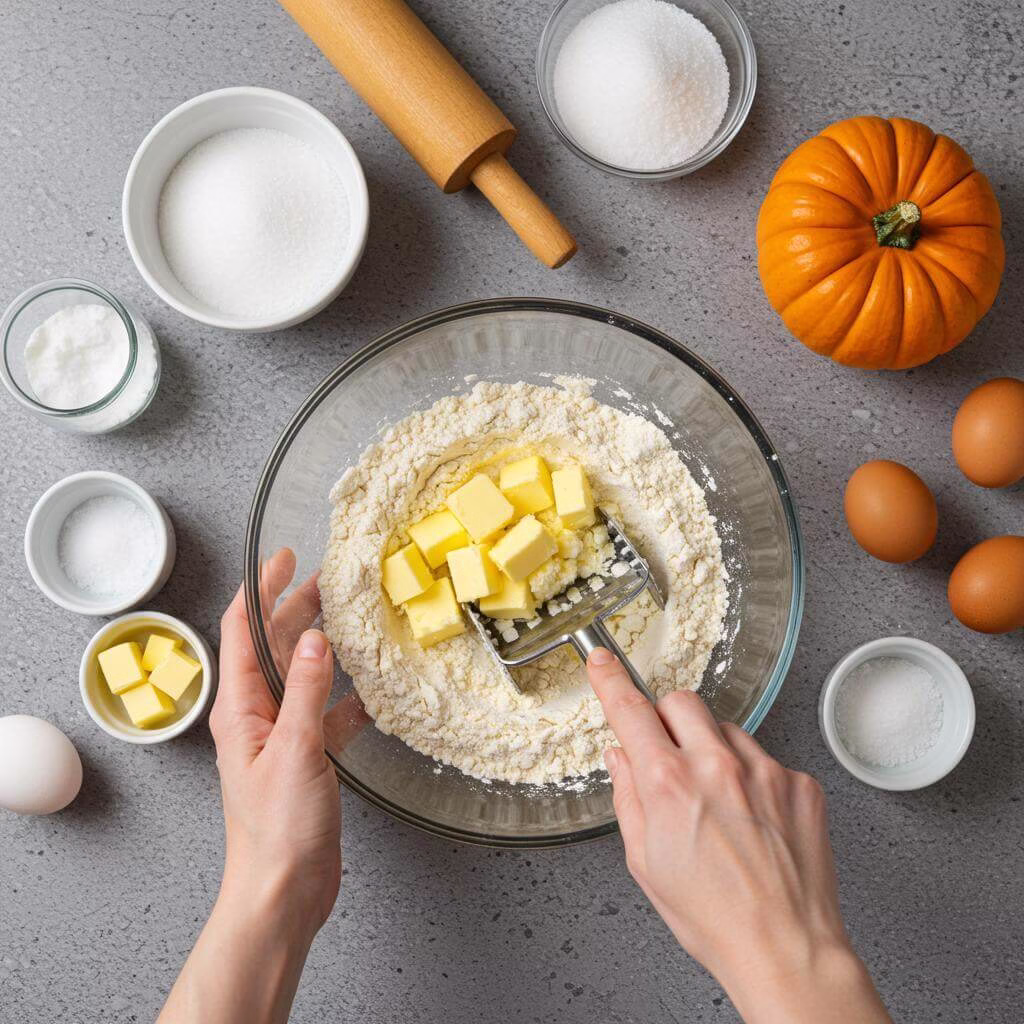
- Food Processor Magic: Using a food processor is ideal for gluten-free dough. It quickly cuts the cold butter into the flour mixture with minimal handling, ensuring the butter stays cold and in discrete pieces. This rapid processing also helps distribute ingredients evenly and prevents overworking the dough, which can lead to a tough or crumbly texture inconsistent with a great gluten free pumpkin pie.
- The Essential Chill Time: Refrigerating the dough for at least an hour (or longer) is non-negotiable. During this time, the gluten-free flours and starches have a chance to fully hydrate from the added liquids (water, sour cream, vinegar). Proper hydration is vital for developing the dough’s structure (aided by the xanthan gum) and getting rid of any potential grittiness often associated with under-hydrated gluten-free starches. It also chills the butter and firms up the dough, making it significantly easier to roll.
- Rolling Between Plastic Wrap: This technique is a game-changer for delicate gluten-free doughs. Gluten-free dough is inherently less elastic than wheat-based dough and can be prone to cracking or sticking. Rolling between two sheets of plastic wrap prevents sticking, eliminates the need for adding excess flour (which dries out the dough), and allows you to easily lift and invert the rolled dough into the pie plate without breakage. It takes the stress right out of shaping the crust for your gluten free pumpkin pie.
- Freezing the Shaped Shell: Freezing the crust in the pie plate before adding the filling ensures the butter is completely solid and the dough is firm. This helps the crust hold its shape during the initial high-temperature bake, preventing shrinkage and promoting maximum lift and flakiness as the butter melts and steams.
The Naturally Gluten-Free Filling Completes the Picture
While the crust requires careful attention, the traditional pumpkin pie filling is naturally gluten-free! The combination of pumpkin puree, eggs (which set the custard), milk (like evaporated milk or coconut milk for richness), sugar, and warming spices creates a smooth, creamy, and flavorful custard. This recipe utilizes a classic, reliable filling ratio, ensuring it bakes up with the perfect texture – not too watery, not too firm. The filling complements the flaky gluten-free crust beautifully, making the entire gluten free pumpkin pie harmonious and satisfying.
In summary, this gluten free pumpkin pie works so incredibly well because it combines smart ingredient choices (like a quality 1:1 blend with xanthan gum, sour cream, and vinegar in the crust) with precise, compensating techniques (cold ingredients, specific processing, extensive chilling, and plastic wrap rolling). These elements work together synergistically to overcome the challenges of baking without gluten, resulting in a flaky, tender crust and a smooth, classic filling. It’s a testament to the fact that gluten-free baking, when done thoughtfully, can yield results every bit as delicious and satisfying as traditional baking. Get ready to bake the best ever gluten free pumpkin pie!
Transform Your Mornings with 33 FREE Gluten-Free Breakfasts!
Unlock delicious, easy-to-make recipes that will make you excited to start every single day. No more boring breakfasts, just pure flavor and joy!

Get Your FREE Breakfast Ebook Now!
(No credit card required. Instant download.)
Ingredients, Nutritional Information, and Additional Tips
Crafting a perfect gluten free pumpkin pie starts with understanding the role of each ingredient. Here’s a breakdown of what you’ll need and why it matters, along with helpful tips and nutritional insights to make your gluten free pumpkin pie the star of any gathering.
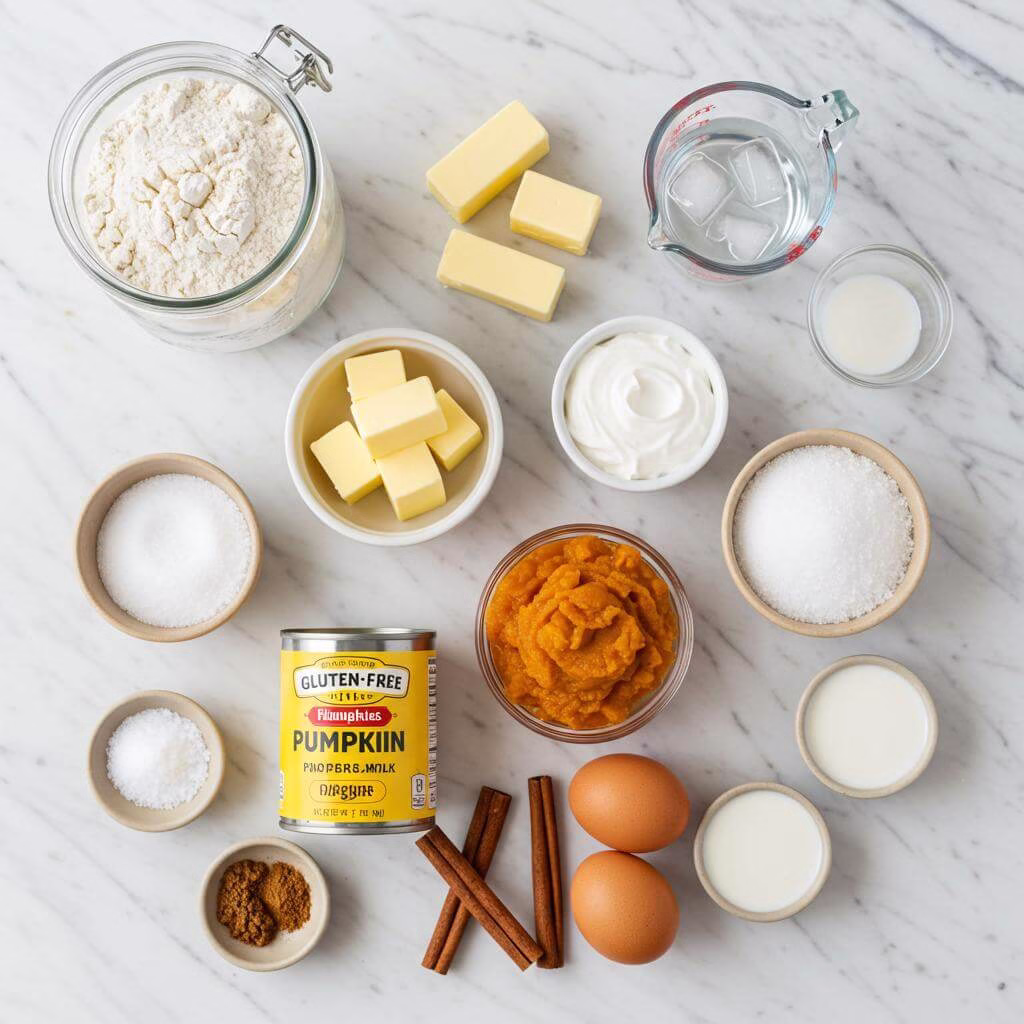
Ingredients List
Gathering the right ingredients is key to achieving that classic custardy filling and flaky gluten-free pie crust for your gluten free pumpkin pie.
For the Gluten-Free Pie Crust:
- 8 tablespoons butter (1 stick): Essential for creating flakiness and flavor in the crust. Using very cold butter is crucial for texture.
- 3 tablespoons ice water: Helps bind the dough without developing gluten (since there isn’t any!). Using ice water keeps the fat cold.
- 1 1/2 tablespoons sour cream: Contributes moisture and a slight tang, aiding in dough stability and browning for a beautiful crust.
- 1 1/2 teaspoons white vinegar or rice vinegar: Helps tenderize the dough by inhibiting gluten development (though not applicable here) and contributes to flakiness.
- 1 cup + 2 tablespoons gluten-free 1:1 baking flour (180 grams): This is the foundational ingredient for the gluten-free crust. A high-quality 1:1 gluten-free baking flour blend that contains xanthan gum is vital. Xanthan gum acts as a binder and provides structure in gluten-free baking, mimicking the elasticity and stability usually provided by gluten. It’s what holds the dough together and prevents it from being crumbly.
- 1 teaspoon sugar: Adds a touch of sweetness and aids in browning the crust.
- 1/2 teaspoons salt: Enhances the overall flavor of the crust.
For the Gluten-Free Pumpkin Pie Filling:
- 2/3 cup sugar: Sweetens the custard. (Note: The recipe suggests this can be reduced).
- 1 teaspoon cinnamon: The classic warm spice flavor for pumpkin pie.
- 1/2 teaspoon ginger: Provides a complementary warm, slightly spicy note.
- 1/4 teaspoon cloves: Adds depth and intensity to the spice blend.
- 1/2 teaspoon salt: Balances the sweetness and enhances the other flavors.
- 1 15 oz can of pumpkin: Be sure this is 100% pure pumpkin puree, not pumpkin pie filling (which contains added sugars and spices). Canned pumpkin puree is the base for the rich custard.
- 2 eggs: Act as the primary binder and thickener for the custard, providing structure and richness.
- 12 ounce (1 can) evaporated milk or 1 cup full-fat coconut milk: Adds creaminess and liquid to the custard. Evaporated milk provides a classic richness, while full-fat canned coconut milk offers a dairy-free alternative with a similarly smooth texture.
Nutritional Information & Gluten-Free Benefits
Making a homemade gluten free pumpkin pie allows you to control the ingredients and enjoy a delicious dessert that fits dietary needs. The primary nutritional advantage here is the absence of gluten, making it safe and enjoyable for individuals with Celiac disease or gluten sensitivity. While traditional pies rely on wheat flour for the crust, this recipe uses a specially formulated blend designed for gluten-free baking.
Beyond being a safe gluten free pumpkin pie option, this dessert offers other positives:
- Fiber from Pumpkin: Pumpkin puree is a good source of dietary fiber, which supports digestive health.
- Vitamins and Antioxidants: Pumpkin is rich in Vitamin A (from beta-carotene), along with other vitamins and antioxidants.
- Potential for Reduced Sugar: As noted in the recipe, the sugar in the filling can be reduced, allowing you to lower the overall sugar content compared to many store-bought or traditional recipes.
- Dairy-Free Option (Filling): The ability to swap evaporated milk for coconut milk offers a pathway to a dairy-free filling, catering to additional dietary needs within the gluten free pumpkin pie framework.
While pie is certainly a treat, choosing to make a homemade gluten free pumpkin pie lets you understand exactly what goes into it, free from hidden gluten sources often found in commercially prepared baked goods.
Substitutions, Variations, and Additional Tips
Making gluten free pumpkin pie can be a rewarding experience. Here are some tips and ways to adapt this recipe to suit your needs and preferences:
Substitutions:
- Gluten-Free Flour Blend: This recipe specifically calls for a 1:1 gluten-free baking flour blend that contains xanthan gum. Using a blend *without* xanthan gum will likely result in a crumbly crust. Not all 1:1 blends are created equal; performance can vary between brands. Stick to a trusted brand known for pie crusts if possible.
- Dairy-Free Crust: The recipe as written for the crust is *not* easily converted to dairy-free due to the sour cream and butter. The original source specifically recommends seeking out a dedicated gluten-free *and* dairy-free crust recipe if needed, rather than attempting substitutions in this particular crust formula.
- Dairy-Free Filling: The recipe *does* provide a direct substitution for the filling: use 1 cup of full-fat canned coconut milk in place of the evaporated milk. Ensure you use full-fat coconut milk from a can for the best consistency in the custard. Shake the can well before opening to combine the cream and liquid.
- Egg Substitute (Filling): While the recipe specifies eggs for the custard, if you need an egg-free option (making the filling vegan if using coconut milk), you *might* experiment with egg replacers designed for custards, such as a commercial egg replacer or a cornstarch/water slurry. However, this could alter the texture and setting time. For a truly reliable egg-free filling, you might need a recipe specifically developed as a vegan gluten free pumpkin pie filling.
Variations:
- Spice It Up: Feel free to add a pinch of other warming spices like nutmeg or allspice to the filling for extra flavor dimension in your gluten free pumpkin pie.
- Sweetener: While the recipe allows reducing the granulated sugar, you could potentially experiment with other granular sweeteners (like brown sugar for a slightly different flavor) or sugar substitutes designed for baking, though this may impact texture and sweetness level.
- Toppings: Elevate your gluten free pumpkin pie with toppings like fresh whipped cream (dairy or non-dairy), a sprinkle of cinnamon, chopped nuts (if no allergies), or a drizzle of caramel sauce.
Additional Tips for Success:
- Crust Temperature is Crucial: Pay close attention to the chilling times for the dough (at least 1 hour in the fridge, 15 mins in the freezer before baking) and letting it sit at room temp (15 mins before rolling). These steps are vital for handling and baking a flaky gluten-free crust.
- Rolling the Crust: As noted, rolling the gluten-free dough between two pieces of plastic wrap makes transferring it to the pie plate much easier, minimizing breakage.
- Preventing Cracks: Avoid over-baking the pie, which can lead to cracks in the filling. The pie is done when the edges are set but the center is still slightly wobbly. It will firm up as it cools.
- Cooling and Chilling: Allow the pie to cool completely on a wire rack before refrigerating. Chilling for at least 4 hours (or overnight) is highly recommended for the best texture and clean slices of your gluten free pumpkin pie.
- Storage: Store any leftover gluten free pumpkin pie covered in the refrigerator for up to 2 days. This pie does not freeze well once baked.
With these details and tips, you’re well-equipped to create a stunning and delicious gluten free pumpkin pie that everyone at the table will enjoy!
Essential Equipment for This Recipe
To prepare this delicious recipe, you’ll need the following kitchen tools:
- Mixing Bowls – A set of sturdy mixing bowls is essential for combining wet and dry ingredients.
Find Mixing Bowls on Amazon - Measuring Cups and Spoons – Accurate measurements are key for baking success.
Find Measuring Cups and Spoons on Amazon - Baking Sheets – Perfect for even baking and crispy results.
Find Baking Sheets on Amazon - Whisks – Essential for creating airy mixtures and smooth sauces.
Find Whisks on Amazon - Spatulas – Ideal for folding ingredients and scraping bowls clean.
Find Spatulas on Amazon - Food Processors – Great for chopping and blending ingredients quickly.
Find Food Processors on Amazon - Saucepans – A versatile pan for cooking sauces and other recipe components.
Find Saucepans on Amazon - Chef’s Knives – A high-quality knife is essential for any kitchen.
Find Chef’s Knives on Amazon - Cutting Boards – Protect your countertops while preparing ingredients.
Find Cutting Boards on Amazon
- Prepare the Butter for the Crust: Begin by cutting the cold butter into small, approximately 1/4-inch cubes. It’s crucial that the butter is very cold for a flaky gluten-free crust. Place these small butter pieces onto a plate or small tray and pop them into the freezer for about 10 to 15 minutes. This extra chilling step helps ensure the butter remains solid and creates those wonderful flaky layers when baked, essential for a perfect gluten free pumpkin pie crust.
- Combine Wet Ingredients: While the butter is chilling, get a small bowl ready. Measure out the ice water, sour cream, and vinegar. Combine these ingredients in the bowl and whisk them together until the mixture is smooth and uniform. Set this bowl aside for now; you’ll add this liquid mixture to your dry ingredients and butter shortly. The sour cream and vinegar contribute to the tenderness and slight tang of the crust.
- Process Dry Ingredients and Cut in Butter (Food Processor Method): If you’re using a food processor (which is a quick and reliable method for gluten-free pastry), add the measured high-quality 1:1 gluten-free baking flour (make sure your blend contains xanthan gum for structure), sugar, and salt into the processor bowl fitted with the blade attachment. Pulse a couple of times to combine them. Then, scatter the chilled butter pieces over the dry ingredients. Pulse the mixture in short bursts, about 10 times, until the butter is broken down into pieces roughly the size of large peas. Avoid over-processing at this stage; you still want visible pieces of butter.
- Add Wet Ingredients to Dough: Pour the reserved sour cream mixture evenly over the flour and butter mixture in the food processor. Pulse again, about 10 more times, just until the dough starts to come together and clump around the blade. Don’t process too long after it starts to clump, as overmixing can make gluten-free dough tough or crumbly. If after 10 pulses it still looks very dry or doesn’t clump, don’t worry! Simply turn the mixture out into a bowl and gently press it together with your hands until it forms a cohesive ball of dough.
- Chill the Dough: Carefully turn the dough out onto a large piece of plastic wrap. Gently gather it into a flat, round disc shape – handling it as little as possible. Wrap the disc tightly in the plastic wrap, pressing out any excess air. Transfer the wrapped dough to the refrigerator and chill it for a minimum of 1 hour. Chilling is *critical* for gluten-free dough; it allows the flour to fully hydrate and the butter to firm up again, making it much easier to roll and handle for your gluten free pumpkin pie base. You can refrigerate the dough for up to 2 days if you’re making it ahead of time.
- Prepare Dough for Rolling: If your dough has been refrigerated for longer than the minimum 1 hour, take it out of the fridge about 15 minutes before you plan to roll it. Let it sit at room temperature to soften slightly, which will prevent cracking when you try to roll it. Gluten-free dough can be more delicate, so rolling it between two large pieces of plastic wrap is highly recommended. Place the dough disc between the two sheets of plastic wrap and roll it out evenly using a rolling pin to a thickness of about 1/4 inch, aiming for a circle large enough to fit your pie plate.
- Transfer Dough to Pie Plate: Once rolled, carefully peel off the top layer of plastic wrap. Invert the rolled dough (which is still on the bottom sheet of plastic) over a standard 9-inch pie plate. Gently ease the dough down into the contours and edges of the pan, being careful not to stretch it, which can cause it to shrink during baking. Once the dough is settled, slowly and carefully peel off the second piece of plastic wrap. Trim any excess dough hanging over the edge using kitchen scissors or a sharp knife, leaving about a 1-inch overhang. You can then crimp or shape the edges as desired for a decorative finish on your gluten free pumpkin pie crust.
- Chill the Shaped Crust: After shaping the crust in the pie plate, lightly cover it with plastic wrap (don’t wrap it too tightly) and place the entire pie plate into the freezer. Freeze the shaped crust for at least 15 minutes, or up to 1 hour, until it is well-chilled and firm. This step prevents the crust from shrinking significantly during the initial baking phase and helps it hold its shape against the weight of the filling.
- Preheat Your Oven: As the shaped crust chills in the freezer, preheat your oven to 425°F (220°C). Ensure the oven is fully preheated before you place the pie inside for even baking.
- Prepare the Pumpkin Filling: In a medium-sized mixing bowl, combine the sugar, cinnamon, ginger, cloves, and salt using a whisk. Whisk these dry ingredients together until they are well mixed. Then, add the 15-ounce can of 100% pumpkin puree (make sure it’s puree, not pumpkin pie filling), the two eggs, and the 12 ounces of evaporated milk (or full-fat canned coconut milk for a dairy-free option). Continue whisking until the filling is completely smooth and all ingredients are fully incorporated. This creates the rich, custardy center for your gluten free pumpkin pie.
- Fill and Partially Bake the Pie: Carefully remove the chilled pie crust from the freezer. Pour the prepared pumpkin filling into the frozen pie shell. If you have a small amount of filling left over that doesn’t fit in the pie plate, you can pour it into small ramekins and bake alongside the pie. Place the pie plate onto a baking sheet (this makes it easier to transfer in and out of the oven and catches any potential spills). Bake in the preheated 425°F (220°C) oven for exactly 15 minutes.
- Reduce Heat and Finish Baking: After the initial 15 minutes of baking at 425°F, carefully reduce the oven temperature to 350°F (175°C) *without opening the oven door if possible* or opening it only briefly. Continue to bake the gluten free pumpkin pie for another 40 to 50 minutes. The pie is done when the edges of the filling appear set and slightly cracked, but the center still has a slight wobble – it will firm up as it cools. You can also gently insert a knife near the center (but not *in* the center, which stays soft longest); if it comes out mostly clean, the pie is ready.
- Cool and Chill the Pie: Once baked, carefully remove the pie from the oven and place it on a wire cooling rack. Allow the pie to cool completely at room temperature for at least 2 hours. This slow cooling process is essential for the custard to properly set. After it has cooled to room temperature, cover the pie loosely with plastic wrap or aluminum foil and transfer it to the refrigerator. Chill the pie for a minimum of 4 hours, but ideally overnight, before slicing and serving. This chilling time allows the gluten free pumpkin pie to firm up fully for clean slices. You can store the pie in the refrigerator for up to 2 days. Serve your delicious gluten free pumpkin pie cold, perhaps with a dollop of whipped cream!
Tips for Perfect Gluten-Free Pumpkin Pie
Making a delicious gluten-free pumpkin pie from scratch is absolutely achievable! With a few key techniques tailored for gluten-free baking, you’ll get that classic, creamy filling and a wonderfully flaky crust. Here are our best tips for creating a show-stopping gluten free pumpkin pie:
- Keep Ingredients COLD for the Crust: Using frozen butter cut into small pieces and ice-cold water/sour cream/vinegar mixture is paramount for a flaky gluten-free pie crust. Cold fat creates steam pockets during baking, leading to those desirable layers.
- Process Dough Just Until it Clumps: Gluten-free flours can become gummy if overmixed once liquid is added. Pulse the dough in the food processor only until it *just* starts to clump together. If it doesn’t quite form a ball, a few quick presses by hand are better than over-processing.
- Chill Dough Adequately (But Don’t Skip the Room Temp Rest): Chilling for at least an hour (or up to 2 days) allows the gluten-free flour time to fully hydrate, making the dough less crumbly and easier to handle. However, letting it sit at room temperature for 15 minutes before rolling makes it pliable enough without cracking.
- Embrace the Plastic Wrap Rolling Method: Gluten-free dough is more delicate than traditional dough. Rolling it between two sheets of plastic wrap makes transferring it to the pie plate a breeze and significantly reduces the risk of breakage.
- Freeze the Shaped Pie Crust Before Baking: This step is crucial for a gluten-free pumpkin pie. Freezing the crust ensures the fat is super cold and the dough is firm before it hits the hot oven. This helps the crust hold its shape, preventing shrinkage and protecting against a soggy bottom once the wet filling is added.
- Whisk Filling Gently Until Smooth: For the gluten-free pumpkin pie filling, combine the ingredients and whisk just until everything is smooth and fully incorporated. Over-whisking can introduce too much air, which can sometimes lead to cracking in the finished custard.
- Use 100% Pure Pumpkin Puree: Be sure you’re using canned pumpkin puree, not “pumpkin pie filling.” The latter contains added sugars and spices that will alter the texture and flavor of your gluten free pumpkin pie.
- Employ the Two-Temperature Baking Method: Starting the pie at a higher temperature (425°F) for the first 15 minutes helps set the edges of the gluten-free crust quickly. Reducing the temperature to 350°F allows the custard to bake gently and evenly without overcooking or cracking, vital for a smooth gluten free pumpkin pie filling.
- Cool Completely at Room Temperature, Then Chill: Custard needs time to finish setting outside of the oven. Cooling on a wire rack for the recommended time before refrigerating is essential for achieving the proper firm but creamy texture required for slicing your beautiful gluten-free pumpkin pie.
Common Gluten-Free Pumpkin Pie Mistakes to Avoid
Even with the best recipe, a few common errors can derail your perfect gluten free pumpkin pie. Steering clear of these pitfalls will significantly improve your results:
- Not Chilling the Dough Enough (or Skipping the Room Temp Rest): Rushing the chilling process means the flour hasn’t absorbed enough liquid, resulting in a frustratingly crumbly dough that’s hard to roll. Conversely, trying to roll straight from the fridge can lead to major cracking. Follow the chilling *and* room temperature rest steps for manageable gluten-free pie dough.
- Overworking the Dough or Filling: Gluten-free dough lacks the elastic network of gluten, making it prone to toughness if handled too much. Be gentle when forming the disc and rolling. Similarly, over-mixing the pumpkin pie filling can lead to a tougher or cracked custard instead of a smooth, rich one.
- Opening the Oven Door Too Early or Frequently: Constant temperature fluctuations can disrupt the delicate setting process of the custard, potentially causing the surface of your gluten free pumpkin pie to crack or the center to sink. Trust the baking times and peek through the oven door if possible until near the end of the baking time.
Frequently Asked Questions
Can I make parts of this gluten free pumpkin pie ahead of time?
Absolutely! This recipe is great for getting a head start, especially during busy holiday times. You can make the gluten-free pie crust dough up to 2 days in advance and keep it stored in the refrigerator. For the assembled and baked gluten free pumpkin pie itself, you can bake it up to 2 days before you plan to serve it. Just make sure to cool it completely after baking and then keep it covered and refrigerated until you’re ready to slice and enjoy!
The recipe mentions reducing the sugar in the filling. How much can I cut back?
Yes, you definitely can! The recipe notes that the amount of sugar in the pumpkin filling can be adjusted to your preference. It specifically suggests that you can cut the sugar back to 1/2 cup for the filling as a tested variation. This is a great way to customize the sweetness level of your gluten free pumpkin pie.
Why is chilling the gluten-free pie dough so important?
Chilling the gluten-free pie dough is a really crucial step for success! There are a couple of main reasons. First, it gives the gluten-free flour time to fully hydrate with the liquid ingredients, making the dough more cohesive. Second, and perhaps most importantly, it allows the butter pieces to firm up again. Keeping the butter very cold and in small pieces is what creates those wonderful pockets of fat that steam in the oven, resulting in a flaky, tender gluten-free crust structure when baked. Don’t skip that fridge time!
Can I make this gluten free pumpkin pie recipe dairy-free?
Yes, you can make the filling portion dairy-free! The recipe provides a direct substitution: you can use 1 cup of full-fat canned coconut milk in place of the evaporated milk in the pumpkin filling. This works wonderfully to create a creamy, dairy-free custard. However, the recipe for the gluten-free crust as written, which uses butter and sour cream, is not easily adapted to be dairy-free. If you need a completely dairy-free gluten free pumpkin pie, you would need to use a different, specifically developed gluten-free AND dairy-free pie crust recipe.
What kind of gluten-free flour should I use for the crust?
It’s really important to use the right kind of flour blend for this gluten-free crust to turn out correctly. The recipe specifically calls for a high-quality 1:1 gluten-free baking flour blend that contains xanthan gum. Xanthan gum acts as a binder in gluten-free baking, mimicking the elasticity that gluten provides, and is essential for giving the dough structure and preventing it from being too crumbly or falling apart. Make sure the blend you choose includes it!
How do I know when the gluten free pumpkin pie filling is perfectly baked?
Knowing when the custard is set is key! The pie is ready when the edges of the filling look set and might even have some small cracks, but the center still has a slight wobble to it when you gently nudge the pie plate. The center will continue to set up as the pie cools. You can also carefully insert a knife into the filling about halfway between the center and the edge; if it comes out mostly clean, it’s likely done baking. Avoid over-baking, as this can cause larger cracks in the filling.
How should I store leftover gluten free pumpkin pie? Can I freeze it?
After your gluten free pumpkin pie has cooled completely on a wire rack for a couple of hours, you should cover it loosely with plastic wrap or foil and store it in the refrigerator. It will keep well in the fridge for up to 2 days. Unfortunately, based on testing, this particular pie does not freeze well once it’s baked, so it’s best to enjoy it fresh within a couple of days of baking and refrigerating.