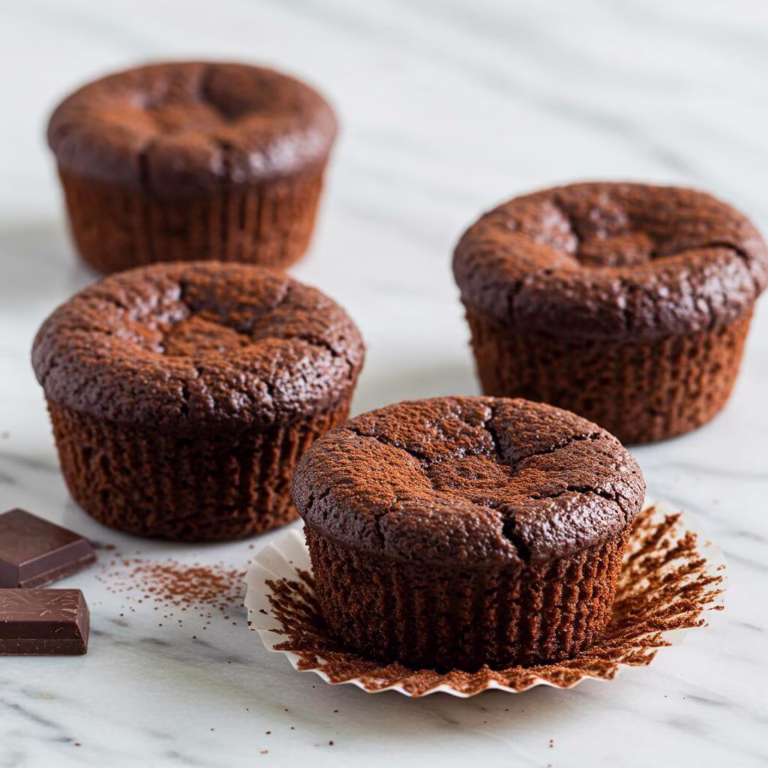
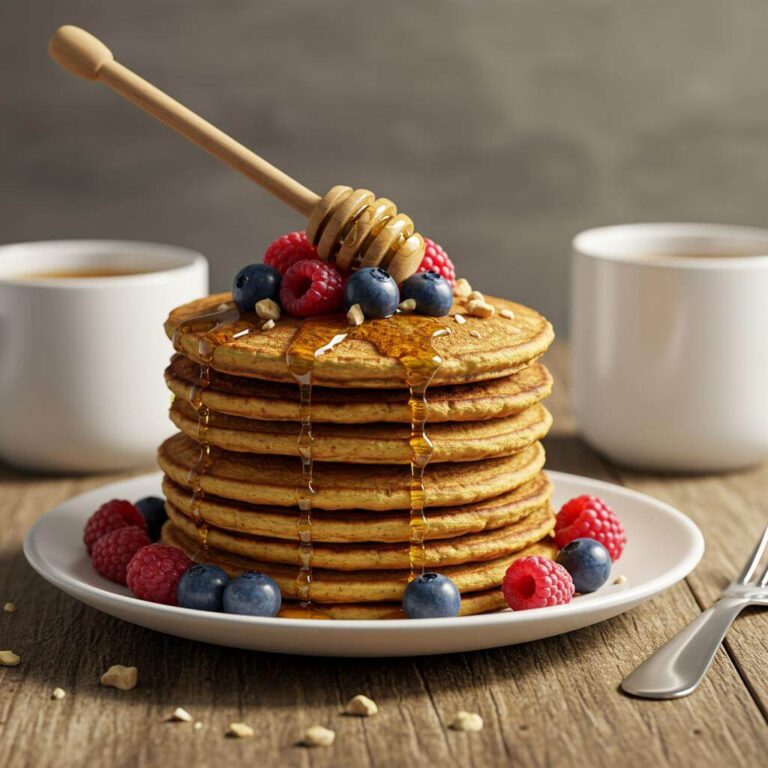
Do you remember those days? The effortless joy of walking into any bakery and picking out a perfectly fluffy, moist vanilla cake slice, knowing it would be pure heaven? Or the simple pleasure of whipping up a classic vanilla cake for a birthday or special moment? If you’re like me and navigate the world gluten-free, those days were replaced with a different reality. A reality where the simple craving for a truly delicious gluten free vanilla cake can feel like an impossible dream. We yearn for that light, airy texture and sweet, comforting vanilla flavor, but often meet disappointment instead.
Oh, the journey I’ve been on! Especially since my oldest daughter’s celiac diagnosis turned our kitchen upside down. Baking, my passion and livelihood, suddenly had a whole new set of rules. Armed with a stack of books and a healthy dose of determination, I plunged into the world of gluten-free flours, binders, and gums. My mission? To recreate those beloved classics for her, starting with the most fundamental: a perfect gluten free vanilla cake. There were trials, friends. So many trials. Layers that crumbled at the slightest touch, cakes with a gummy, unpleasant texture, and that familiar, slight sigh of disappointment when the result just wasn’t *right*. I know many of you, my fellow gluten-free friends, have walked this same path.
But baking is about persistence, isn’t it? I tweaked, I experimented, I researched different flour blends and techniques. I discovered the magic ratio of specific flours and the crucial role of xanthan gum (the unsung hero of gluten-free baking!). Then, one glorious day, it happened. The aroma wafting from the oven was different – it was the sweet, unmistakable scent of a perfect vanilla cake. I pulled out layers that were golden, lifted cleanly from the pan, and felt light and bouncy. The batter itself was transformed. This was it. The gluten free vanilla cake I had been dreaming of, and bonus, it’s also dairy-free!
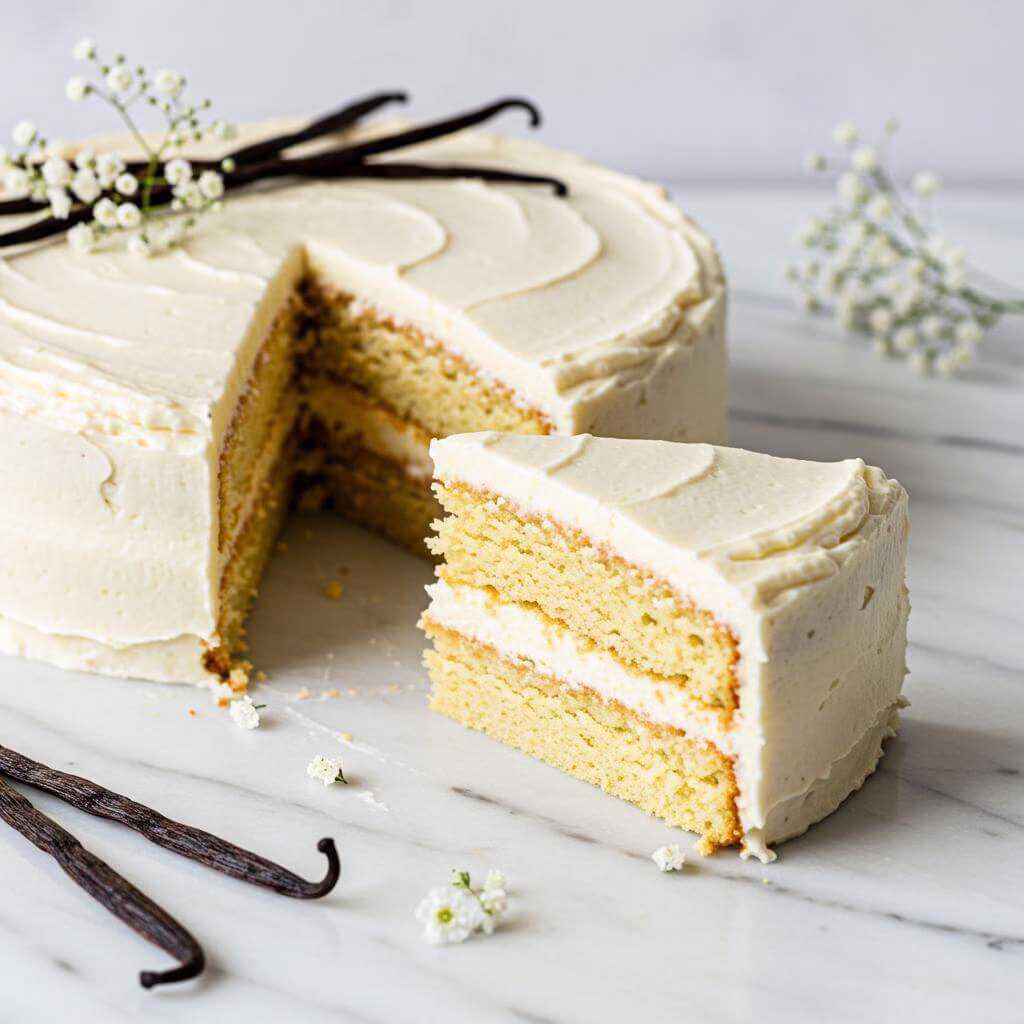
The real test came with the first bite. Would it live up to the aroma? Would it pass the family taste test? The answer was a resounding YES! My daughter Bree’s eyes lit up, and the compliments flew like confetti. This gluten free vanilla cake, crowned with a smooth dairy-free buttercream, is everything a classic vanilla cake should be: incredibly fluffy, moist, and bursting with pure vanilla flavor. It’s sturdy enough to stack high for any celebration, yet tender enough to melt in your mouth. If you’ve been searching for the ultimate gluten-free vanilla cake that rivals any traditional recipe (or perhaps looking for a killer gluten-free chocolate cake or gluten-free banana bread), your quest ends here. Get ready to bake the best gluten free vanilla cake you’ll ever make!
Struggling with Gluten-Free Baking Beyond This Vanilla Cake?
We get it, fellow gluten-free friends! Adapting recipes and finding the right substitutions can be a real challenge. Imagine confidently tweaking any recipe to be perfectly gluten-free, just like this amazing vanilla cake.
Download our FREE “Gluten-Free Baking Substitutions Cheat Sheet” and unlock the secrets!
- Never guess which gluten-free flour to use again.
- Discover easy swaps for eggs, dairy, and sugar in your baking.
- Avoid common baking fails and save precious ingredients (and time!).
- Bake with more confidence and enjoy delicious results every single time!
Get Your FREE Cheat Sheet Now!
We respect your privacy and promise not to spam you. Join our community for more tips & recipes!
Why This Gluten-Free Vanilla Cake Recipe Works
You’re about to discover the secrets behind creating the most delightful gluten free vanilla cake you’ve ever tasted – one so good, no one will guess it’s gluten and dairy-free! Making a stellar gluten free vanilla cake involves a bit of kitchen chemistry, and this recipe masterfully balances ingredients and technique to achieve that perfect, tender, sky-high crumb we all crave.
The Flour Power Team: Building a Bakery-Style Crumb
The foundation of any great cake is its flour, and in gluten-free baking, the blend is everything. The secret to this fluffy gluten free vanilla cake lies in a strategic mix, particularly one featuring rice, potato starch, and tapioca. Rice flour provides structure, while the starches (potato and tapioca) contribute to a light, tender texture and help create that desirable soft crumb that can sometimes be elusive in gluten-free baked goods. This combination mimics the performance of wheat flour much more effectively than single-ingredient flours.
The Essential Binder: Building Structure and preventing Crumbliness
Here’s where the magic truly happens in gluten-free baking! Without gluten’s elastic network, we need a substitute to hold everything together. This recipe relies on xanthan gum (often with guar gum from the blend) as the crucial binder. Think of xanthan gum as the scaffolding for your cake; it provides the necessary structure and elasticity that gluten typically offers. Adding that extra touch of xanthan gum, as recommended, is a brilliant move to ensure your layers are sturdy enough to stack high without crumbling, giving your gluten free vanilla cake that beautiful bounce and stability.
Reverse Creaming: A Technique for Ultimate Tenderness
While traditional cake recipes often start by creaming butter and sugar, this gluten free vanilla cake uses the reverse creaming method, and it’s a game-changer for gluten-free baking. By coating the dry ingredients (including the flours and leaveners) with the butter first, you create a tender crumb by inhibiting excessive liquid absorption by the starches. This technique also helps prevent over-mixing, which can toughen gluten-free batters. The subsequent addition of liquids in stages allows for optimal emulsification, creating a smooth, fluffy batter that bakes up beautifully.
Moisture and Flavor: Dairy-Free Deliciousness
Achieving moisture and richness without dairy is another triumph of this gluten free vanilla cake recipe. Using dairy-free milk and dairy-free butter that are at room temperature ensures they integrate seamlessly into the batter, contributing fat and liquid for tenderness. The vegetable oil adds additional moisture, helping the cake stay soft and moist for days. Combined with the generous amount of pure vanilla extract, these ingredients work together to create a cake that is rich in flavor and wonderfully moist, proving that dairy isn’t necessary for a decadent slice of gluten free vanilla cake.
From the strategic flour blend and essential binders to the smart reverse creaming technique and careful dairy-free substitutions, every element in this recipe is designed for success. You’re not just following steps; you’re harnessing the power of science to create a truly exceptional gluten free vanilla cake that everyone will adore!
Making This Recipe Your Own
It’s wonderful to take a delicious recipe and make it perfectly suited to your tastes and needs! This **gluten free vanilla cake** is incredibly versatile. Here are some ways you can switch things up or add your own creative flair while keeping it deliciously gluten-free and dairy-free!
Easy Swaps
Don’t have exactly what the recipe calls for? No problem! Here are a few simple swaps that work beautifully for this **gluten free vanilla cake**:
- Dairy-Free Milk: The recipe calls for dairy-free milk, and most options will work! If you’re out of the kind you usually use (like almond or soy), feel confident using equal amounts of oat milk, rice milk, or even cashew milk. Just ensure it’s unsweetened plain for the best flavor profile.
- Vegetable Oil: If you don’t have vegetable oil on hand, feel free to substitute it with another neutral-flavored oil like canola oil, sunflower oil, or even melted refined coconut oil (make sure it’s melted before measuring and adding). Use the same 1:1 ratio (1/4 cup). Olive oil isn’t recommended as its strong flavor can impact the delicate vanilla taste of the **gluten free vanilla cake**.
- Dairy-Free Butter: The recipe uses salted dairy-free butter (like Miyoko’s or Country Crock Plant Butter sticks). If you only have unsalted, that’s okay! Just add an extra pinch (about 1/8 teaspoon) of salt to the dry ingredients to balance the flavor. Different brands of plant-based butter can vary slightly in texture, but the 1:1 substitution by weight (227g for the cake, 480g for the frosting) should work.
- Gluten-Free Flour Blend: While the recipe highlights a specific blend, many cup-for-cup **gluten free vanilla cake** blends made with rice flour, potato starch, and tapioca starch will work well. Ensure your blend contains xanthan gum (or add it separately as instructed if it doesn’t). Brands like King Arthur Baking Gluten-Free All-Purpose Flour or Bob’s Red Mill 1-to-1 Baking Flour are popular choices. Results can vary slightly depending on the blend, but stick to the weight measurement (200g) for the most accurate results.
- Granulated Sugar: You can swap out the granulated sugar for other granulated white sugars, such as organic cane sugar. The texture and sweetness level will remain consistent with a 1:1 swap (266g).
Creative Variations
Get creative with your **gluten free vanilla cake**! Here are some fun ideas to customize this delicious recipe:
- Flavor Boosts: While vanilla is the star, you can introduce other flavors! Add 1/4 teaspoon of almond extract along with the vanilla for a lovely subtle nutty hint, or swap a portion of the vanilla (say, half a teaspoon) for lemon or orange extract for a citrusy twist. Make sure your extracts are gluten-free. Find a variety of extracts here: Pure Baking Extracts.
- Sprinkle Fun: Incorporate sprinkles directly into the cake batter for a funfetti-style **gluten free vanilla cake**! Gently fold in about 1/2 cup of **gluten-free sprinkles** into the batter right before dividing it into the pans. Ensure your sprinkles are certified gluten-free. There are many fun options like Sweetapolita or Enjoy Life Foods Chocolate Decadence Sprinkles.
- Cupcake Transformation: This recipe easily adapts to cupcakes! Divide the batter among standard muffin tins lined with paper liners (this recipe should yield about 24-30 cupcakes). Baking time will be shorter, typically 18-22 minutes.
- Alternative Pan Sizes: Don’t have four 6-inch pans? You can bake this **gluten free vanilla cake** in other configurations. One 9×13 inch pan will take about 30-35 minutes. Two 8-inch round pans will take roughly 25-30 minutes. Adjust baking time and check for doneness with a toothpick. Using different pan sizes might alter the number of layers or the overall height, but the delicious flavor remains! Consider investing in different sizes of Round Cake Pans.
- Frosting Flavors: While the vanilla buttercream is classic, feel free to change it! Replace the vanilla extract with other extracts (like almond or peppermint) or add cocoa powder (start with 1/2 cup unsweetened cocoa powder, adding a little extra dairy-free milk as needed) for a chocolate dairy-free buttercream.
- Add-Ins: Gently fold in 1/2 to 1 cup of mini **dairy-free chocolate chips** or fresh berries (like blueberries or raspberries) into the batter just before baking for delightful pockets of flavor and texture within your **gluten free vanilla cake**. Make sure chocolate chips are verified dairy-free and gluten-free: Dairy-Free Gluten-Free Chocolate Chips.
Tips for Perfect Results
- Master the Magic of Room Temperature Ingredients: This is the secret to a smooth, emulsified batter and ultimately, a perfectly textured gluten free vanilla cake. Always ensure your dairy-free milk, eggs, and especially the dairy-free butter are at true room temperature (around 68-72°F or 20-22°C). Cold ingredients won’t combine properly, leading to a lumpy batter and a less even bake. Plan ahead and take them out 1-2 hours before you start baking. This one simple step will completely transform your results!
- Choose Your Gluten-Free Flour Blend Wisely: The recipe specifically calls for a rice, potato starch, and tapioca-based blend. This combination provides the best structure and tenderness for this gluten free vanilla cake. Seriously, the blend matters! Weighing your flour (200g as specified) is far more accurate than using cup measurements, as gluten-free flours compact differently. Using too much flour is a common pitfall that leads to dense, dry cake.
- Understand the Power of Xanthan Gum: Xanthan gum is the binding agent in gluten-free baking that replaces gluten. It’s crucial for giving your cake structure and preventing crumbling. The recipe includes a specific amount (1/2 tsp) *unless* your blend already contains it. Always double-check your flour blend’s ingredients list! Adding too much xanthan gum can result in a gummy, unpleasant texture, while too little will leave you with a fragile, crumbly cake. Precision is key here.
- Embrace the Reverse Creaming Method: This technique, where butter is mixed into the dry ingredients before adding wet ones, is particularly effective for gluten-free cakes. It coats the starch and flour particles in fat, which inhibits excessive liquid absorption and helps create a tender, moist crumb instead of a tough one. Don’t rush the initial butter-into-dry step; mix until it truly resembles coarse sand.
- Adhere to the Mixing Timings: The specific high-speed mixing intervals (two 2-minute periods separated by adding the remaining liquid and scraping) are designed to properly hydrate the gluten-free flours and allow the xanthan gum to develop its structure (the “proverbial glue”). Don’t shorten these times. You’re looking for that light, fluffy, almost frosting-like batter consistency the recipe describes. This develops the necessary lift and structure for your **gluten free vanilla cake**.
- Prepare Your Pans Perfectly: Gluten-free cakes can be delicate, especially when warm. Using both non-stick spray AND parchment paper circles on the bottom of your cake pans provides an extra layer of insurance against sticking and makes un-molding much easier. This simple step saves you from heartbreak (and broken layers!) later.
- Learn the Visual Cues for Doneness: While the toothpick test is helpful (looking for a few moist crumbs, not wet batter), also pay attention to the cake’s edges. When the cake is done, the edges will be lightly golden and often pull away *ever so slightly* from the sides of the pan. This, combined with the toothpick test, ensures you don’t overbake (leading to dryness) or underbake (risking a sunken center).
- Patience is a Virtue During Cooling: Resist the urge to flip the cakes out of the pans immediately. Allowing them to cool in the hot pans for 10 minutes continues the gentle cooking process and allows the structure to set. Inverting them onto a cooling rack *after* that 10 minutes is crucial for air circulation, preventing soggy bottoms. Handle these fully cooled layers with care; they are delicate until chilled.
- Chill or Freeze for Stacking Success: This is a pro-tip for handling delicate gluten-free layers! Fully cooled layers are much sturdier and easier to level and frost when they are chilled or even partially frozen. Wrapping them tightly in plastic wrap before chilling/freezing locks in moisture. This technique makes assembling your beautiful **gluten free vanilla cake** a breeze and minimizes breakage.
Common Mistakes to Avoid
- Measuring Flour by Volume (Cups Only): As highlighted earlier, using volume measurements for gluten-free flour blends can result in adding too much dry ingredient, leading to a dense, heavy, or crumbly cake. The Fix: Always use a kitchen scale to weigh your gluten-free flour blend. The recipe provides the exact weight (200g) for a reason! This ensures consistent results every time.
- Incorrect Xanthan Gum Amount: Either adding it when your blend already contains it, or adding too much/too little. This directly impacts the structure and texture, leading to gummy or excessively crumbly layers, or even sinking. The Fix: Read your flour blend’s ingredient list carefully. If it contains xanthan gum (or guar gum), omit the extra amount called for in the recipe unless specifically instructed otherwise (like the note about adding a *dash* if using Kinnikinnick). Measure precisely using appropriate spoons.
- Handling/Un-molding Warm Layers: Gluten-free cakes are very fragile when hot out of the oven. Trying to remove them too soon or handling them roughly before they are fully cooled (and ideally chilled) is a recipe for broken cake layers. The Fix: Follow the cooling instructions precisely: 10 minutes in the pan, then invert onto a cooling rack to cool completely. For easier handling during leveling, stacking, and frosting, make sure the layers are fully chilled.
Common Mistakes to Avoid When Baking Gluten-Free Vanilla Cake
Baking gluten-free, especially a classic like vanilla cake, can sometimes feel like navigating a new world. But don’t worry, many common pitfalls are easily avoided once you know what to look for! Here are a few things to keep in mind to ensure your **gluten free vanilla cake** turns out perfectly fluffy and delicious.
Using the Wrong Gluten-Free Flour Blend
The Problem: Your beautiful cake might end up dense, gritty, or crumbly instead of light and airy. This is probably the most common challenge in gluten-free baking!
Why it Happens: Not all gluten-free flour blends are created equal. They have different compositions – varying ratios of rice flour, tapioca starch, potato starch, and other grains or starches. These differences affect how the flour absorbs liquid and develops structure without gluten, leading to inconsistent results if you swap blends without care.
Prevention: This recipe was developed using a specific type of blend (rice, potato starch, tapioca-based). For the best results with this **gluten free vanilla cake**, try to use a blend with a similar composition. Always measure your flour by weight (grams) rather than volume (cups), as scoops can vary wildly and impact the wet-to-dry ingredient balance crucial in GF baking.
Pro Tip: If you absolutely must substitute, look for a blend labeled “1:1” or “all-purpose” that is primarily rice, potato, and tapioca starch. Be prepared that slight adjustments to liquid might be necessary, though it’s best to follow the recipe precisely on your first try.
Incorrect Xanthan Gum Measurement or Omission
The Problem: Your cake might be gummy or rubbery (too much xanthan gum) or completely fall apart with no structure (too little or none). Xanthan gum is the crucial binder in gluten-free baking, mimicking gluten’s role.
Why it Happens: Xanthan gum works by providing elasticity and structure that gluten would normally provide. The amount needed depends heavily on whether your gluten-free flour blend already contains xanthan or guar gum. Adding too much makes the texture unpleasant; adding too little results in a fragile, crumbly cake.
Prevention: Carefully check the ingredients list of your chosen gluten-free flour blend. If it already contains xanthan gum or guar gum, omit the extra 1/2 teaspoon called for in the recipe. If it does NOT contain gum, add the 1/2 teaspoon measured accurately. This is a critical step for a successful **gluten free vanilla cake**.
Pro Tip: When in doubt, especially with an unfamiliar blend, it’s sometimes safer to lean towards slightly less xanthan gum initially if your blend already has it, as some blends contain a higher amount than others.
Not Following the Specific Mixing Method and Times
The Problem: The cake might be dense, have tunnels, or lack that desired fluffy texture. This recipe uses the reverse creaming method with specific mixing instructions.
Why it Happens: In gluten-free baking, especially with methods like reverse creaming, the timing and speed of mixing after adding liquids are vital. The initial high-speed mix helps hydrate the starches and activate the xanthan gum, building structure. The second high-speed mix further develops this structure and incorporates air for a light texture. Skipping steps, reducing mixing times, or not scraping the bowl prevents proper emulsification and aeration.
Prevention: Follow the mixing instructions exactly as written. Pay close attention to the stages: mixing the dry ingredients with butter to a sand-like texture, then adding half the wet ingredients and mixing on high for a full 2 minutes. Add the rest of the wet, mix briefly on low, scrape the bowl thoroughly, and then mix on high for the final 2 minutes. Use a timer!
Pro Tip: The batter should transform during those high-speed mixing periods, becoming noticeably lighter, smoother, and fluffier, almost like a thick frosting. If it doesn’t look like this, you might need to check your mixing speed or timing.
Handling Cake Layers Before They Are Fully Cooled
The Problem: Your beautiful **gluten free vanilla cake** layers may break, crack, or fall apart when you try to remove them from the pan, level them, or move them for frosting.
Why it Happens: Gluten-free cakes, especially when warm, can be much more delicate and prone to breakage than traditional cakes because they lack the elastic gluten network. Handling them too soon puts stress on the fragile structure before it has fully set.
Prevention: Be patient! Allow the cake layers to cool in their pans for the full 10 minutes as instructed. Then, carefully invert them onto a cooling rack and let them cool completely. For easier handling, leveling, and stacking, follow the tip to chill or freeze the cooled layers wrapped in plastic wrap before assembling the cake.
Pro Tip: Use a cake lifter or a large, flat spatula to help transfer the cooled layers if you don’t plan on chilling them. Chilling for even 30-60 minutes makes a huge difference in reducing breakage risk.
Recovery: If a layer cracks, don’t despair! You can often ‘glue’ it back together using a bit of frosting when you assemble the cake. If it crumbles significantly, you can still salvage it for making cake pops, trifles, or simply serving it as a deconstructed cake dessert.
You’ve got this! By being mindful of these common **gluten free vanilla cake** mistakes, you’re well on your way to baking a perfectly delicious cake every time.
Essential Equipment for This Recipe
To prepare this delicious recipe, you’ll need the following kitchen tools:
- Mixing Bowls – A set of good quality mixing bowls are essential for prepping ingredients.
Find Mixing Bowls on Amazon - Measuring Cups and Spoons – For accurate ingredient measurements.
Find Measuring Cups and Spoons on Amazon - Baking Sheets – Perfect for baking cookies, roasting vegetables, and more.
Find Baking Sheets on Amazon - Whisks – For properly blending your ingredients.
Find Whisks on Amazon - Spatulas – A spatula is great to have when combining ingredients.
Find Spatulas on Amazon - Food Processors – To expedite food prep and to make consistent cuts.
Find Food Processors on Amazon - Saucepans – Essential for cooking and heating ingredients.
Find Saucepans on Amazon - Chef’s Knives – A quality chef’s knife is essential for any kitchen.
Find Chef’s Knives on Amazon - Cutting Boards – It’s very important to have a cutting board to protect your countertops.
Find Cutting Boards on Amazon
Frequently Asked Questions
Can I use any gluten-free flour blend for this vanilla cake, or does it need to be a specific type?
Great question! While the recipe was perfected using a rice, potato starch, and tapioca blend (like Kinnikinnick), other 1:1 all-purpose gluten-free baking blends can potentially work. However, be aware that different blends absorb liquid differently, which can affect the final texture. You might need to slightly adjust the liquid amount (add a tiny bit more dairy-free milk) or baking time depending on your specific blend. For the absolute best results and closest texture to the original, sticking to a rice, potato, and tapioca-based blend is highly recommended for this gluten free vanilla cake.
Also, remember to check if your blend contains xanthan gum. If it does, omit the extra 1/2 teaspoon listed in the recipe ingredients!
The recipe uses a ‘reverse creaming’ method for the butter and dry ingredients. What is that and why is it good for gluten free vanilla cake?
Absolutely! The reverse creaming method is a fantastic technique, especially for gluten-free baking. Instead of creaming butter and sugar first, you add the butter into the dry ingredients (flour, sugar, etc.) until it resembles coarse sand.
Why is this great for your gluten free vanilla cake? This process coats the flour particles with fat before the liquid is added. This helps inhibit the absorption of liquid by the starches, leading to a more tender, softer crumb and helping prevent the cake from becoming tough. It’s a key secret to achieving that wonderful, fluffy texture in this gluten free vanilla cake!
Why do you recommend chilling or freezing the gluten-free vanilla cake layers before frosting?
This is a total game-changer for assembling gluten-free cakes! Gluten-free cake layers can be quite delicate, particularly when they are fresh. Chilling or freezing them slightly firms them up, making them much easier to handle, level, and stack without fear of breaking or crumbling. Pro Tip: Chilling helps you achieve those nice, clean edges and a smooth final frosted finish on your beautiful gluten free vanilla cake. Simply wrap the cooled layers tightly in plastic wrap and pop them in the fridge for an hour or the freezer for about 20-30 minutes before you plan to frost.
My gluten-free vanilla cake layers sank a little after baking, or they seem delicate/crumbly. Is this normal?
Don’t worry, these are common concerns in gluten-free baking, and we’ve addressed them in the recipe! A slight sinking can sometimes happen, which is why the recipe was recently updated with minor tweaks and the tip to gently tap the pans after baking – this helps release air bubbles that can contribute to sinking.
For crumbliness, the key binder is xanthan gum! Ensuring you have the correct amount of xanthan gum (either included in your blend or added separately as specified) is crucial for providing structure and preventing that crumbly texture. Also, allowing the cake layers to cool completely before handling is super important, as they are most delicate when warm.
How can I tell for sure when my gluten free vanilla cake layers are perfectly baked through?
Mastering the doneness test is essential! Here are the best ways:
- The Toothpick Test: Insert a toothpick or a thin skewer into the very center of a cake layer. It should come out with just a few moist crumbs attached. If you see wet batter, it needs a few more minutes. If it comes out completely clean, it’s likely done!
- Edge Test: Look at the edges of the cake where it meets the pan. A fully baked cake will often begin to pull ever so slightly away from the sides of the pan.
- Gentle Press Test: You can also gently press the top center of the cake. If it springs back slightly, it’s a good sign it’s done. If the indentation remains, it needs more time.
Combining these methods will give you confidence that your gluten free vanilla cake layers are perfectly baked!
This recipe is dairy-free. Can I use regular dairy milk and butter if I don’t need it to be dairy-free?
Absolutely! This recipe is designed to work beautifully whether you need it to be dairy-free or not. If you don’t require a dairy-free cake, you can simply substitute the dairy-free milk with regular milk and the salted dairy-free butter with regular salted butter. Important: When making this swap to regular dairy, make sure you are using the cup measurements listed in the ingredients, not the weight measurements provided specifically for the dairy-free ingredients.
What’s the best way to store this stunning gluten free vanilla cake, and can I freeze leftovers?
Proper storage keeps your delicious gluten free vanilla cake fresh and moist!
- At Room Temperature: A frosted cake can generally sit at room temperature for 1-2 days, covered to prevent it from drying out.
- In the Fridge: For longer storage, place any leftover cake in an airtight container and store it in the refrigerator. It will stay fresh for up to 7 days.
- Freezing: Yes, you can absolutely freeze this cake! To freeze slices or larger portions, wrap them tightly in plastic wrap, then place in a freezer-safe container or bag. It can be frozen for up to 6 months. Thaw overnight in the refrigerator before enjoying. Freezing is a great way to make your amazing gluten free vanilla cake last!
Gluten-Free Vanilla Birthday Cake (Dairy-Free Option)
Gluten-Free Vanilla Birthday Cake (Dairy-Free Option)
Do you remember those days? The effortless joy of walking into any bakery and picking out a perfectly fluffy, moist vanilla cake slice, knowing it would be pure heaven? Or the simple pleasure of whipping up a classic vanilla cake for a birthday or special moment? If you’re like me and navigate the world gluten-free, those days were replaced with a different reality. A reality where the simple craving for a truly delicious gluten free vanilla cake can feel like an impossible dream. We yearn for that light, airy texture and sweet, comforting vanilla flavor, but often meet disappointment instead.
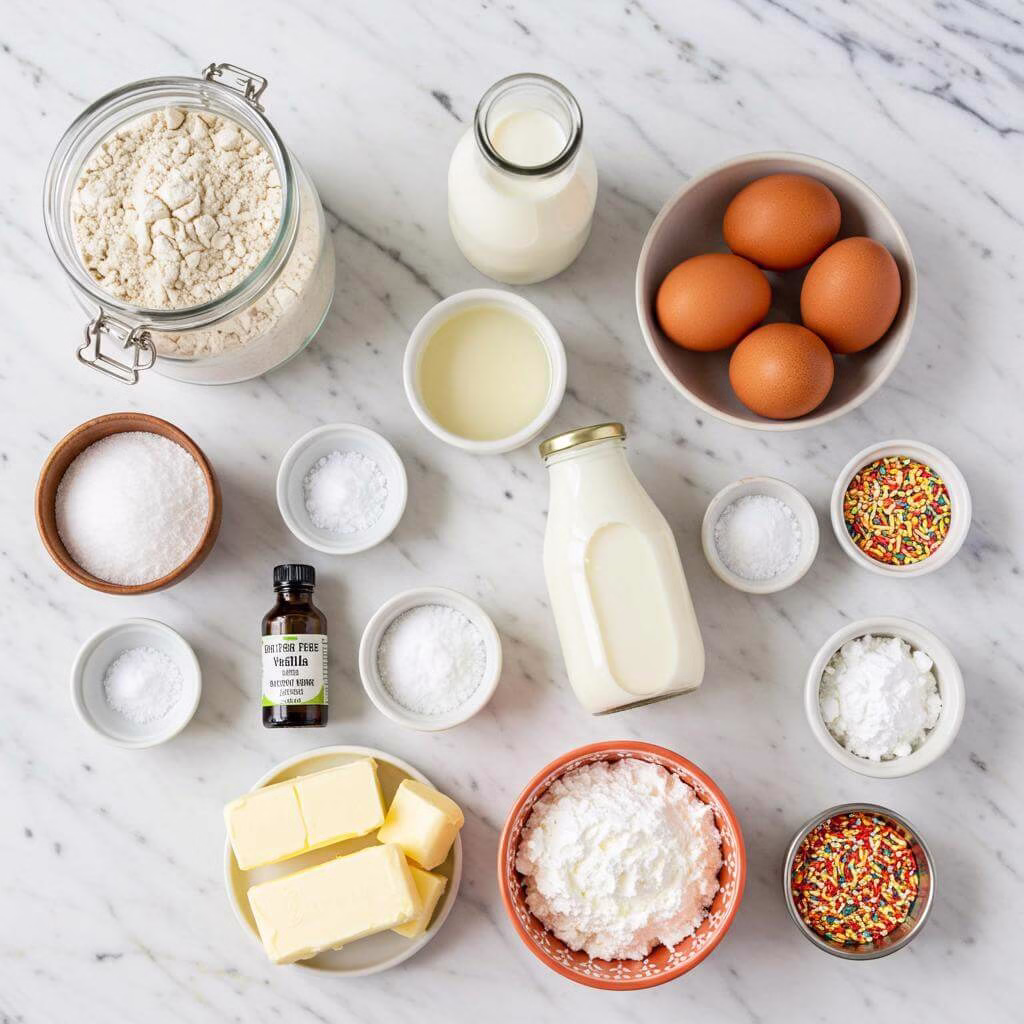
Ingredients
12
- 1 1/4 cup dairy-free milk, room temperature (for cake)
- 1/4 cup vegetable oil (for cake)
- 3 large eggs, room temperature (for cake)
- 1 tablespoon pure vanilla extract (for cake)
- 1 2/3 cups gluten-free 1:1 baking blend (for cake)
- 1 1/3 cup granulated sugar (for cake)
- 3 teaspoons baking powder (for cake)
- 1 teaspoon fine sea salt (for cake)
- 1/2 teaspoon baking soda (for cake)
- 1/2 teaspoon xanthan gum (for cake, *omit if already in the gluten-free flour blend)
- 1 cup salted dairy-free butter, room temperature & cubed (for cake)
- 2 cups salted dairy-free butter, room temperature (for buttercream)
- 5 1/2 cups icing sugar (for buttercream)
- 1 tablespoon pure vanilla extract (for buttercream)
- 1 teaspoon fine sea salt (for buttercream)
- Optional: gluten-free sprinkles (for decoration)
Equipment
- Four 6-inch round cake pans
- Non-stick baking spray
- Parchment paper rounds
- Small mixing bowl
- Whisk
- Stand mixer
- Paddle attachment
- Flexible rubber spatula
- Wire cooling rack
- Cake leveler (or serrated knife)
- Cake board, serving plate, or cake turntable
- Offset spatula or cake smoother
- Wilton 2D piping tip (or similar)
- Cookie sheet (optional for sprinkles)
Instructions
Get Started: Preheat & Prepare Your Pans! Preheat your oven to 350°F (175°C). This is the perfect temperature for baking a beautiful gluten free vanilla cake. Take four 6-inch round cake pans (like these) and liberally coat the inside of each one with non-stick baking spray. Then, line the bottom of each pan with a round of parchment paper (pre-cut rounds save time!). This double layer of protection is key for ensuring your delicate gluten-free cake layers release easily after baking.
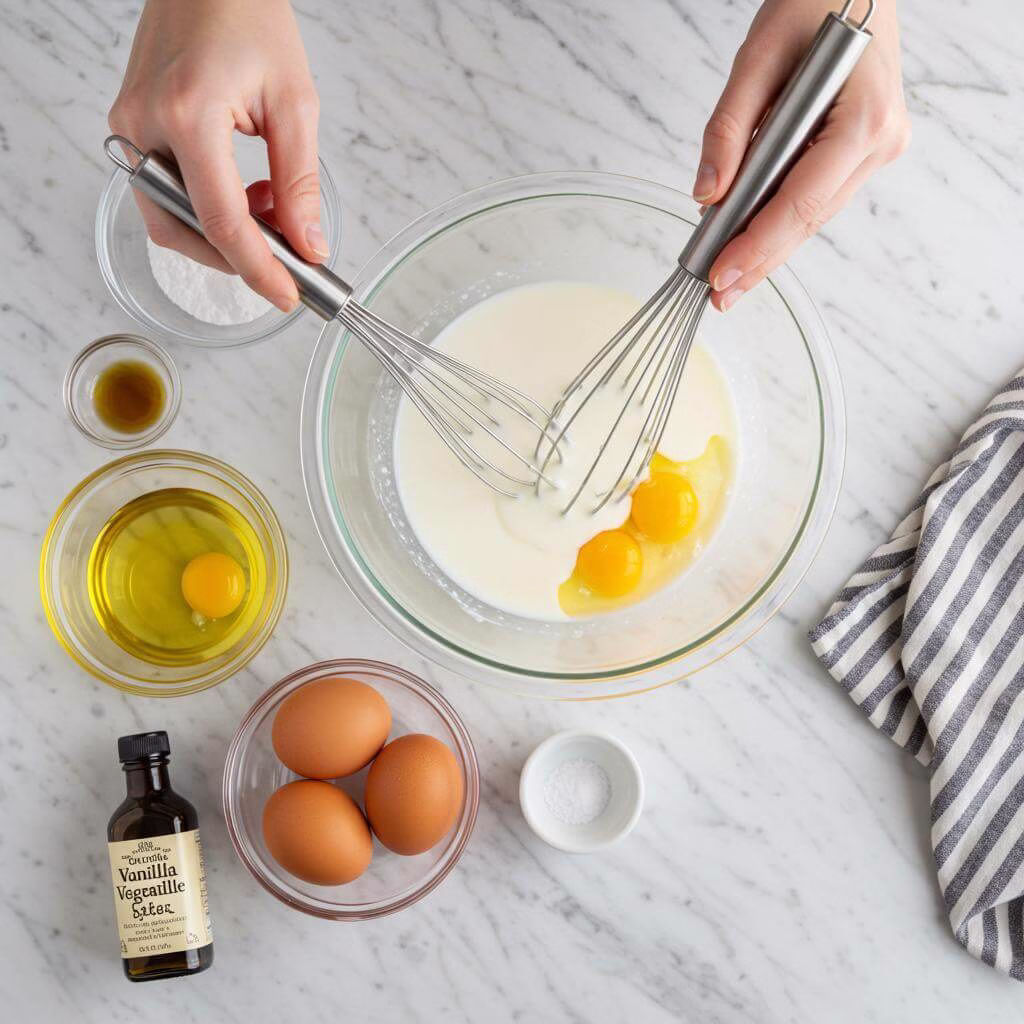
Mix Your Wet Ingredients: In a small mixing bowl, combine the room temperature dairy-free milk, vegetable oil, room temperature large eggs, and pure vanilla extract. Using a whisk, gently combine these ingredients until they are well mixed. Set this bowl aside for now – you’re doing great!
Combine Your Dry Ingredients: In the bowl of a stand mixer fitted with the paddle attachment, add your gluten-free 1:1 baking blend, granulated sugar, baking powder, fine sea salt, baking soda, and xanthan gum (Note: If your specific gluten-free flour blend already contains xanthan gum, you can omit the extra half teaspoon listed in the ingredients). Mix these dry ingredients together on low speed for about to ensure everything is evenly distributed and break up any small clumps. Even distribution is important for the structure of your gluten free vanilla cake.
Add the Dairy-Free Butter: With the mixer still on low speed, add the cubed, room temperature salted dairy-free butter (like this) to the dry ingredients, piece by piece. Continue mixing on low until the mixture resembles coarse sand. This “reverse creaming” method helps coat the flour particles with fat, contributing to a tender gluten free vanilla cake crumb!
First Liquid Addition: With the mixer running on a slow speed, gradually pour in approximately half of the liquid mixture you prepared in Step 2. Once added, increase the mixer speed to high and beat for a full . The batter will start to come together and might look different than traditional wheat batter – that’s completely normal for amazing gluten-free goodness! This high-speed mixing helps develop the structure provided by the xanthan gum.
Second Liquid Addition: Reduce the mixer speed back to low and pour in the remaining liquid mixture. Mix on low for just about until it’s mostly combined. Stop the mixer and use a flexible rubber spatula to scrape down the sides and bottom of the bowl, making sure no dry pockets are hiding.
Final Mixing & Batter Check: Turn the mixer back up to high speed and mix for another . After this final mixing period, the batter should look beautiful! It will be fluffy, smooth, and almost resemble a thick frosting in appearance. This perfect texture is exactly what you want for your gluten free vanilla cake layers.
Divide and Bake: Carefully divide the fluffy gluten free vanilla cake batter as evenly as possible between your four prepared 6-inch pans. Place the pans in your preheated oven. Bake for approximately . You’ll know they’re ready when the edges look slightly golden and a toothpick inserted into the center of a cake comes out with just a few moist crumbs attached (or perfectly clean!).
Cooling Step One (In the Pan): Once baked, remove the cake pans from the oven and place them on a wire cooling rack. Gently tap each pan on the counter a couple of times – this can help release any trapped air bubbles and prevent the layers from sinking excessively as they cool. Let the cakes cool in their pans on the wire rack for exactly . Resist the urge to move them sooner!
Cooling Step Two (Out of the Pan): After the 10 minutes are up, carefully invert each cake pan onto the wire cooling rack to release the cake layer. Gently lift the pan away. Allow the cake layers to cool completely on the rack. Important: Gluten-free cakes can be quite delicate when warm, so do not handle them until they are fully cooled. This slow cooling prevents breakage. These layers are the foundation for your amazing gluten free vanilla cake!
Make the Buttercream (Cream Butter): While the cakes cool (or after they are completely cool), it’s time for the frosting! In the bowl of a stand mixer with the paddle attachment, add the room temperature salted dairy-free butter. Cream the butter on high speed until it is visibly lightened in color and fluffy, which takes about . This process incorporates air and makes the dairy-free butter nice and spreadable for frosting.
Add Remaining Buttercream Ingredients: Reduce the mixer speed to low (this prevents an icing sugar cloud!). Add the icing sugar, pure vanilla extract, and fine sea salt to the creamed dairy-free butter. Mix on low speed until the ingredients are just combined and the sugar is mostly incorporated.
Whip the Buttercream: Increase the mixer speed back to high and let it whip for . This extended mixing time makes the buttercream incredibly smooth and creamy. Stop occasionally to scrape down the sides and bottom of the bowl with your spatula to ensure everything gets whipped evenly. Your perfect dairy-free frosting for your gluten free vanilla cake is almost ready!
Prepare the Layers: Once the gluten free vanilla cake layers are completely cool, you can level them if needed using a cake leveler or a serrated knife. Leveling helps ensure your stacked cake is straight and professional-looking. (Remember the tip about chilling or freezing layers first if needed for easier handling and leveling!)
Start Stacking: Place the first cooled and leveled gluten free vanilla cake layer onto a cake board, serving plate, or a cake turntable. Spoon approximately 1 ½ cups of your delicious dairy-free vanilla buttercream onto the top of this layer and spread it evenly.
Stack & Crumb Coat: Carefully place the next cake layer on top and add another 1 ½ cups of buttercream. Repeat this process with the remaining layers. Once all layers are stacked, apply a very thin layer of buttercream all over the entire cake (top and sides). This is called a “crumb coat,” and its job is to trap any loose crumbs so they don’t show up in your final frosting layer.
Chill the Crumb Coat: Place your cake in the refrigerator for about . Chilling the crumb coat allows it to firm up, making the final frosting step much easier and cleaner. This is a game-changer for a smooth finish on your gluten free vanilla cake!
Apply the Final Frosting Layer: Once the crumb coat is firm, take the cake out of the fridge. Apply a generous second layer of dairy-free buttercream all over the cake. Use an offset spatula or a cake smoother to smooth the sides and top to your desired finish. You’re almost there! Your gluten free vanilla cake is looking fantastic.
Decorate & Enjoy!: Now for the fun part – decoration! Get creative! You can use gluten-free sprinkles around the base (placing the cake on a cookie sheet helps catch the excess!) or pipe beautiful swirls on top using a Wilton 2D piping tip or similar. Take a deep breath and admire your stunning creation. Now, slice and enjoy every delicious bite of your homemade gluten free vanilla cake!
Proper Storage: If you have any glorious gluten free vanilla cake leftover, store it in an airtight container. It will keep well in the refrigerator for up to 7 days. For longer storage, you can freeze it for up to 6 months. Wrap slices or the entire cake tightly in plastic wrap, then place in a freezer-safe container or bag.
Recipe Notes
- The Power of Xanthan Gum: Xanthan gum is your best friend in gluten-free cake baking. It acts as the binder, preventing that dreaded crumbly texture and ensuring your cake has a light, fluffy structure. Don’t skip it unless your blend already contains it!
- Reverse Creaming Method: This technique involves coating the flour first with butter before adding liquids. It helps tenderize the cake crumb, leading to a softer, more delicate texture, which is particularly beneficial for gluten free vanilla cake.
- Room Temperature Ingredients: Ensure your dairy-free milk, eggs, and butter are at room temperature. This helps them emulsify properly, creating a smooth, consistent batter that bakes evenly.
- Don’t Overmix After Adding Liquid: Once you add the wet ingredients, mix just until combined and then beat for the specified time to develop the structure provided by the xanthan gum. Overmixing can make gluten-free cakes tough.
- Know When It’s Baked: The toothpick test is key! Insert a toothpick into the center; it should come out with a few moist crumbs, not wet batter. The edges of the cake pulling slightly away from the pan is another good sign.
- Gentle Handling is Crucial: Freshly baked gluten-free cakes can be delicate. Allowing them to cool partially in the pan before inverting is important.
- Chilling Layers: Gluten-free cake layers are often easier to handle and stack when chilled or even frozen slightly. This firming-up step makes assembly much smoother and prevents breakage.
- Invest in Good Tools: A stand mixer makes creaming butter and mixing the batter easier. Good cooling racks are essential for proper air circulation.
- Not Dairy-Free? If you don’t need the cake to be dairy-free, you can substitute regular milk and salted butter in equal amounts by volume (recipe creator recommends sticking to weight measurements for the dairy-free version).
- Gluten-Free Flour Blend: Other 1:1 all-purpose gluten-free baking blends can work. Be aware that different blends absorb liquid differently and you may need to slightly adjust liquid or baking time.
- Vegetable Oil: You can substitute other neutral-flavored oils like canola oil or melted coconut oil.