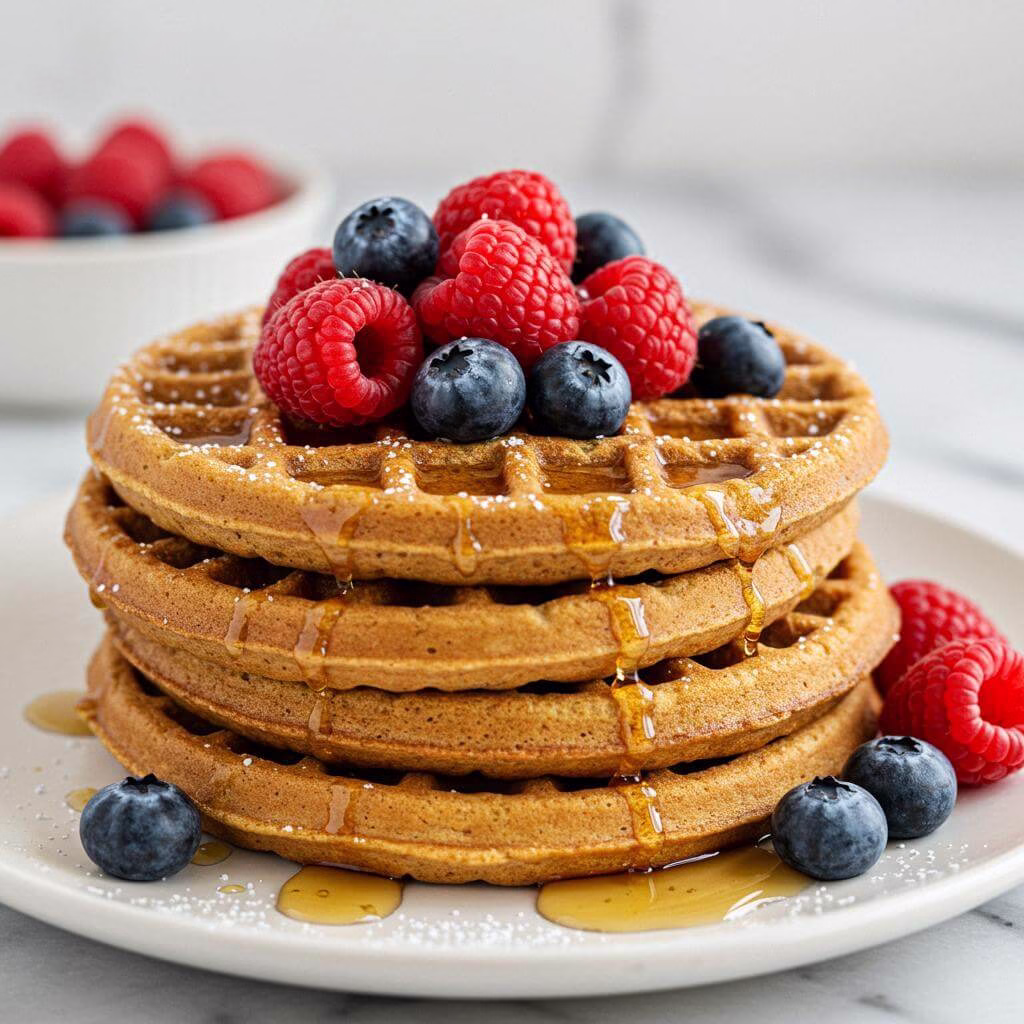
Gluten-Free Waffles: The Ultimate, Fluffy Recipe
Oh, fellow gluten-free friends, let me tell you about the early days. Sunday mornings used to be a little… less bright. I’d watch everyone else pile their plates high with golden, fluffy waffles, syrup dripping down the sides, and sigh internally. Every attempt I made at gluten-free waffles resulted in something either resembling cardboard, falling apart before it even reached the plate, or just having that distinct, slightly gummy texture that screams “this isn’t the real thing.” You know that feeling, right? The yearning for a truly satisfying, classic breakfast treat that feels like zero compromise.
I was starting to give up hope on achieving that waffle perfection. I tried countless mixes, tweaked recipes endlessly, and filled my kitchen with flour experiments that often ended up in the bin. It felt like finding a truly great gluten-free bread or gluten-free pancakes was challenging enough, but waffles seemed to hold a special kind of elusive magic. The crisp exterior, the soft, airy interior – how could we achieve that without gluten?
But I’m not one to back down from a challenge, especially when it comes to delicious food! I dedicated myself to cracking the code. I experimented with different flour blends, played with leavening agents, adjusted liquid ratios, and finally, after many attempts (and a few slightly sad breakfast attempts), I found it. The combination that delivers the most wonderfully fluffy gluten-free waffles you could ever dream of. These aren’t just “good enough” gluten-free waffles; they are *actually* good waffles, period.
This recipe became an instant hit in my house. Sunday mornings were transformed! The smell of these cooking fills the kitchen, and the joy of slicing into a perfectly crisp, yet soft, waffle is something I truly cherish. Plus, they are incredibly versatile – perfect on their own, loaded with toppings, or even used as a base for lunches or snacks. I make a big batch every week for easy meal prep, and they reheat beautifully. Get ready, because these gluten-free waffles are about to become your new breakfast best friend!
Why This Recipe Works for Gluten-Free Waffles
What’s the secret to making truly fluffy and moist gluten-free waffles that don’t crumble? It comes down to smart ingredient synergy and understanding the science behind gluten-free baking. Unlike traditional recipes that rely on gluten for structure and binding, this recipe uses a specific combination of ingredients designed to deliver that perfect waffle texture.
The secret weapon here is the use of a quality gluten-free 1:1 flour blend like Bob’s Red Mill. These blends are carefully formulated with a mix of different flours and starches (like rice flour, tapioca starch, and potato starch) that work together to mimic the binding and structural properties of gluten. Using a blend, especially when weighed for accuracy (a key tip!), prevents the common issues like dryness or excessive crumbliness often associated with single gluten-free flours, ensuring your gluten-free waffles hold together beautifully.
Here’s where the magic truly happens for lift and texture: the combination of baking powder and salt. Baking powder is a leavening agent that produces carbon dioxide gas when wet and heated, creating bubbles that make the waffles light and airy. The addition of salt not only enhances flavor but also works synergistically with the baking powder to promote better rise, resulting in those coveted *fluffy* interiors in your gluten-free waffles.
Binding and moisture are crucial in gluten-free baking, and this recipe tackles that effectively. Eggs provide essential structure and help bind the ingredients together in the absence of gluten’s network. The liquid base, whether it’s almond milk or dairy milk, is vital; it hydrates the flours and starches, allowing them to gelatinize and create a moist crumb. This process, combined with the fat from the olive oil, ensures the waffles are tender, rich, and never dry – a common challenge overcome in these delightful gluten-free waffles.
Even small additions like a touch of sugar aid in browning and contribute to tenderness, while vanilla extract elevates the overall flavor profile. It’s this precise balance of leavening, binding, moisture, and fat that makes these gluten-free waffles consistently successful. By understanding how each component contributes, you can feel confident achieving perfect results every time you make these delicious **gluten-free waffles**!
Newly Diagnosed? Start Every Morning Right!
Start your gluten-free journey with 33 handpicked breakfast recipes that are safe, simple, and full of flavor.
Whether you’re struggling with what to eat or just want new ideas, this guide is made for you.
Feel confident. Eat happily. Live healthier.

No spam. No credit card. Just delicious gluten-free breakfasts—delivered instantly.
Ingredients & Nutrition: Your Guide to Perfect Gluten-Free Waffles
Essential Ingredients for Fluffy Gluten-Free Waffles
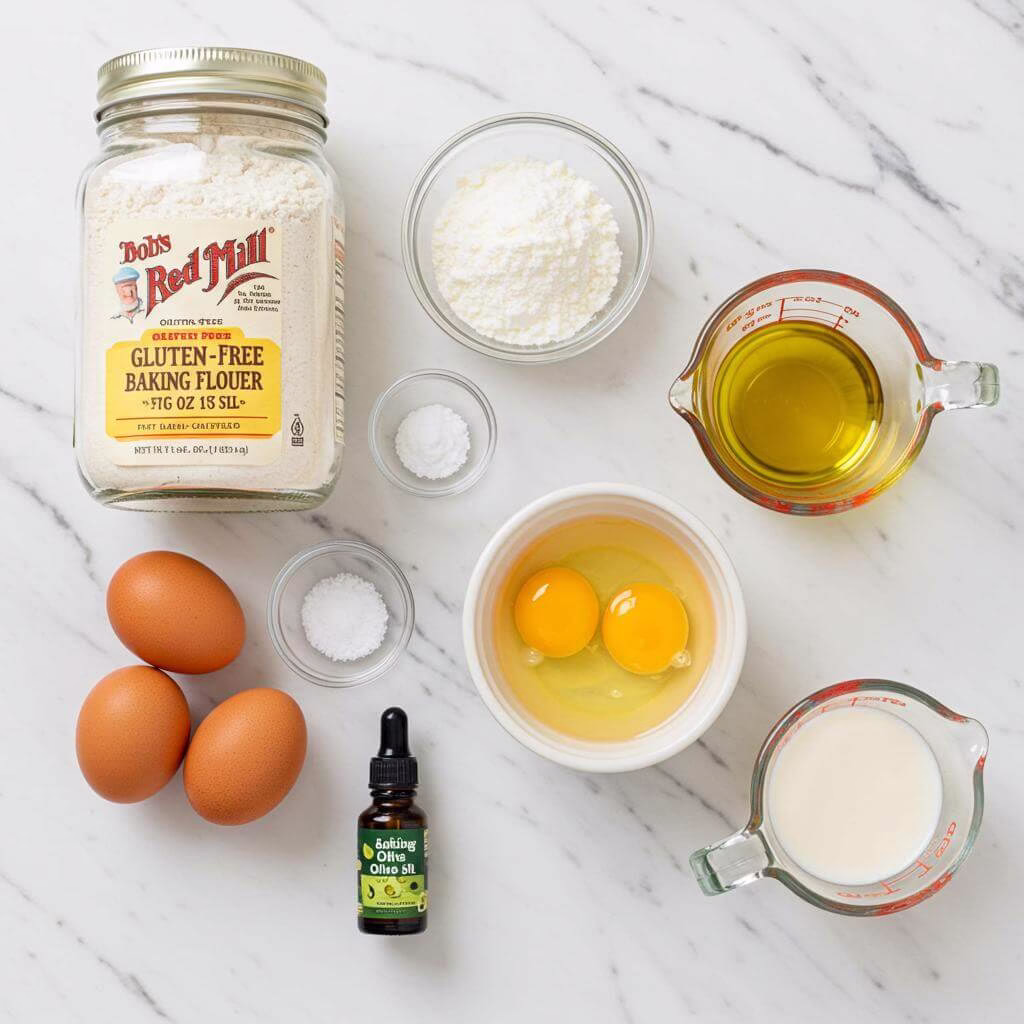
Crafting delicious, fluffy gluten-free waffles starts with understanding the role each ingredient plays. We’ve kept the measurements exact from the recipe to ensure perfect results every time. Here’s what you’ll need:
- 2 cups 1:1 flour gluten free: For these specific gluten-free waffles, this recipe was tested with Bob’s Red Mill Gluten-Free 1:1 Baking Flour (find it here). This blend already contains binders like xanthan gum, which are crucial for structure when gluten is absent, giving you that satisfying waffle texture.
- 3 teaspoon baking powder: The key leavening agent! Baking powder reacts when wet and heated, creating air bubbles that make your gluten-free waffles incredibly light and fluffy.
- 2 tablespoon sugar: Just a touch to enhance the flavor and help with browning, giving your waffles lovely golden edges.
- ¼ teaspoon salt: Salt is vital for balancing the sweetness and enhancing the overall flavor profile of your waffles. It also helps the baking powder do its job effectively for a better rise.
- 1 teaspoon vanilla extract: Adds a warm, classic aroma and subtle depth of flavor that no waffle should be without.
- 2 eggs: Eggs bind the ingredients together, provide richness, and contribute significantly to the overall tenderness and structure of these gluten-free protein waffles. Using room temperature eggs helps them integrate more smoothly.
- ½ cup olive oil: Our chosen fat adds moisture and helps create a tender crumb. Olive oil is used here for its health benefits, but other oils work too (see substitutions below).
- 1 ¾ cup almond milk unsweetened: This dairy-free liquid binds the batter and adds moisture. Using almond milk keeps this recipe naturally dairy-free, but you have other options (see substitutions below).
Nutritional Highlights: Fueling Up with Gluten-Free Protein Waffles
Enjoying these gluten-free protein waffles means starting your day with wholesome goodness! Based on the provided nutritional information (per serving):
- Protein Power: With 3g of protein per serving, these waffles offer a good start to support muscle health and keep you feeling satisfied longer.
- Fiber Boost: Providing 2g of fiber, they contribute to digestive wellness and add to the feeling of fullness.
- Gluten-Free Goodness: By choosing these gluten-free waffles, you’re making a choice that is suitable for celiac disease or gluten sensitivity, allowing everyone to enjoy a classic breakfast without compromise.
Celebrate Choices: By choosing these wholesome, gluten-free ingredients, you’re nourishing your body and taste buds with a delicious and satisfying meal!
Smart Substitutions & Easy Swaps
Don’t have everything on hand, or need to adjust for other dietary needs? No problem! Here are some tested swaps for your gluten-free waffles:
- Milk: This recipe is designed with almond milk, but you can confidently swap the 1 ¾ cups of almond milk for the same amount of regular dairy milk, oat milk, or even flax milk. Choose what works best for you!
- Sugar: If you prefer to avoid refined sugar, simply replace the 2 tablespoons of regular sugar with cane sugar or coconut sugar instead. The small amount is primarily for flavor and color.
- Oil: While olive oil is recommended, you can substitute it with other neutral oils like melted coconut oil (which also helps coat the waffle maker) or a standard vegetable oil.
Build Confidence: Making swaps in gluten-free baking can feel tricky, but these tested alternatives work beautifully in this gluten-free waffle recipe!
Creative Variations to Try
Once you’ve mastered the basic gluten-free waffle recipe, have fun experimenting with these simple flavor twists!
- Berry Blast: Gently fold in ½ cup of fresh or frozen blueberries or raspberries into the batter just before cooking.
- Chocolate Chip Treat: Stir in ¼ to ½ cup of your favorite gluten-free chocolate chips for a sweeter indulgence.
- Warm Spices: Add ½ teaspoon of ground cinnamon or a pinch of nutmeg to the dry ingredients for a cozy flavor.
- Citrus Brightness: Add the zest of half a lemon or orange to the wet ingredients for a fresh, vibrant note.
Insider Tips for Gluten-Free Waffle Success
- Pro Tip: Weigh Your Flour! Not all gluten-free flours are the same, and measuring by volume (cups) can lead to inconsistencies. For Bob’s Red Mill Gluten-Free 1:1 Baking Flour, 1 cup weighs approximately 150 grams. For the most consistent results and to avoid dense waffles, we highly recommend weighing your flour using a kitchen scale (find one here).
- Room Temperature Ingredients: Using eggs and milk that are at room temperature helps the batter emulsify and combine more smoothly. Cold ingredients can sometimes cause the batter to be lumpy or seize up slightly. Plan ahead and let your ingredients sit out for 30-60 minutes before mixing.
- Don’t Over-Mix: Once the wet and dry ingredients are combined, mix gently until just combined. Over-mixing gluten-free batters can sometimes make the final product tough. A few small lumps are okay!
- Worried about texture? The precise combination of gluten-free flour blend, baking powder, eggs, and oil works together in this recipe to create that perfect, fluffy-yet-tender consistency you expect from great gluten-free waffles.
How to Store Your Gluten-Free Waffles
One of the best things about these gluten-free waffles is how well they store, making them perfect for meal prep!
- Refrigerator: If you plan to eat them within 3-4 days, let the waffles cool completely, then place them in a single layer or with paper towel between them in an airtight container. Store in the fridge. Reheat in a toaster or oven for best texture.
- Freezer: For longer storage (up to 3 months), allow waffles to cool completely. Wrap individual waffles or stacks of two tightly in freezer wrap, then place them in a freezer-safe bag or airtight container. Be sure to label with the date! Reheating from frozen is easy – pop directly into a toaster or oven until heated through and crisp.
Recommended Equipment
To make these delicious gluten-free waffles, you’ll need a few basic kitchen tools:
- Waffle Maker: Essential for cooking the batter into perfectly shaped waffles. (Browse waffle makers here)
- Large Mixing Bowls: You’ll need two for combining wet and dry ingredients separately.
- Whisk: For combining ingredients smoothly.
- Measuring Cups and Spoons: For accurate measurements (ideally paired with a scale for flour).
- Kitchen Scale: Highly recommended for weighing gluten-free flour for consistent results.
- Slotted Spatula: Helpful for carefully removing cooked waffles from the hot iron.
Essential Equipment for This Recipe
To prepare this delicious recipe, you’ll need the following kitchen tools:
- Mixing Bowls – A set of good quality mixing bowls is essential for combining ingredients.
Find Mixing Bowls on Amazon - Measuring Cups and Spoons – Accurate measurements are key for baking success.
Find Measuring Cups and Spoons on Amazon - Baking Sheets – Perfect for baking cookies, roasting vegetables, and more.
Find Baking Sheets on Amazon - Whisks – Use a whisk for beating eggs, cream and incorporate air.
Find Whisks on Amazon - Spatulas – Great for mixing and scraping batter from bowls.
Find Spatulas on Amazon - Food Processors – Use a food processor for tasks like chopping nuts or making breadcrumbs.
Find Food Processors on Amazon - Saucepans – A saucepan is indispensable for making sauces and heating liquids.
Find Saucepans on Amazon - Chef’s Knives – A good chef’s knife is essential for all types of cooking.
Find Chef’s Knives on Amazon - Cutting Boards – A cutting board will protect the countertop from the knife blade.
Find Cutting Boards on Amazon
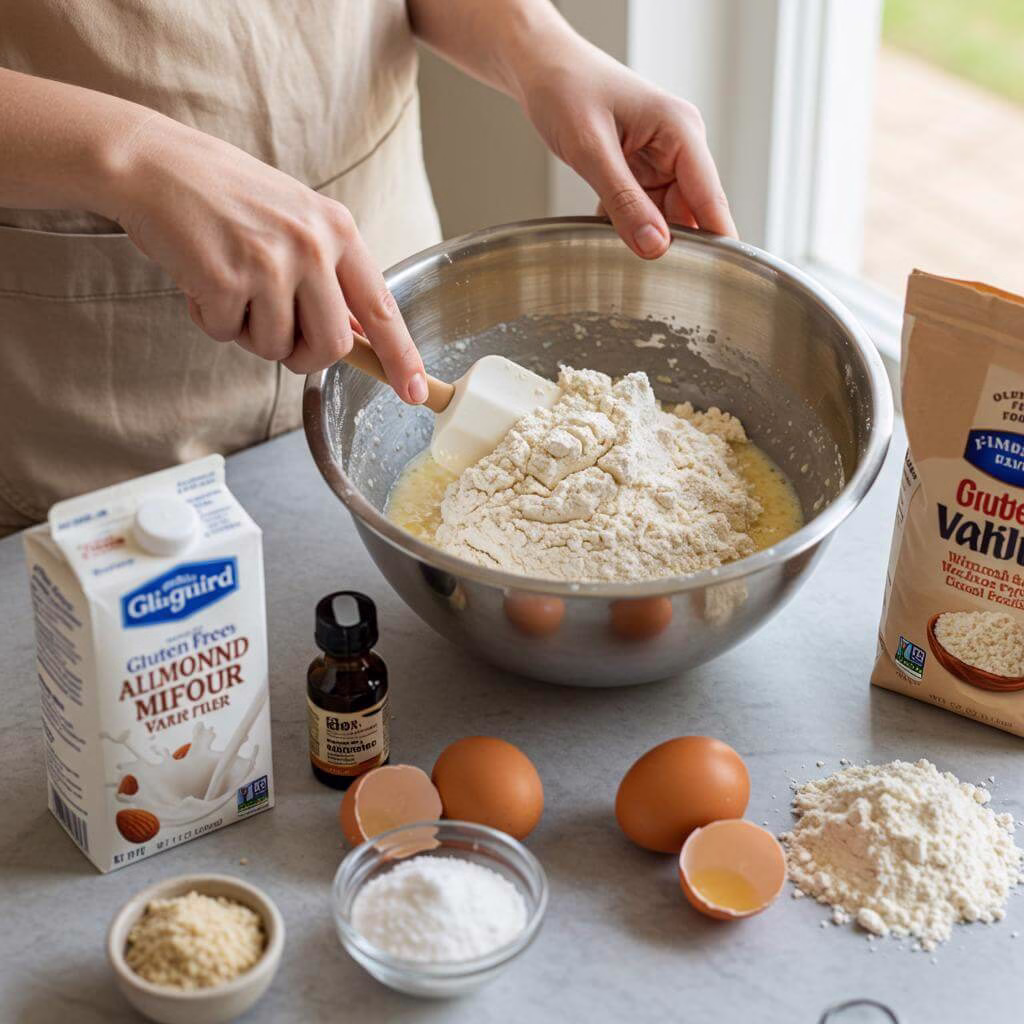
- Okay, let’s get started! First things first, you want to get your waffle iron nice and hot. Preheat your waffle maker according to the manufacturer’s instructions. While it’s heating, give the cooking surfaces a really good coating with oil. You can use coconut oil or olive oil – whichever you prefer! Using a [pastry brush href=”https://www.amazon.com/gp/search?tag=reda04b-20&keywords=pastry+brush”] is great for getting into all those nooks and crannies, or a quick spray with [non-stick cooking spray href=”https://www.amazon.com/gp/search?tag=reda04b-20&keywords=non-stick+cooking+spray+waffle+maker”] works too. This is a crucial step for **gluten-free waffles** as they can sometimes be prone to sticking!
- Grab a [large mixing bowl href=”https://www.amazon.com/gp/search?tag=reda04b-20&keywords=large+mixing+bowl”] and let’s combine all your dry ingredients. This includes your **gluten-free flour** blend (remember this recipe was tested with a 1:1 blend like Bob’s Red Mill – results can vary with different flours!), baking powder, sugar (feel free to use cane or coconut sugar if you prefer!), and salt. Give them a good whisk together. Whisking helps distribute the baking powder and salt evenly throughout the flour, which is key for getting these **gluten-free waffles** nice and fluffy!
*Pro Tip for GF Flour:* Measuring your flour accurately is vital for successful **gluten-free waffles**. If possible, weigh your flour instead of using measuring cups; 1 cup of many 1:1 blends like Bob’s Red Mill is about 150 grams. A [kitchen scale href=”https://www.amazon.com/gp/search?tag=reda04b-20&keywords=kitchen+scale+for+baking”] is a fantastic tool for this! - Now, in a [separate bowl href=”https://www.amazon.com/gp/search?tag=reda04b-20&keywords=medium+mixing+bowl”], let’s mix the wet ingredients. Add your eggs, almond milk (or your preferred milk substitute like regular milk, oat milk, or flax milk!), olive oil, and vanilla extract. Using a [whisk href=”https://www.amazon.com/gp/search?tag=reda04b-20&keywords=kitchen+whisk”], whisk these together until they are well combined and look like a smooth liquid mixture.
*GF Baking Tip:* Using room temperature ingredients is a game-changer! Cold ingredients can make your batter lumpy, while room temperature ones combine beautifully for a smoother, more consistent batter for these glorious **gluten-free waffles**. - Time to bring it all together! Pour the mixed dry ingredients into the wet ingredients bowl. Now, **mix gently** until everything is just combined. It’s super important with **gluten-free** batters to avoid over-mixing. You’re just looking for the dry flour to disappear into the wet ingredients. Don’t worry if the batter looks a bit different or thicker than traditional wheat batters – this is completely normal for **gluten-free waffles**! A few small lumps are okay.
- Your waffle iron should be hot and ready now! Carefully pour the batter onto the heated waffle iron. The right amount is usually about 1/4 to 1/3 cup of batter per waffle, depending on the size of your waffle iron grids. Pour it towards the center and let it spread naturally. Don’t push it or spread it too much! You’re well on your way to enjoying delicious homemade **gluten-free waffles**!
- Close the lid and let those waffles cook! If your waffle iron has an indicator light, cook until the light turns off, signaling they are done. If there’s no light, watch for the steam to slow down or stop, and lift the lid gently to check that the waffles are beautiful and golden brown. This usually takes anywhere from 3 to 5 minutes. You’ll start smelling that amazing waffle aroma as they cook!
- Once they look perfect, carefully remove the waffle from the iron. A [slotted, heat-resistant spatula href=”https://www.amazon.com/gp/search?tag=reda04b-20&keywords=heat+resistant+slotted+spatula”] is ideal for this, as it helps prevent scratching your waffle maker’s surface. Repeat steps 5 and 6 with the remaining batter until you’ve cooked all your lovely **gluten-free waffles**. Congratulations, you did it! Enjoy your fluffy, golden creations!
Tips for Perfect Results
- Master the Flour Measurement (This one tip will completely transform your results!): The single biggest variable in gluten-free waffles is the flour. Gluten-free blends vary wildly by weight. While the recipe calls for 2 cups of Bob’s Red Mill 1:1, the secret to consistent, fluffy results is to weigh your flour. Aim for 2 cups of Bob’s Red Mill 1:1 equaling around 300 grams (150g per cup). Scooping flour directly from the bag compacts it, leading to dense, heavy waffles. Spoon the flour lightly into your measuring cup and level it off, or better yet, use a kitchen scale. I learned this trick after years of struggling with inconsistent batches!
- Always Use Room Temperature Ingredients: This isn’t just a baking cliché; it’s crucial for the structure of your gluten-free waffles. Cold ingredients emulsify poorly, resulting in a lumpy, uneven batter that won’t rise as well. Eggs, milk, and even oil should sit out for 30-60 minutes before mixing. This allows them to combine smoothly, creating a homogenous batter that cooks evenly and yields a superior texture.
- Mix Just Until Combined (The Golden Rule): Gluten-free flours don’t develop gluten like wheat flour, but you can still overwork the starches and binders, leading to tough or gummy waffles. Whisk your dry ingredients thoroughly first. Then, whisk your wet ingredients separately. When combining the two, pour the dry into the wet and mix gently with a whisk or spatula just until no dry streaks remain. A few small lumps are perfectly fine. Stop mixing the moment it comes together – don’t keep beating it smooth!
- Preheat Your Waffle Iron Properly (And Generously Grease It): A hot waffle iron is absolutely essential for achieving that desirable crisp exterior and preventing sticking, especially with delicate gluten-free waffles. Allow your iron ample time to heat up fully (usually 10-15 minutes after plugging it in). Even non-stick irons benefit from a light coating of oil or cooking spray before *each* waffle. This creates a barrier that ensures easy release and a beautiful golden crust.
- Don’t Peek Too Early!: Resist the urge to lift the lid of your waffle iron before the steam subsides or the indicator light (if you have one) signals readiness. Opening the iron too soon can cause the waffle to split or collapse because the structure hasn’t fully set. Trust the timing (typically 3-5 minutes for these gluten-free waffles) and listen for the steam to significantly reduce; that’s your cue it’s almost done.
- Cool Cooked Waffles on a Wire Rack: As each waffle comes off the iron, transfer it immediately to a wire cooling rack. Never stack hot waffles directly on top of each other or place them on a flat plate. Trapping steam will make them rubbery and soggy. Allowing air to circulate around them is the secret to keeping that lovely crisp exterior after cooking.
- Enhance Flavor Creatively: While vanilla is key, consider adding a pinch of nutmeg or cinnamon to the dry ingredients for a warm, comforting flavor. You can also substitute a portion of the almond milk with buttermilk (if not strictly dairy-free) or even a tablespoon of Greek yogurt for extra richness and a slight tang that complements the sweetness.
Common Mistakes to Avoid
- Using Too Much Flour (Without Weighing): This is the number one culprit for dense, dry gluten-free baked goods, and gluten-free waffles are no exception. Prevention: Always weigh your flour using a kitchen scale for accuracy. Refer to the weight provided in the recipe (approx. 300g for 2 cups of Bob’s Red Mill 1:1) instead of relying solely on volume measurements.
- Overmixing the Batter: While you don’t develop gluten, excessive mixing can activate the starches and other binders in gluten-free blends too much, resulting in tough or gummy waffles. Prevention: Mix only until the dry ingredients are just incorporated into the wet. A few small lumps are fine. Stop mixing the moment there are no dry streaks left.
- Not Preheating or Greasing the Waffle Iron Adequately: This leads to sticking, tearing, and pale, unevenly cooked waffles. Prevention: Always allow your waffle iron sufficient time to heat up fully before adding batter. Generously grease the iron before the first waffle AND between each subsequent waffle, even if it’s labeled non-stick. This is vital for clean release and a beautiful golden color.
Frequently Asked Questions
Why aren’t my gluten-free waffles fluffy? Or why do they seem dense?
Oh, this is such a common question when baking gluten-free! Achieving that perfect fluffiness in gluten-free waffles can sometimes be a little trickier than with traditional recipes, but you’ve got this!
Often, density can be due to a few things:
- Flour Measurement: The ABSOLUTE most common reason for dense gluten-free baked goods is using too much flour. Gluten-free flours can be tricky to measure by volume (cups) because they pack down differently. Weighing your flour is highly recommended! For the Bob’s Red Mill 1:1 blend used here, 1 cup is about 150 grams. Getting the flour weight right makes a huge difference!
- Baking Powder: Ensure your baking powder is fresh and active. If it’s old, it won’t provide the necessary lift.
- Over-mixing: While not as critical as with gluten flour, overworking gluten-free batter can still sometimes lead to a tougher texture. Mix until just combined!
Focus on weighing your flour accurately and ensuring your baking powder is good, and you should be well on your way to fluffy success!
Can I use a different gluten-free flour blend than the one recommended?
That’s a great question! This recipe for gluten-free waffles was specifically tested and perfected using Bob’s Red Mill Gluten-Free 1:1 Baking Flour. This blend contains xanthan gum, which acts as a binder and is crucial for structure in gluten-free baking.
While you *can* try other blends, please be aware that results may vary significantly. Different blends have different compositions and may absorb liquid differently or require added binders like xanthan gum. If you use a blend without a binder, your waffles might not hold together as well or could be crumbly. For the best chance of success with this specific recipe, sticking to a 1:1 blend with xanthan gum (like Bob’s Red Mill or King Arthur Baking Measure for Measure) is your safest bet. If you experiment, start by weighing the flour!
My gluten-free waffle batter looks different or thicker than regular wheat waffle batter. Is that normal?
Totally normal! Don’t panic if your gluten-free batter looks a little different from what you might expect from traditional wheat flour batter. Gluten-free flour blends behave differently when mixed with liquids.
It might seem slightly thicker, grainy, or even a bit gloopy compared to the smooth elasticity of wheat batter. This is perfectly fine! Resist the urge to add more liquid unless the batter is *unworkably* thick (like paste). A few small lumps are also completely okay – remember, you want to avoid over-mixing. Trust the process and the measurements as written, and you’ll get that wonderful fluffy texture once they’re cooked!
How should I store leftover gluten-free waffles, and can I freeze them?
One of the best things about these gluten-free waffles is how incredibly well they store and reheat, making them perfect for meal prep!
- Refrigeration: If you’ll eat them within 3-4 days, let them cool completely first. Then, stack them in an airtight container, ideally with a sheet of parchment or paper towel between them to prevent sticking. Store in the fridge.
- Freezing: Yes, they freeze beautifully for up to 3 months! Again, let them cool completely. Wrap individual waffles or stacks of two tightly in plastic wrap or freezer paper, then pop them into a freezer-safe bag or container. This helps prevent freezer burn. Be sure to label with the date!
Pro Tip for Reheating: For the best texture (crispy on the outside, soft inside), reheat refrigerated or frozen waffles in a toaster, toaster oven, or conventional oven (around 350°F or 175°C) rather than a microwave. Toasting brings back that glorious exterior crispness!
The recipe uses almond milk; can I use dairy milk or another plant-based milk instead?
Absolutely! This recipe is naturally dairy-free because it uses almond milk, but it’s very flexible. You can easily swap the 1 ¾ cups of unsweetened almond milk for the same amount of
regular dairy milk, oat milk, or even flax milk. Use whichever milk you prefer or have on hand – the recipe is designed to work well with these alternatives!
My gluten-free waffles are sticking badly to the waffle iron! What can I do?
Ugh, sticking is frustrating, especially with gluten-free batters sometimes! Don’t worry, there are a couple of things that can help:
- Generous Oiling: Make sure your waffle iron is very well-oiled before *each* waffle or batch. Use a non-stick spray, a brush with oil (like coconut or olive oil as recommended), or even melted butter or shortening. Get into all the grids!
- Preheat Fully: Ensure the waffle iron is fully preheated to the correct temperature *before* adding batter. A hot surface is less likely to stick.
- Cooking Time: Make sure you’re cooking them long enough. Sometimes, if removed too early, they are more likely to tear or stick. Let them cook until the steam significantly reduces or the indicator light goes off.
A good, non-stick waffle maker helps, but proper seasoning and oiling are key for preventing sticky situations with gluten-free waffles!
Why are these called “protein waffles”? Do I need to add protein powder?
Great question! You absolutely do *not* need to add any extra protein powder to this recipe. The term “protein waffles” here refers to the fact that these waffles naturally contain protein from wholesome ingredients like the eggs and the specific gluten-free flour blend used (many 1:1 blends have a good amount of protein).
As noted in the nutrition information, each serving provides about 3g of protein, making them a more protein-rich breakfast or snack option compared to some traditional waffle recipes, without needing any special protein powder ingredient!